Zigbee2MQTT without Home Assistant
Zigbee2MQTT is the best way to run Zigbee locally. You don't need Home Assistant to use it: Gladys Assistant sets it up for you and gives you the dashboards and automations.
Zigbee2MQTT is an open-source bridge that supports more than 5,000 Zigbee devices from nearly 600 brands through a simple USB coordinator, with no vendor hub and no cloud. On its own, it only publishes MQTT messages: you still need a platform to see your devices, build a dashboard and automate.
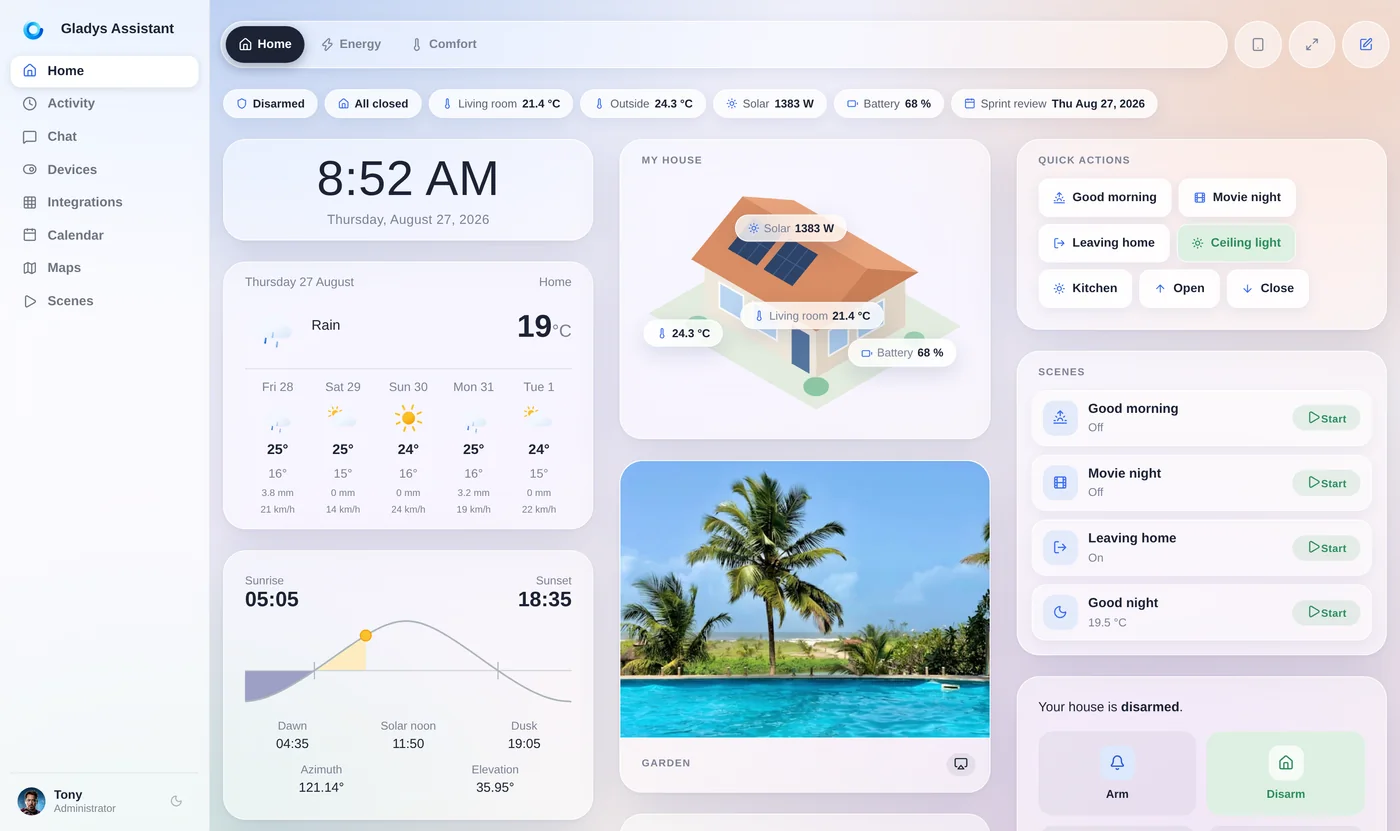
Many people end up installing Home Assistant for that, then spend their evenings in YAML and add-ons. Gladys Assistant is a free, open-source alternative designed to be simple: plug in your dongle, click Enable, and Gladys installs Zigbee2MQTT and its MQTT broker, then lets you pair and use your devices from its own interface.
Running Zigbee2MQTT on its own is only half the job
If you've tried Zigbee2MQTT standalone, you know the drill:
- You need an MQTT broker (Mosquitto) next to it, with matching credentials and topics.
- The Zigbee2MQTT frontend is great for pairing and debugging, but it isn't a dashboard for the family, and it doesn't do automations.
- Node-RED or scripts can fill the gap, but now you maintain three or four moving parts.
- Home Assistant solves it, at the cost of a large platform to learn, YAML, and frequent breaking changes.
What most people want is simpler: Zigbee2MQTT's device support, with a clean dashboard and easy automations on top.
Zigbee2MQTT with Gladys vs standalone vs Home Assistant
Three ways to use the same Zigbee2MQTT:
| With Gladys | Standalone or with Home Assistant | |
|---|---|---|
| Installing Zigbee2MQTT and MQTT | Automatic: Gladys creates both containers | By hand (Docker, add-ons) and configuration files |
| Pairing devices | From the Gladys interface | Zigbee2MQTT frontend, then import into the platform |
| Dashboards | Built in, mobile-friendly | None standalone; very flexible but complex in Home Assistant |
| Automations | Visual scenes, no code | None standalone; automations, YAML or Node-RED in Home Assistant |
| Learning curve | One interface to learn | Several tools and concepts (broker, YAML, add-ons) |
Home Assistant is more extensive and has a larger community; Gladys is built for people who want the essentials to just work.
What you get with Zigbee2MQTT in Gladys
Every device Zigbee2MQTT supports becomes a Gladys device:
Pick your coordinator and its model; Gladys installs and wires Zigbee2MQTT and the MQTT broker for you.
Permit joining, and new devices show up with their detected features, ready to name and assign to a room.
Sensors, lights, plugs, thermostats and covers on a dashboard, with charts of every value over time.
Trigger on any Zigbee event, add conditions, act on any device: without code.
Zigbee alongside Matter, Z-Wave, Wi-Fi and cloud integrations in one interface.
Talk to your Zigbee devices in plain language, or expose them to Claude through the MCP server.
Set up Zigbee2MQTT without Home Assistant, step by step
On a mini-PC, a Raspberry Pi or a NAS running Docker:
- Install Gladys with a single Docker command.
- Plug a USB Zigbee coordinator (Sonoff ZBDongle-E or -P…) into the machine, or connect a network coordinator like the SMLIGHT SLZB-06 to your network.
- In Gladys, open Integrations → Zigbee2MQTT and select your coordinator and its model.
- Click Enable Zigbee2MQTT: Gladys starts the containers and shows their status.
- Permit joining, pair your devices, and add them to your dashboard.
Troubleshooting for the classic Zigbee2MQTT errors (zigbee-herdsman, adapter ping, EZSP version) is in the setup guide.
The same Zigbee2MQTT, without the complexity
Gladys doesn't replace Zigbee2MQTT, it uses it: you get the same device compatibility and the same local, cloud-free Zigbee network. What changes is everything around it: no broker to configure, no YAML, a dashboard your family can use, and scenes you build in a few clicks.
Gladys is free and open source, has been developed since 2013, and runs entirely on your own hardware.
Go further
Everything you need for a local Zigbee network:
Pair Hue bulbs directly with your Zigbee dongle.
Aqara Zigbee sensors, locally, without the Aqara app.
Which coordinator to buy for Zigbee2MQTT, USB or network.
Which protocol to choose, and how they can live together.
The same approach for your Z-Wave network.
Why people choose Gladys when Home Assistant feels like too much.
Frequently asked questions
Can I use Zigbee2MQTT without Home Assistant?
Yes. Zigbee2MQTT is an independent open-source project: it only needs a Zigbee coordinator and an MQTT broker. Home Assistant is one platform that can use it, but not the only one. Gladys Assistant installs and manages Zigbee2MQTT and the MQTT broker for you, and adds dashboards and automations on top.
Does Zigbee2MQTT need an MQTT broker?
Yes, Zigbee2MQTT publishes every device state over MQTT, so it needs a broker like Mosquitto. With Gladys, you don't have to set it up: Gladys creates the broker and the Zigbee2MQTT containers with matching credentials when you enable the integration.
Which Zigbee devices work with Gladys?
Every device supported by Zigbee2MQTT, more than 5,000 devices from nearly 600 brands: IKEA, Philips Hue bulbs, Aqara, Sonoff, Tuya, Schneider, Legrand, Sinopé and many more. The full list is on the Zigbee2MQTT website.
Which Zigbee dongle should I use?
Any coordinator supported by Zigbee2MQTT. Popular choices are the Sonoff ZBDongle-E and ZBDongle-P over USB, or a network coordinator like the SMLIGHT SLZB-06 if you want to place it away from interference. Our Zigbee dongle guide compares them.
Can I still use the Zigbee2MQTT web interface?
For everyday use you won't need it: pairing, renaming and using devices happen in Gladys. Zigbee2MQTT remains the standard project underneath, so its documentation and device list apply as is.
Is Gladys a good Home Assistant alternative for Zigbee?
If you want local Zigbee with a simple interface, yes: Gladys uses the same Zigbee2MQTT, without YAML or add-ons. Home Assistant has a broader ecosystem and more integrations; Gladys focuses on simplicity and stability.
Get Zigbee2MQTT running tonight
Gladys is free, open source and installs with a single Docker command. Plug in your dongle and pair your first devices.