Zigbee2MQTT setup with Gladys: local Zigbee hub, no cloud
Zigbee2MQTT lets you run your own local Zigbee hub with Gladys: you plug a USB Zigbee dongle into the machine running Gladys, and you control every Zigbee device directly from your home, with no cloud account and no vendor bridge. This tutorial shows you how to set it up, pair your dongle, and add devices.
Gladys installs and manages Zigbee2MQTT and its MQTT broker for you: see Zigbee2MQTT without Home Assistant. Still choosing a dongle? Read the Zigbee dongle buyer's guide.
In short, we'll connect your Zigbee devices directly to Gladys, without needing any third-party bridges (just by using a USB Zigbee dongle and the Zigbee2Mqtt project).
You can check the list of compatible devices here.
Before you start, make sure you have a Zigbee coordinator: a USB dongle plugged into the machine running Gladys, or a network coordinator (see Use a network coordinator below).
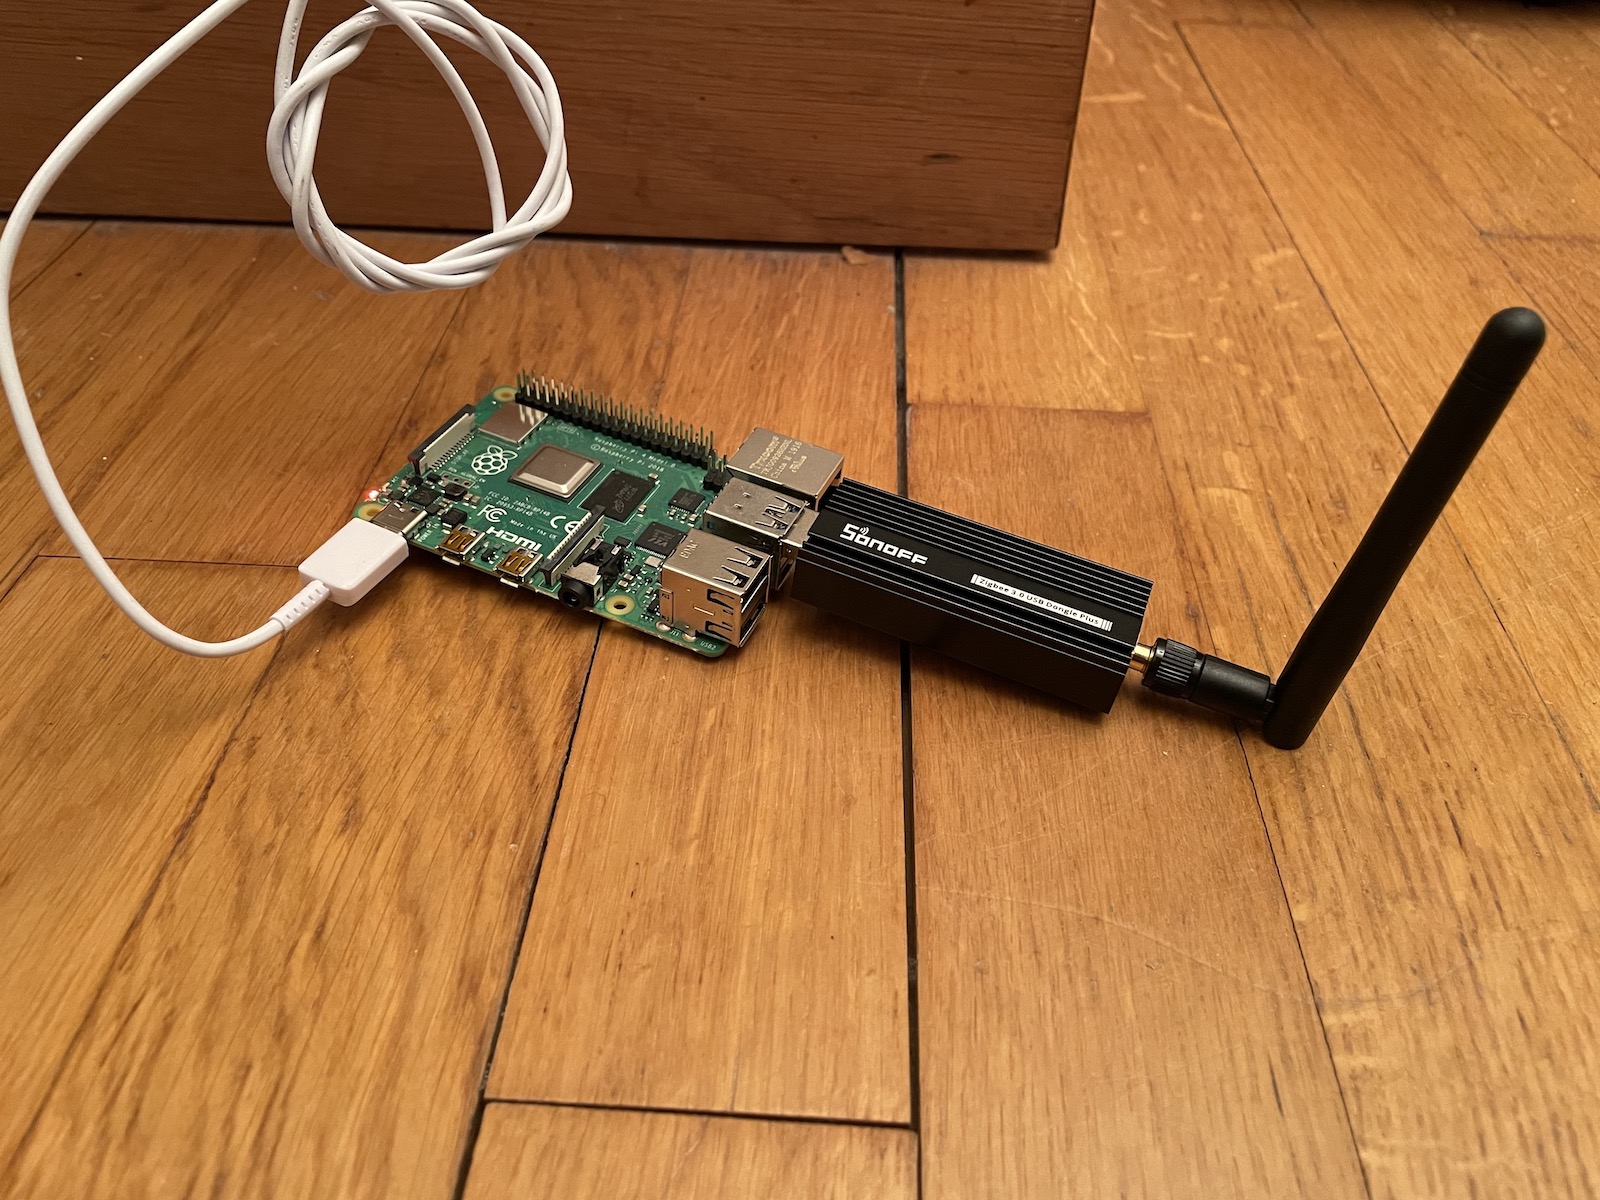
An easy & affordable USB dongle we tested with Gladys is the Sonoff Zigbee 3.0 USB dongle.
The full list of compatible adapters can be found on Zigbee2mqtt supported adapters list.
Configure the USB dongle port
Connect your Zigbee USB dongle to your machine running Gladys (your Raspberry Pi, your NAS).
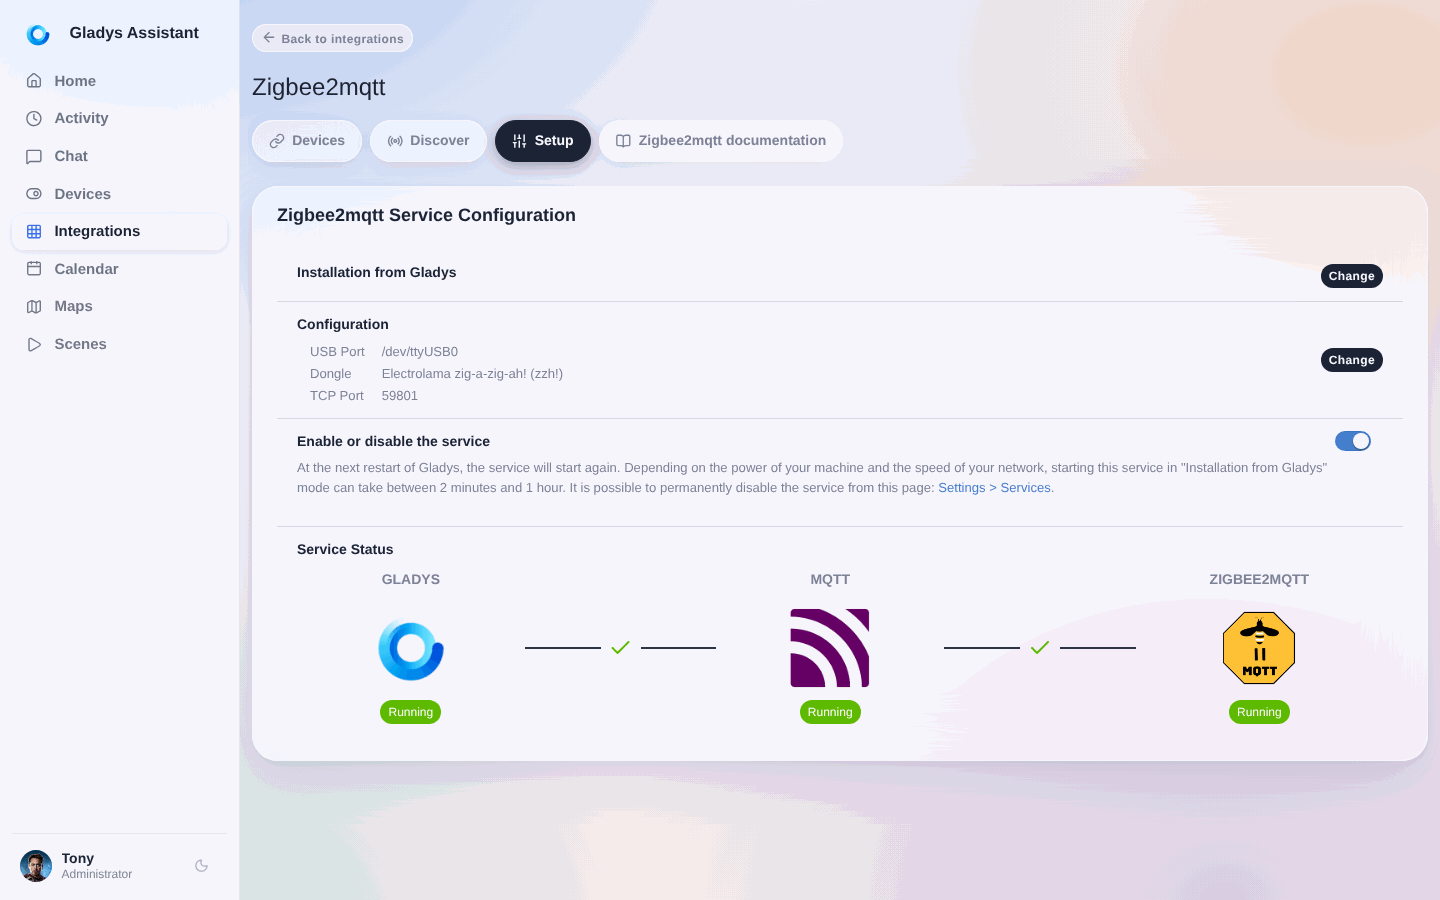
In Gladys, go to Integrations / Zigbee2Mqtt.
Then, click on Settings in the menu. Gladys will automatically scan the different USB ports to suggest a drop-down list.
Select the settings the USB port is to use in order to allow Gladys to communicate with Zigbee.
13 May 2023: You can now select the Zigbee dongle model you're using:
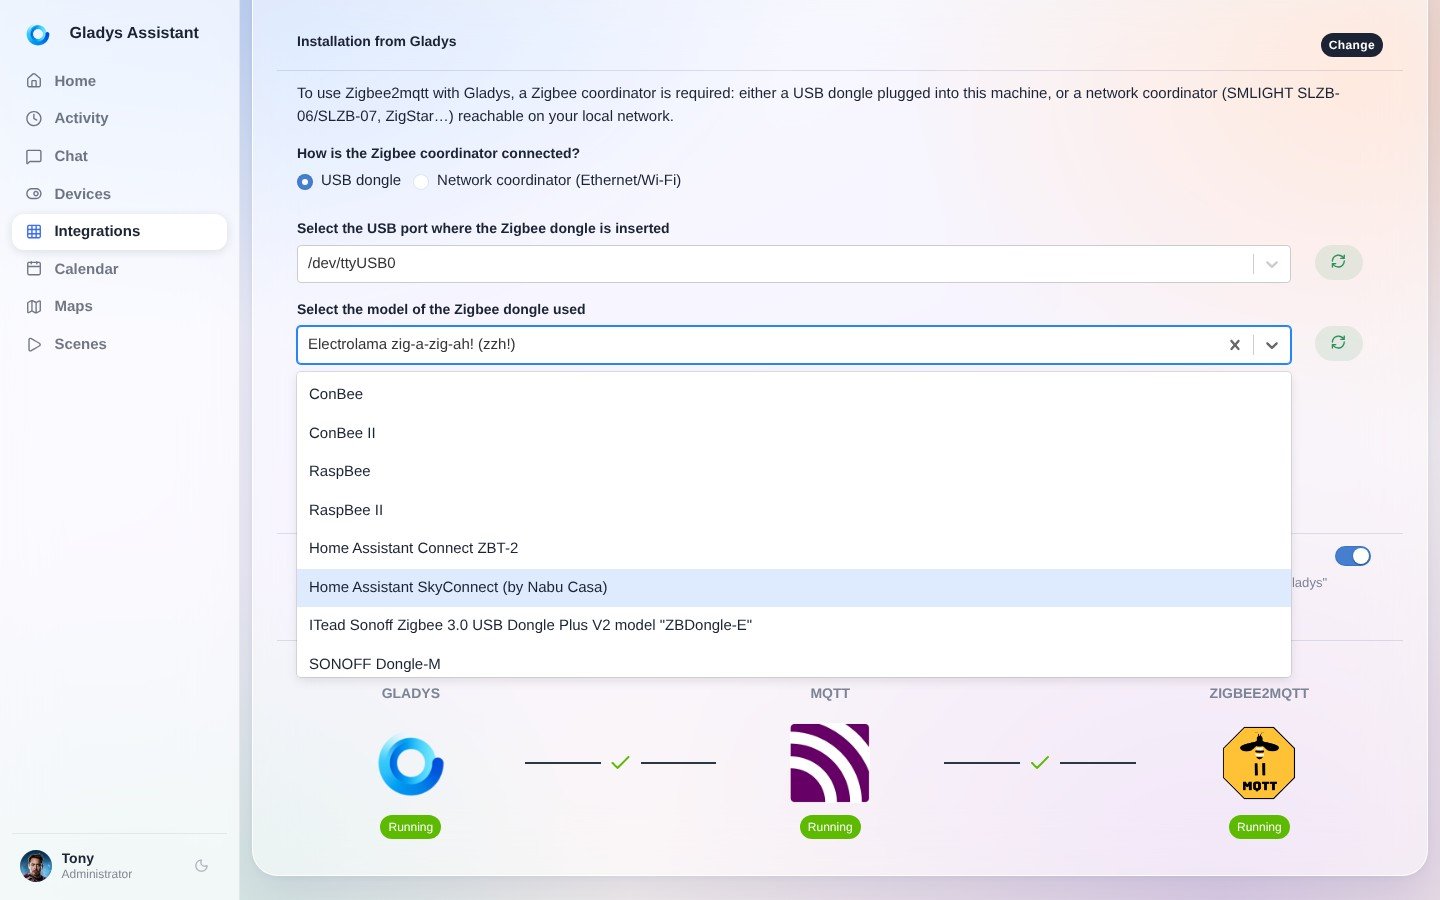
This tells Zigbee2mqtt which configuration to run.
If you run Gladys on an external disk connected in USB, you may have power issues as your Pi can struggle to give enough power to both the disk and the Zigbee USB key.
We recommend you use a externaly powered USB charging tower.
You can read more about it on ZigbeeMQTT website: Zigbee2MQTT fails to start
Use a network coordinator
Since Gladys 5, the coordinator doesn't have to be plugged into the machine running Gladys. A network coordinator (SMLIGHT SLZB-06/SLZB-07, ZigStar…) connects over Ethernet or Wi-Fi, so you can place it in the middle of your home, away from your server and from interference. Gladys still installs and manages Zigbee2MQTT for you.
In Integrations / Zigbee2Mqtt, in the setup:
- Under How is the Zigbee coordinator connected?, choose Network coordinator (Ethernet/Wi-Fi).
- Enter the coordinator's address and TCP port, for example
tcp://192.168.1.20:6638(thetcp://prefix is optional). Give the coordinator a fixed IP address on your router. - Select the adapter type given by your coordinator's documentation: the SLZB-06 uses
zstack, the SLZB-06M and SLZB-07 useember.
Then continue with the next step to enable Zigbee2MQTT.
Activate Zigbee2Mqtt
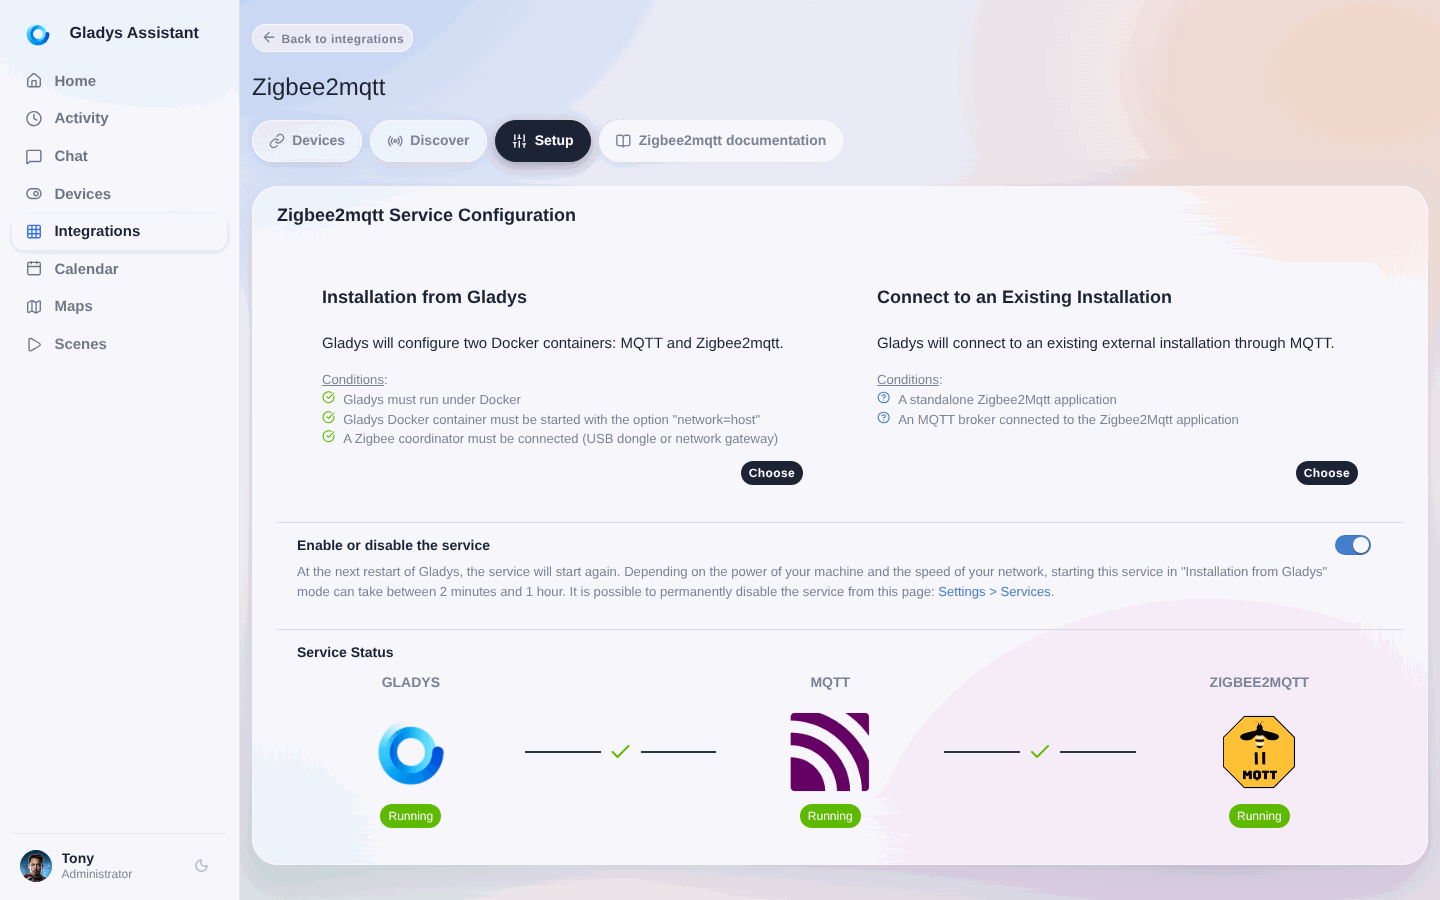
Once your dongle is configured, Gladys needs to install two containers (MQTT and Zigbee2Mqtt) to use the dongle and communicate with all your devices. Don't worry, all this has been automated.
Go to the Setup section and click on the Enable Zigbee2mqtt button. After a few moments (the waiting time depends on your Raspberry Pi model and your bandwidth), you should see all the elements started and the links between each one green.
Allow device association
To allow devices to be associated to your Zigbee network, you must allow joining in the Zigbee configuration.
Click on the Discover menu, then click on the Permit joining button.
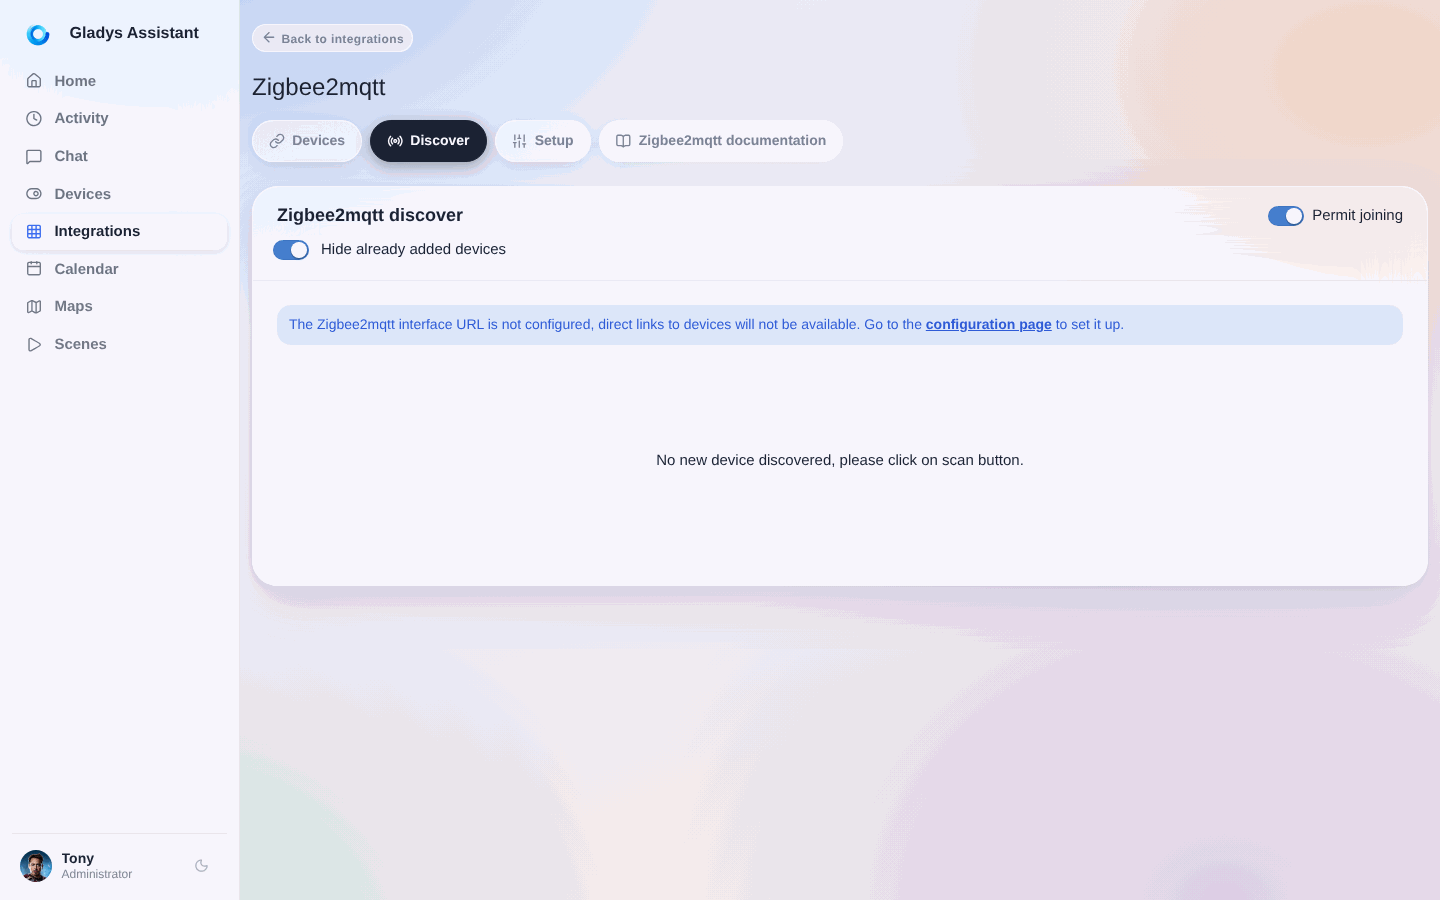
⚠️ Once your devices are associated, you will have to come back here to forbid the association, for security.
Add devices
To make your device join the network, please refer to its manual. In most cases, a long press on the physical button allows this operation.
The devices already associated to your Zigbee network will automatically appear in the list with detected features. You can rename them and associate them to a room using the drop-down list.
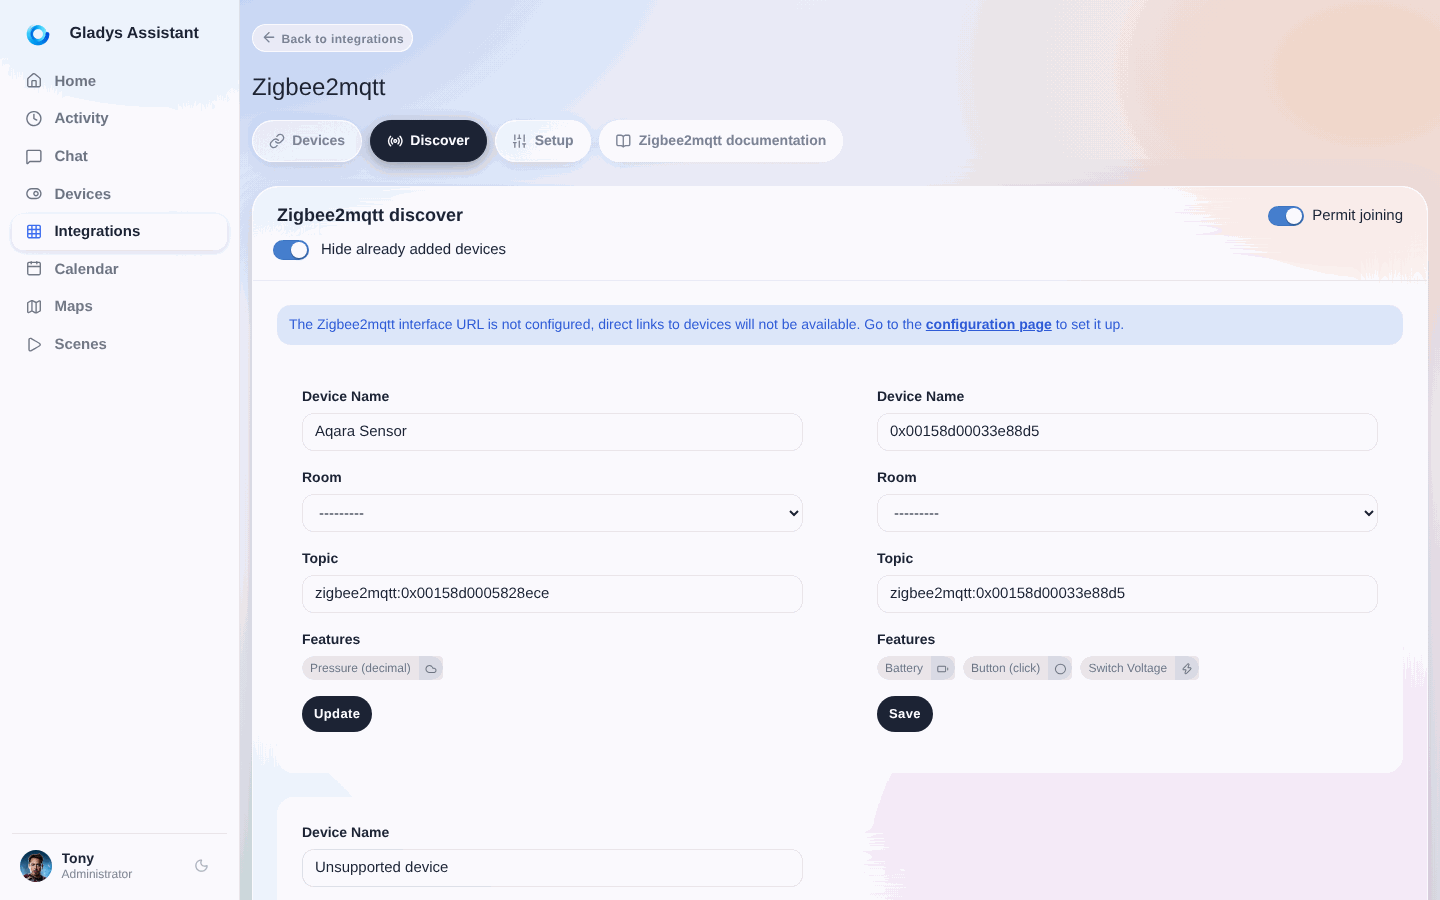
Modify the devices
If necessary, you can go to the Devices menu to modify/complete the configuration of your devices.
Click on the Edit button of a device. You can then edit its name, the room it belongs to and the name of each feature.
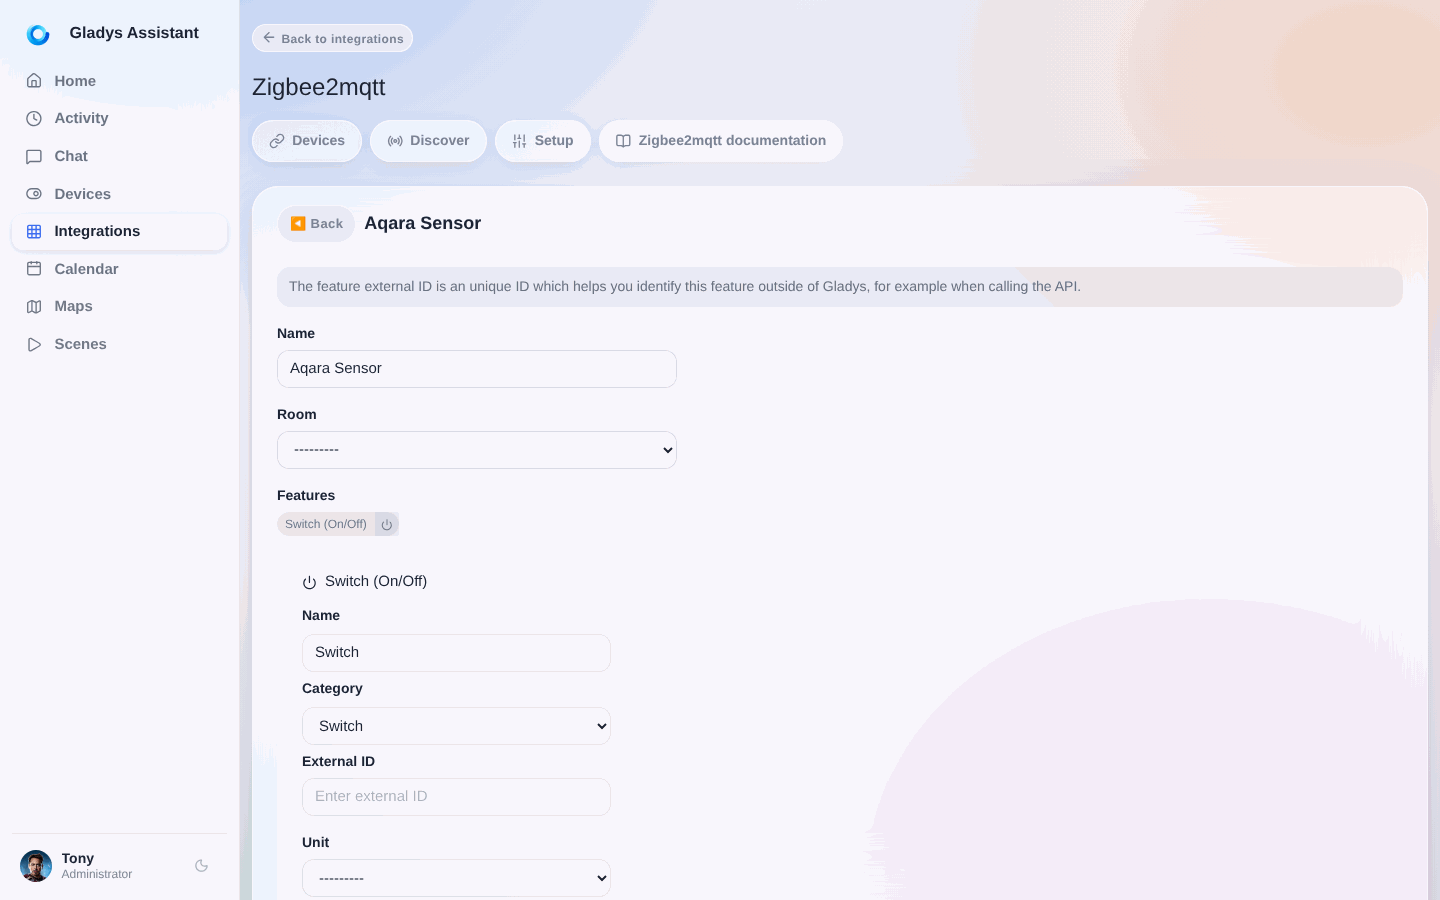
Usage
You can now use these Zigbee devices from the Dashboard or from the Scenes automatically. Depending on the feature of each device, you will have access to measures, states or actions.
Troubleshooting common Zigbee2MQTT errors
Most Zigbee2MQTT problems come from three things: the wrong USB port, the wrong adapter type, or 2.4 GHz interference. Here are the errors you are most likely to meet, and what they actually mean.
Error while starting zigbee-herdsman
Zigbee2MQTT could not talk to your dongle at all. Check, in this order:
- The USB port selected in
Integrations / Zigbee2Mqtt / Settingsis the one your dongle is on. If you moved the dongle to another port, or rebooted with a disk plugged in, the port name may have changed. - The dongle model selected in the settings matches your hardware. A Silicon Labs dongle configured as a Texas Instruments one (or the opposite) fails here.
- Nothing else is using the dongle. Only one Zigbee2MQTT instance can hold the adapter.
- The dongle has enough power. Unplug it, plug it back in through a powered USB hub or a short USB extension cable, and restart the integration.
Failed to connect to the adapter (SRSP - SYS - ping after 6000ms)
This one is specific to Texas Instruments (CC2652 / ZBDongle-P) coordinators: the adapter is there, but it does not answer. It is almost always a wrong port, a wrong adapter type in the settings, or a dongle that needs to be physically unplugged and replugged. If it persists, reflashing the coordinator firmware solves the remaining cases.
Adapter EZSP protocol version (8) is not supported by host
Your EmberZNet (Silicon Labs) dongle, typically a Sonoff ZBDongle-E, runs a firmware older than what the current Zigbee2MQTT expects. You have two options:
- Update the dongle firmware, which is the recommended path, or
- select the
(legacy ezsp)option in the dongle model list in Gladys, which tells Zigbee2MQTT to speak the old protocol.
MQTT failed to connect, exiting (connection refused: not authorized)
Zigbee2MQTT started, but the MQTT broker rejected its credentials. In Gladys, both containers are managed for you, so you rarely need to touch a configuration file: go back to the Setup section, disable Zigbee2MQTT, then enable it again. Gladys recreates both containers with matching credentials. If you also use the MQTT integration with your own broker, make sure you did not point Zigbee2MQTT at it with a different username or password.
MAC channel access failure
This is a radio problem, not a software one: the coordinator cannot get a free slot on the air. The usual causes and fixes:
- The dongle is plugged directly into the machine, next to USB 3.0 ports, an SSD or the Raspberry Pi itself. Move it away with a USB extension cable of about one metre, which is the single most effective fix.
- Your Wi-Fi and your Zigbee network overlap on the 2.4 GHz band. Move your Wi-Fi channel, or your Zigbee channel, so they do not sit on top of each other.
- The device is too far from the coordinator. Add a mains powered Zigbee device (a plug or a bulb) in between: those act as routers and extend the mesh.
If your problem is not listed here, the Zigbee2MQTT documentation covers startup failures in depth, and the Gladys forum is a good place to search for your exact message.
Frequently asked questions
How do I add a device to Zigbee2MQTT in Gladys?
Once Zigbee2MQTT is enabled, open the Discover menu and click Permit joining, then put your device into pairing mode (usually a long press on its button). The device appears automatically in the list with its detected features, where you can rename it and assign it to a room. Remember to turn joining off again afterwards for security.
What USB Zigbee dongle should I use with a Raspberry Pi or NAS?
Any adapter on the Zigbee2MQTT supported adapters list works. An affordable dongle we tested with Gladys is the Sonoff Zigbee 3.0 USB dongle. Plug it into the machine running Gladys (your Raspberry Pi or NAS); if you boot from a USB disk, use a powered USB hub so the dongle gets enough power. Our Zigbee dongle buyer's guide compares the most common models.
Does Zigbee2MQTT with Gladys work without the cloud?
Yes. Zigbee2MQTT runs locally on your own hardware and talks to your devices through the USB dongle, so your Zigbee network keeps working with no internet connection and no manufacturer cloud account.
Which port and settings should I select for my Zigbee dongle?
In Gladys go to Integrations / Zigbee2Mqtt, then Settings. Gladys scans your USB ports and suggests them in a drop-down, so you simply pick the one matching your dongle and select your dongle model so Zigbee2MQTT loads the right configuration.
Why does Zigbee2MQTT fail to start?
Nearly always because Zigbee2MQTT cannot reach the coordinator: the wrong USB port is selected, the dongle model in the settings does not match your hardware, the dongle is short on power, or its firmware is too old (the EZSP protocol version is not supported error on Sonoff ZBDongle-E dongles). Check the port and the model in the integration settings first, then unplug and replug the dongle through a powered hub or a USB extension cable.
Why do my Zigbee devices keep disconnecting?
Interference on the 2.4 GHz band is the main cause, and it shows up as MAC channel access failure in the logs. Move the dongle away from the machine with a one metre USB extension cable, keep it clear of USB 3.0 ports and SSDs, make sure your Wi-Fi and Zigbee channels do not overlap, and add mains powered Zigbee devices, which act as routers and extend the mesh.