Thermostat: weekly heating schedules in Gladys Assistant
The "Thermostat" integration does two things, available since Gladys Assistant 5.2:
- Gladys becomes the thermostat. A temperature sensor and a switch (a relay, a smart plug, a boiler contact) are enough to make a regulated heating zone: Gladys reads the temperature and turns the heater on and off to reach the setpoint.
- Gladys programmes the thermostats you already have. A Netatmo, a Zigbee radiator valve, a Matter or MQTT thermostat regulates itself perfectly well: Gladys writes its setpoint according to a weekly schedule, right next to the rest of your home.
In both cases you get the same thing: presets (Frost protection, Away, Eco, Night, Comfort), weekly schedules per house, a dashboard widget, and features that scenes, the AI and the voice assistants can read and write.
Everything runs locally, without any cloud.
Create a thermostat
Go to Integrations / Thermostat, "My Thermostats" tab, and click "New".
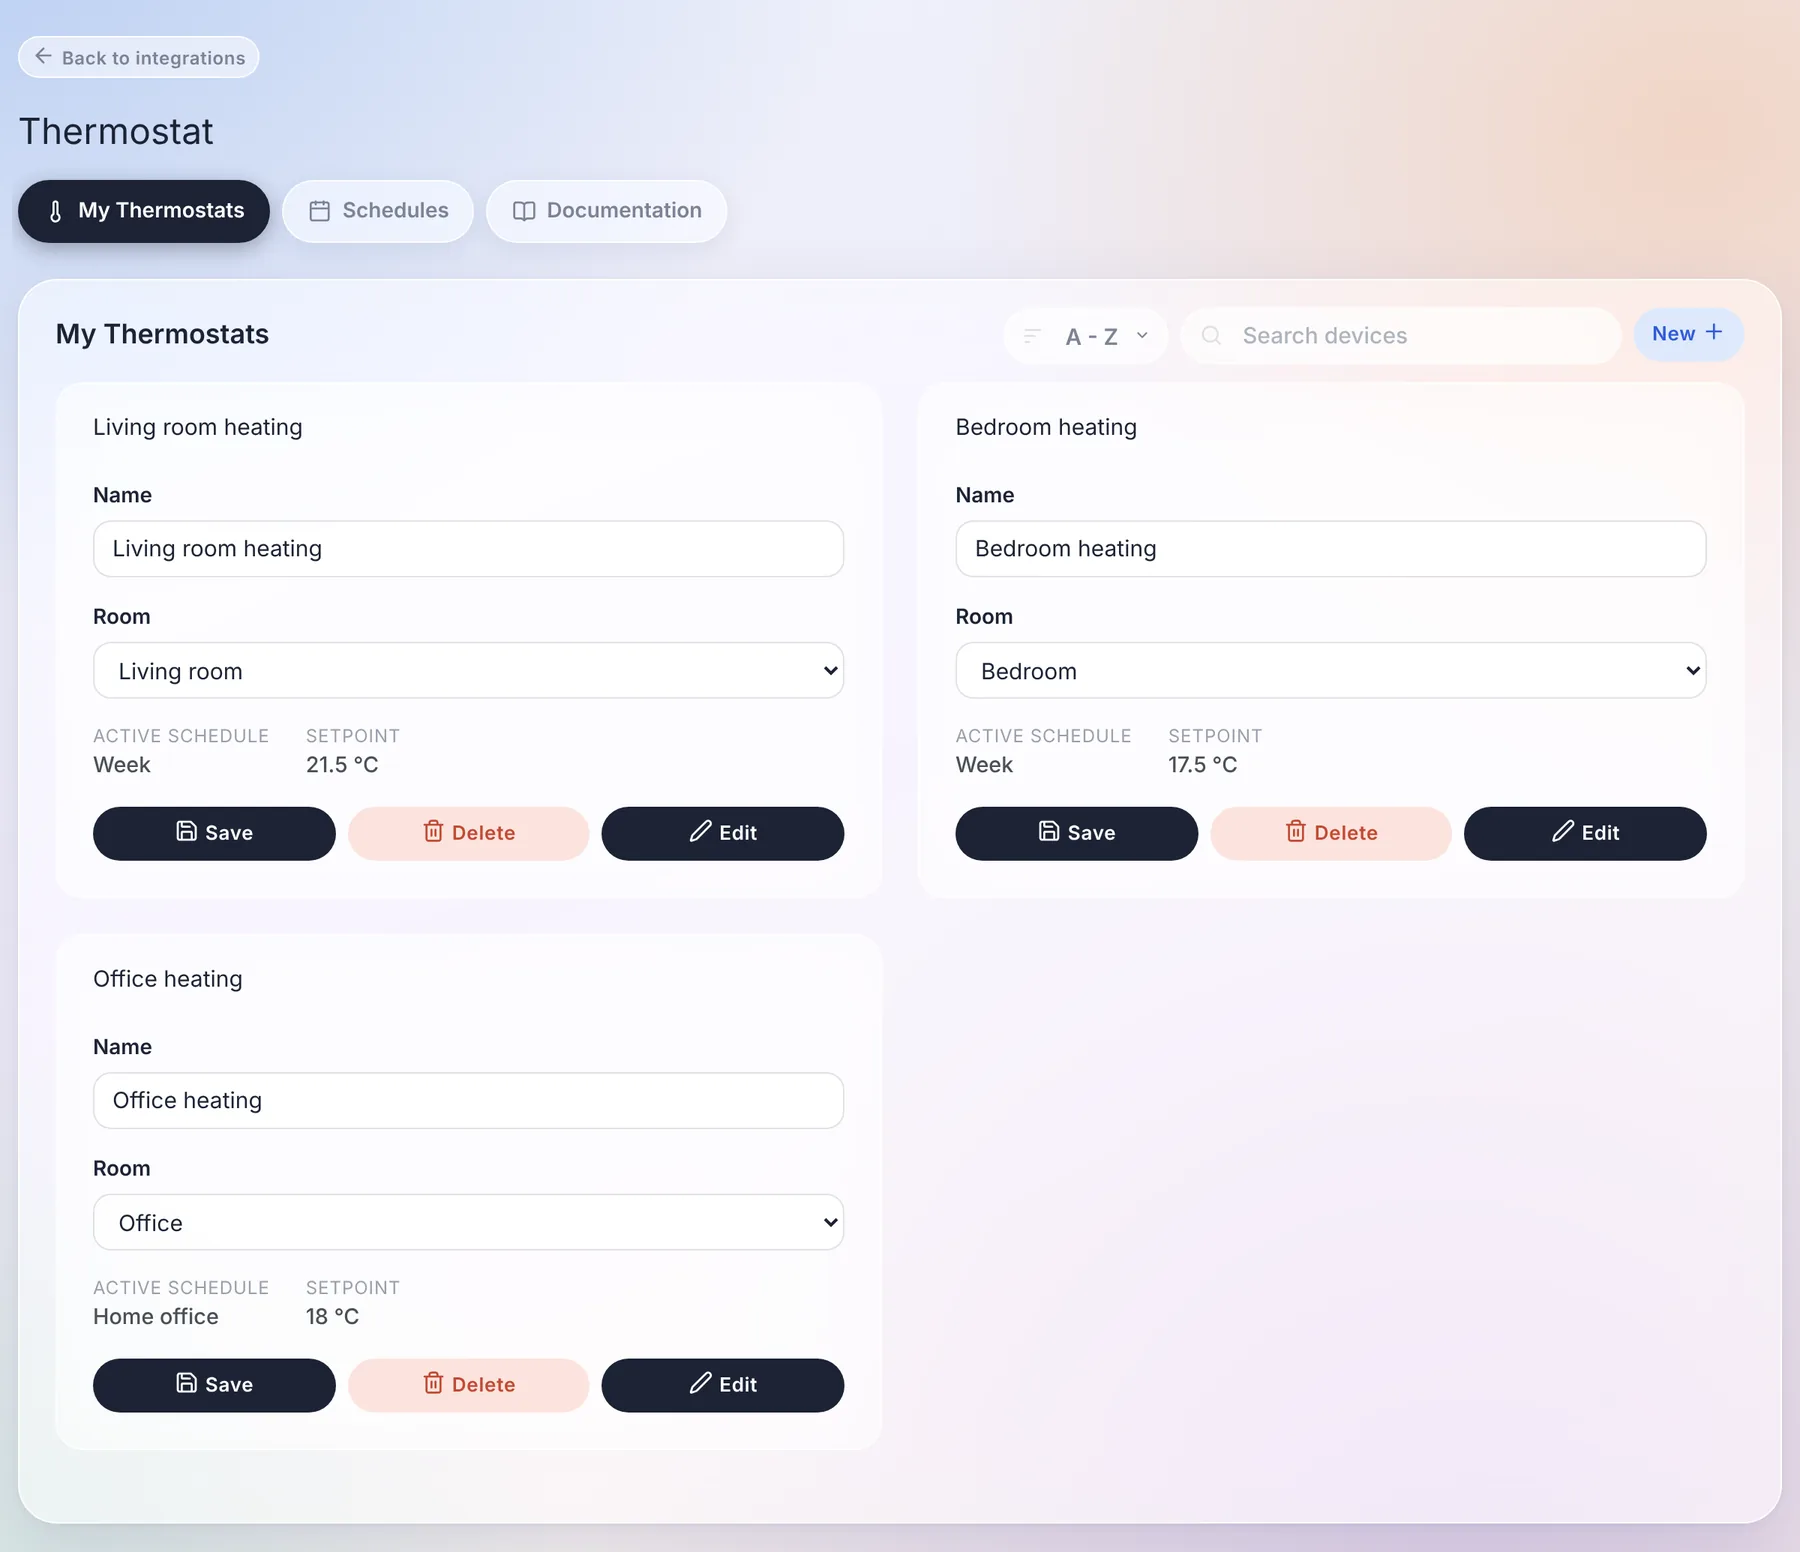
Give the thermostat a name and a room, then choose its type.
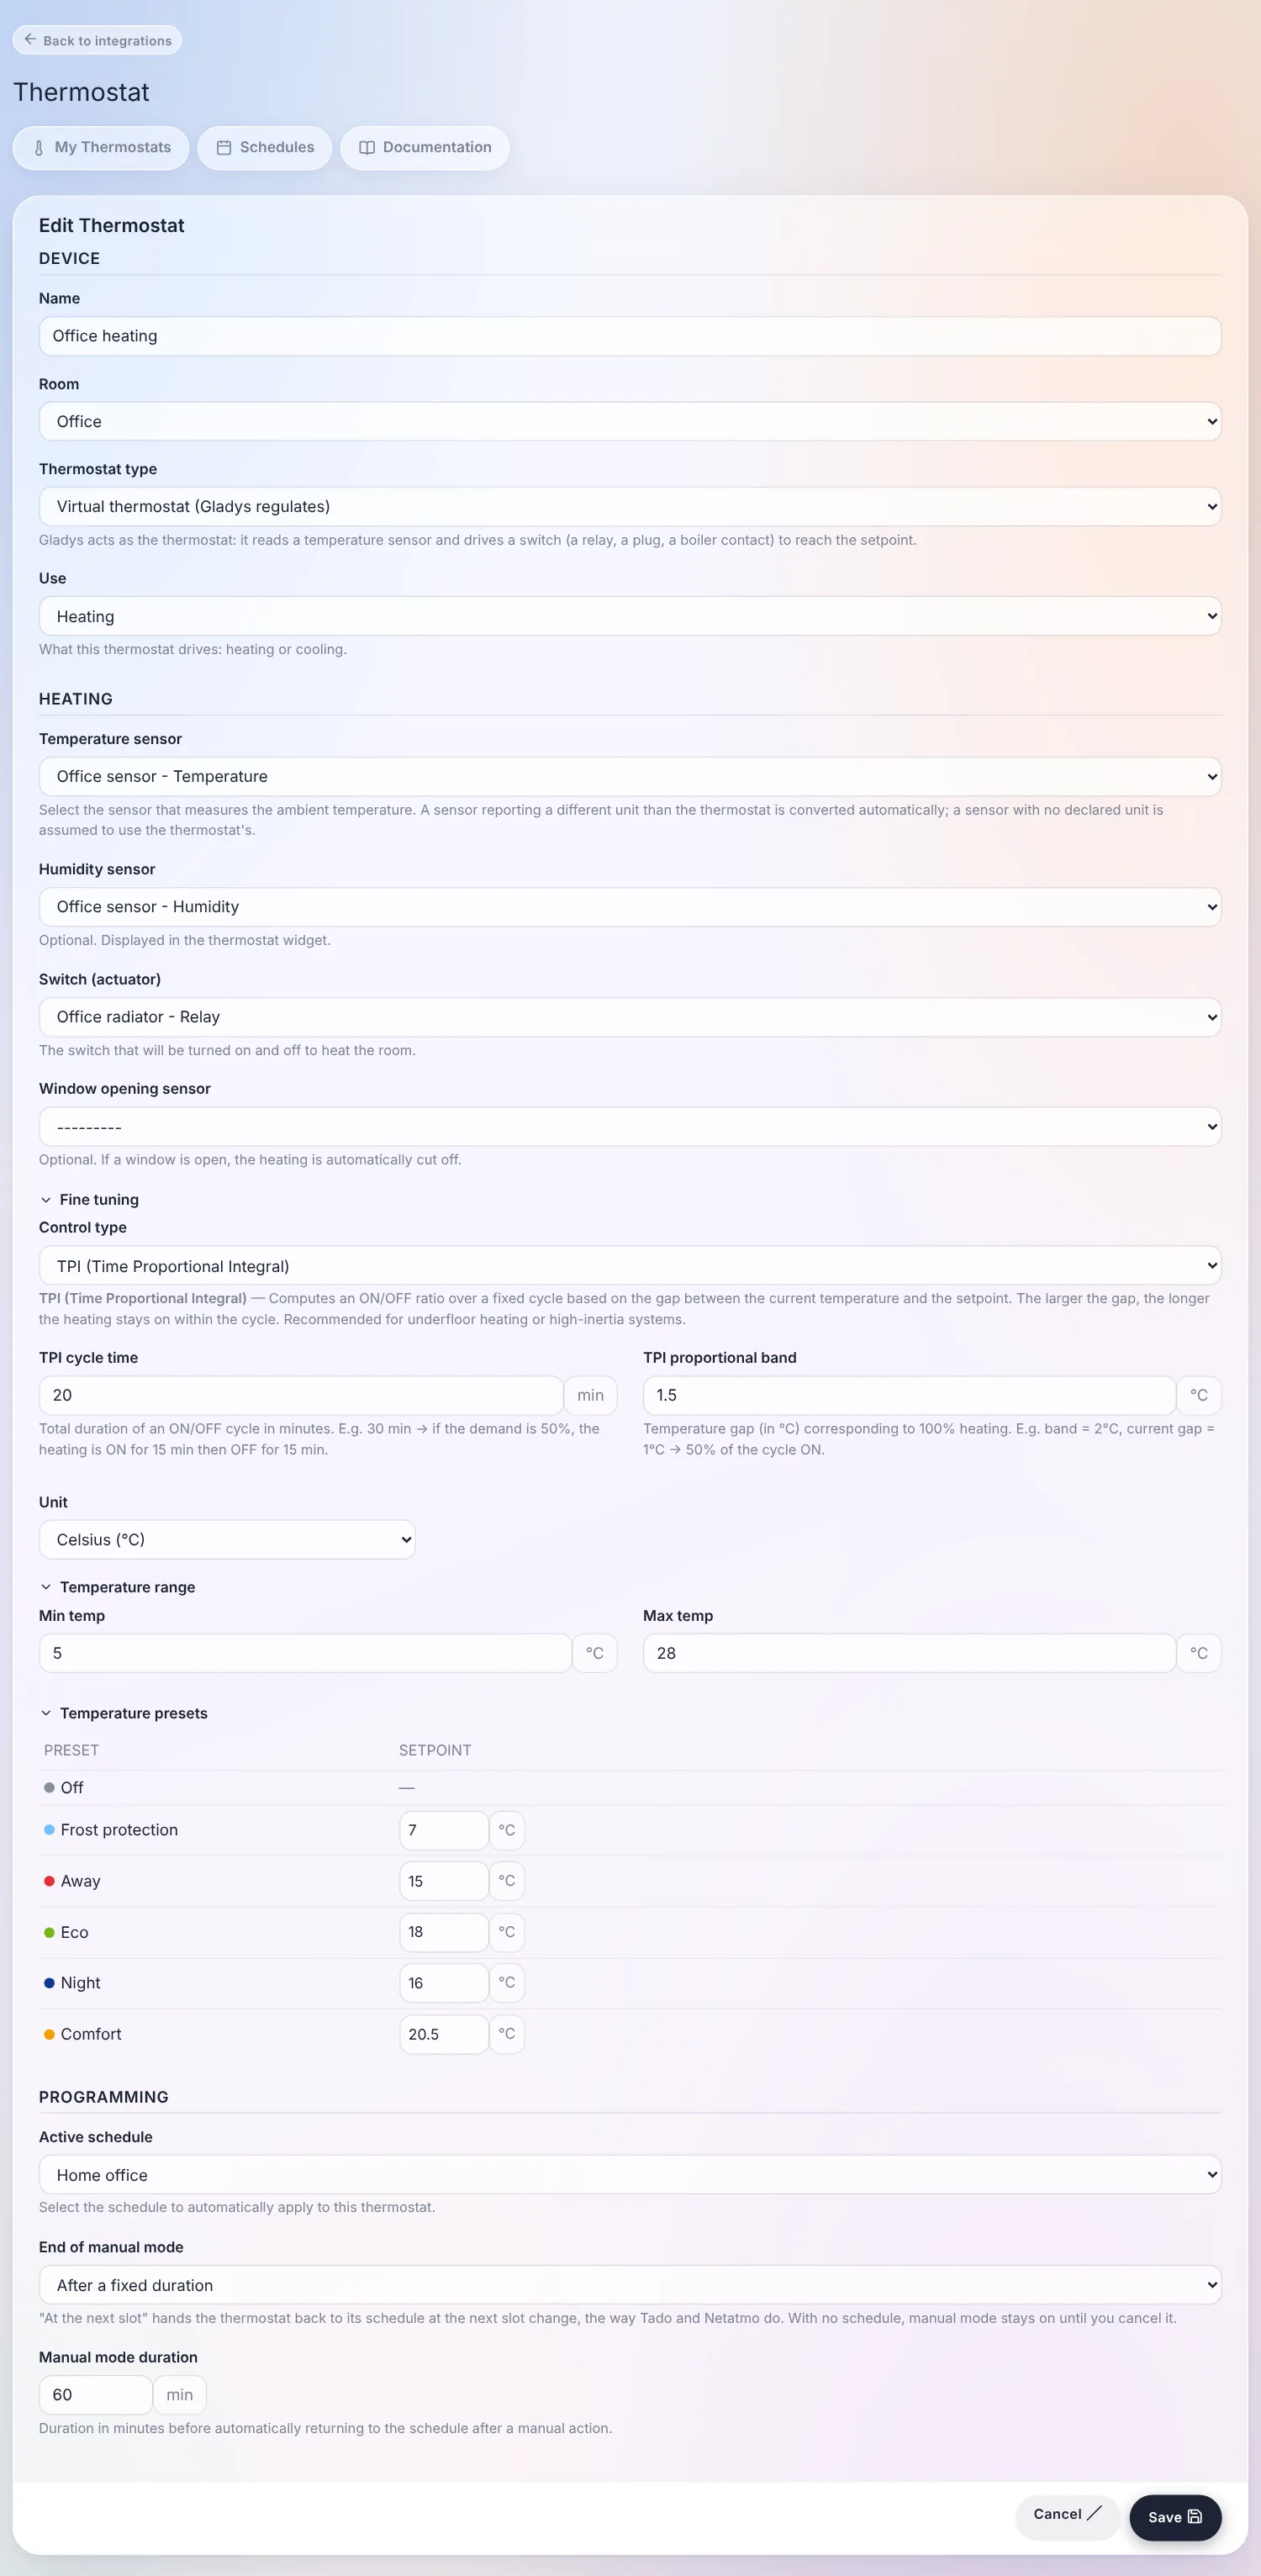
Virtual thermostat (Gladys regulates)
Gladys acts as the thermostat. You need:
- a temperature sensor, the one that measures the room temperature. A sensor reporting another unit than the thermostat (°F and °C) is converted automatically;
- a switch (actuator): the relay, the plug or the boiler contact that turns the heater on and off;
- optionally a humidity sensor, displayed in the widget;
- optionally a window opening sensor: when the window opens, the heating is cut immediately, and comes back when it closes.
In "Fine tuning", choose how Gladys regulates:
- Hysteresis (default): the heating turns on below the setpoint minus the start threshold, and turns off above the setpoint plus the stop threshold. With a setpoint of 21 °C and thresholds of 0.5 °C, it turns on below 20.5 °C and off above 21.5 °C.
- TPI (Time Proportional Integral): over a fixed cycle (30 minutes by default), the heating stays on for a share of the cycle proportional to the gap with the setpoint. The further the room is from the setpoint, the longer it heats. It avoids the overshoots of a heater with a lot of inertia.
Real thermostat (the appliance regulates itself)
Your thermostat already regulates: Gladys only writes the setpoint of its schedule, and displays the state of the device. You choose:
- the setpoint of the real thermostat: the feature Gladys writes the target temperature on. Some devices expose several (heating / cooling, occupied / unoccupied): pick the one that actually drives your heating;
- the heating state (optional), to show in the widget whether the device is heating. An operating state or a boiler contact both work;
- the operating mode (optional), if the thermostat has one: Gladys switches it to Off when the thermostat is stopped, and back on when a setpoint takes over again.
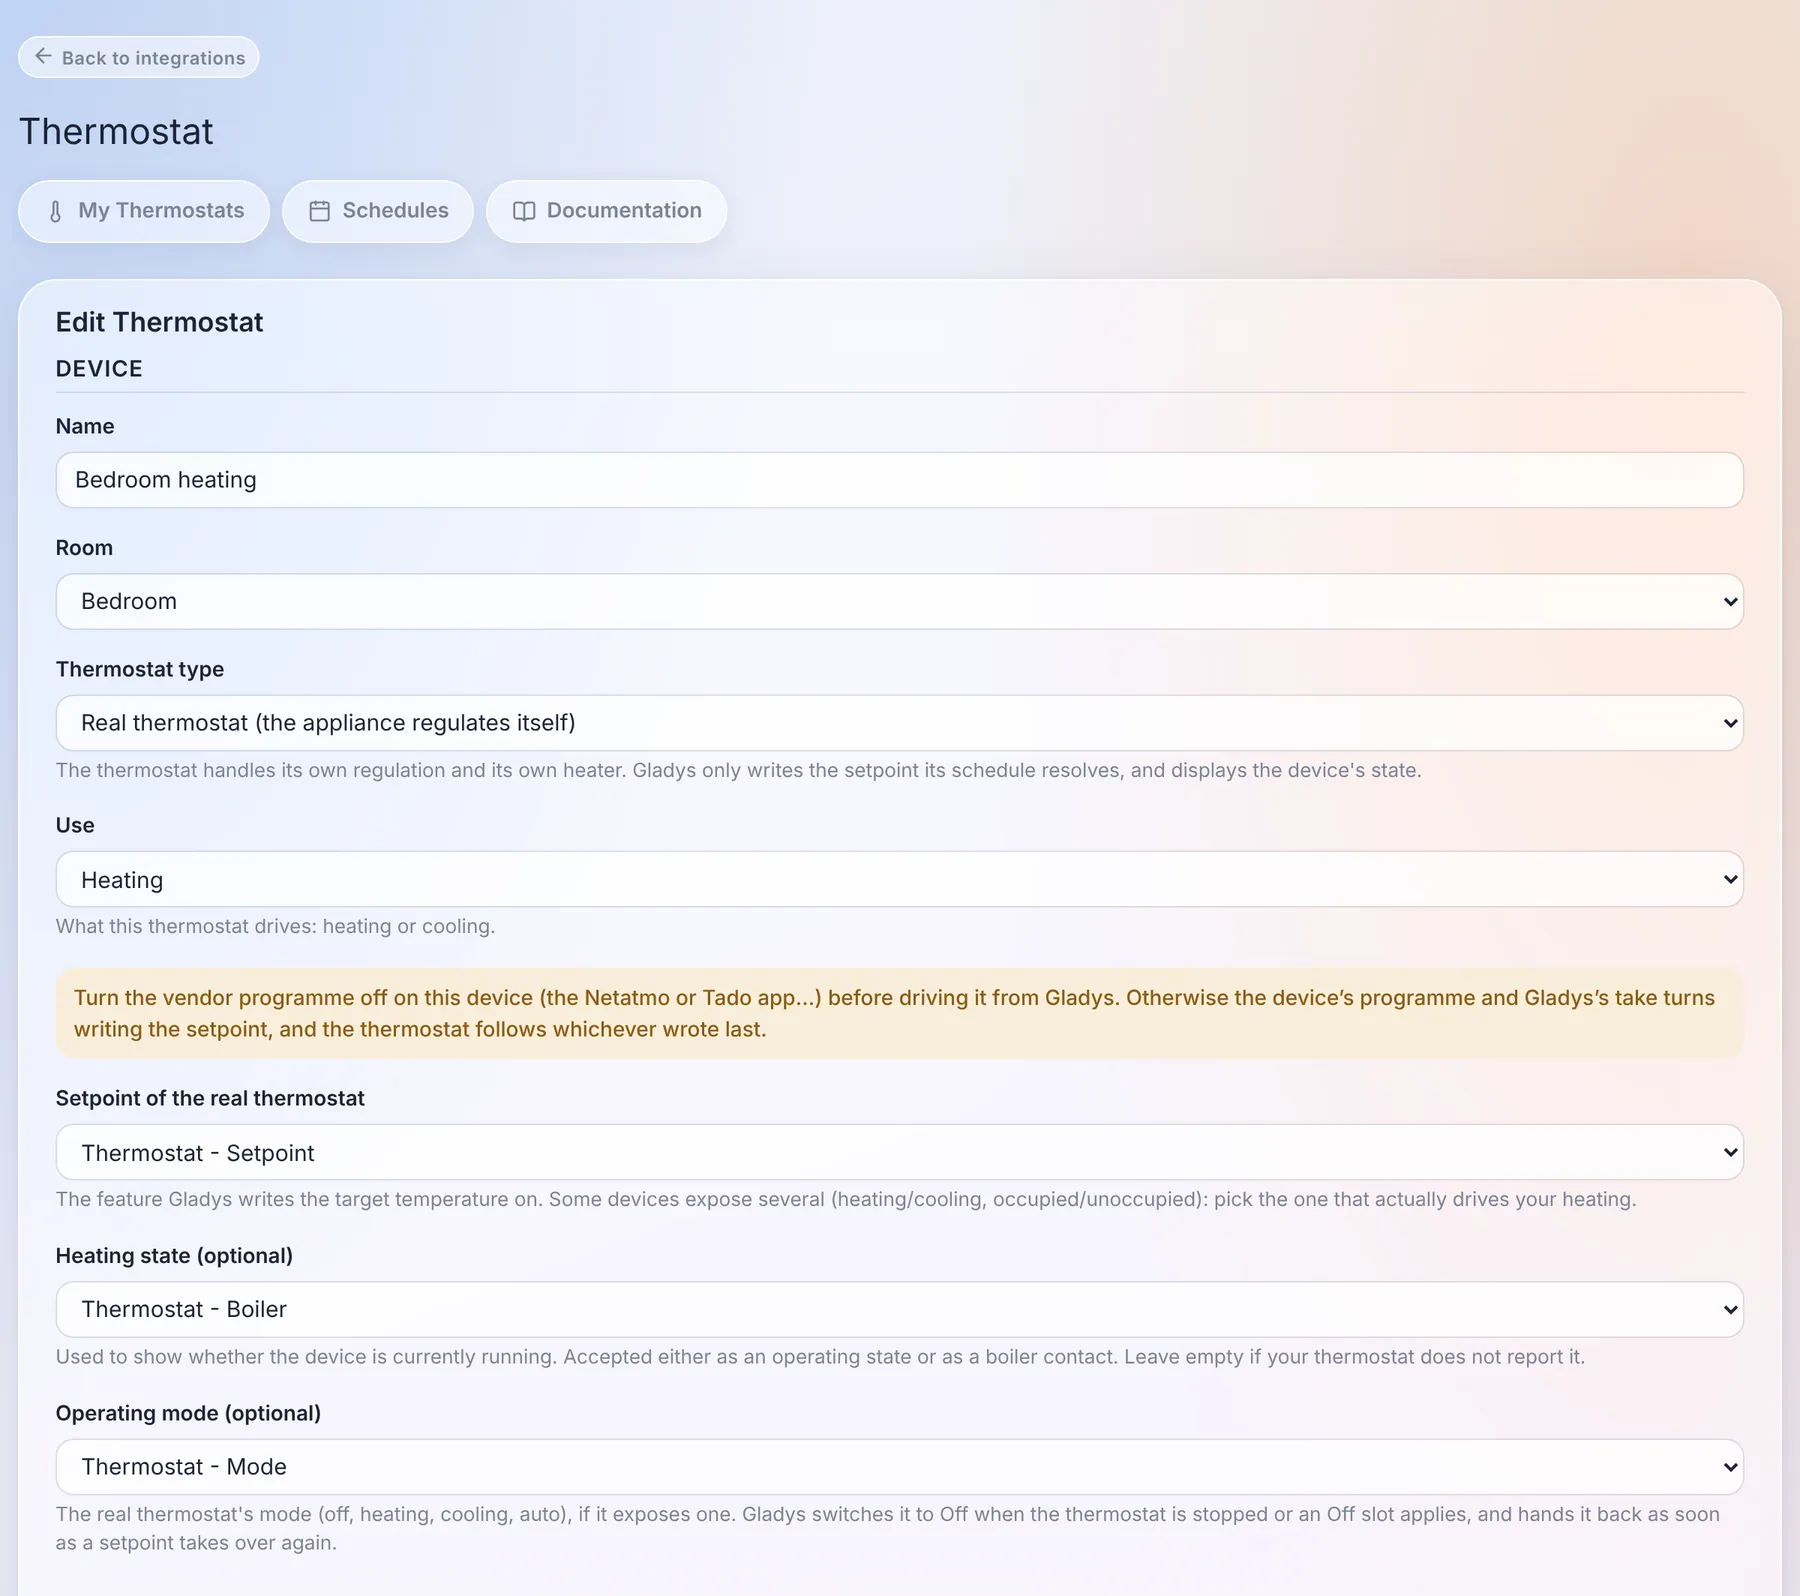
Turn the manufacturer's programme off on the device (the Netatmo or Tado app...) before driving it from Gladys. Otherwise the programme of the device and the one of Gladys take turns writing the setpoint, and the thermostat follows whoever wrote last.
If you change the setpoint directly on the device (its dial, its app), Gladys sees it and treats it as a manual change: it doesn't overwrite it a minute later.
Settings common to both types
- Use: heating or cooling (an air conditioner, for example).
- Unit (°C or °F) and temperature range of the dial. For a real thermostat, Gladys offers to use the range the device advertises.
- Temperature presets: the setpoint of each preset. By default Frost protection 7 °C, Away 16 °C, Eco 18 °C, Night 17 °C and Comfort 21 °C.
- Active schedule: the weekly schedule this thermostat follows.
- End of manual mode: when you change the temperature by hand, how long before the schedule takes over again. "At the next schedule slot" (the default, as Tado and Netatmo do) or "After a fixed duration" in minutes. Without a schedule, a manual change stays until you change it again, like on a classic thermostat.
Weekly schedules
In the "Schedules" tab, click "New schedule".
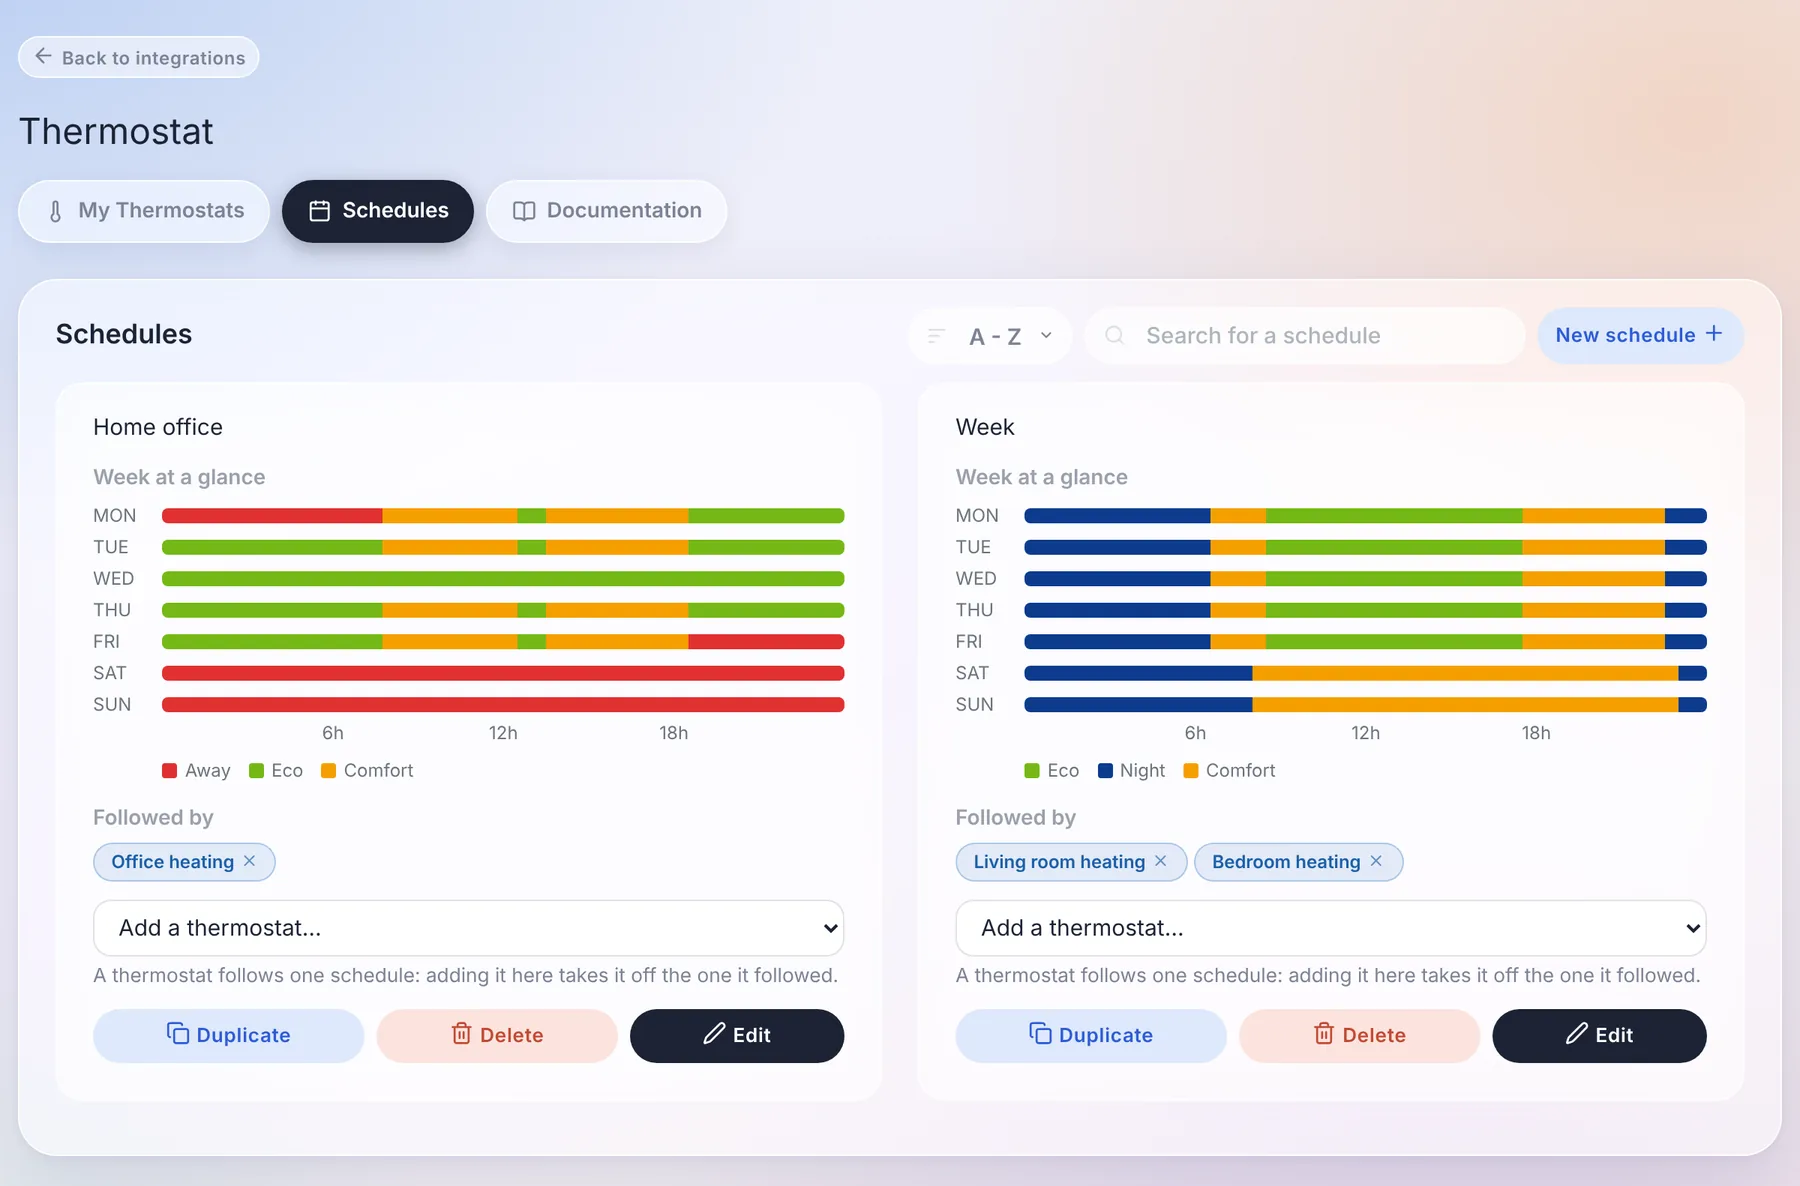
A schedule belongs to a house: with two houses, each has its own schedules, and two houses can each have their own "Week". For each day, add time slots ("Add time slot") with a start, an end and a preset. A slot can cross midnight: a night from 22:30 to 06:30 is a single slot, marked "+1d".
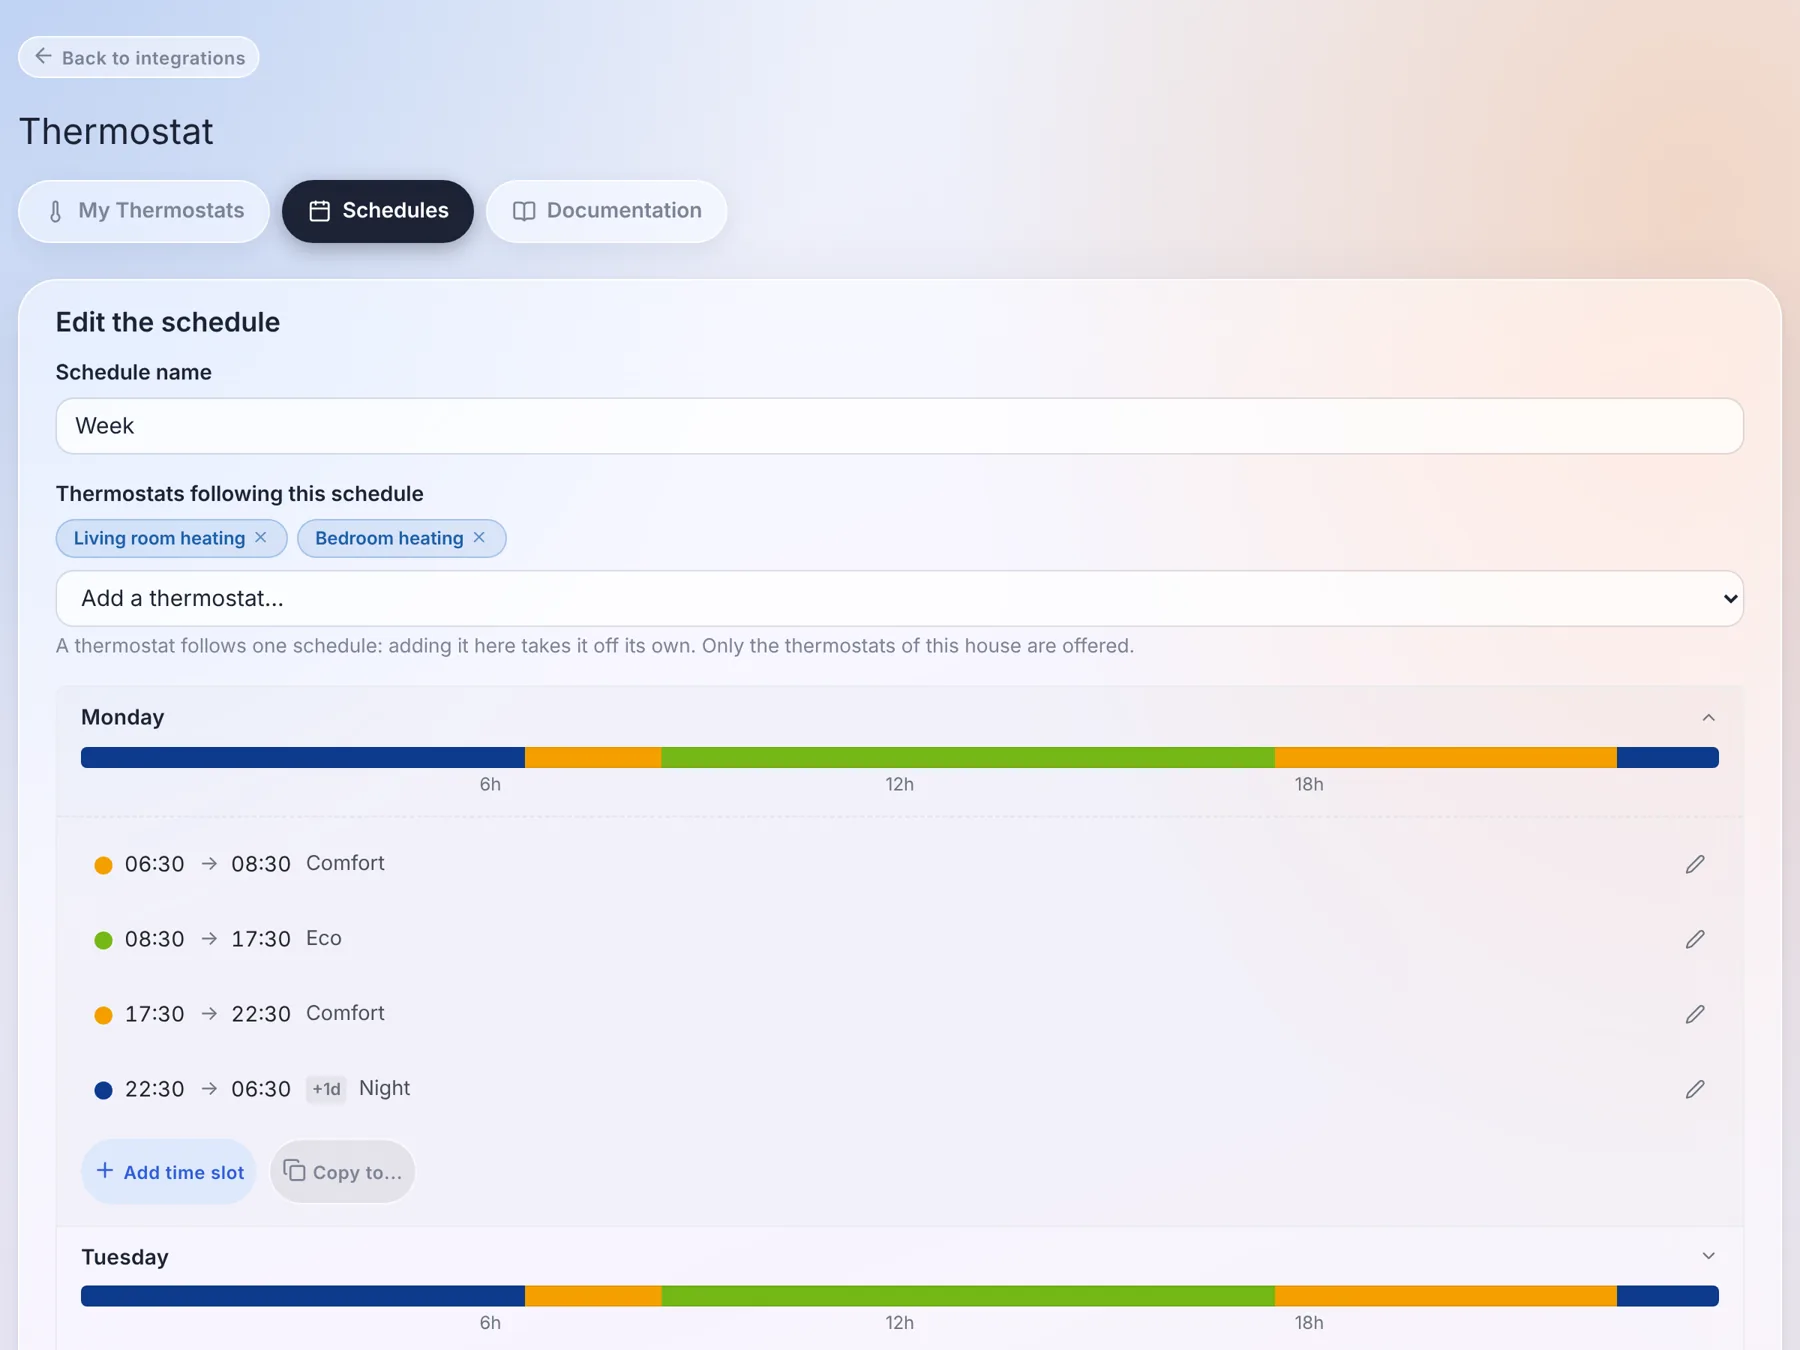
A few rules make editing easy:
- "Copy to..." copies a day onto other days: write Monday, copy it to the whole week.
- Adding a slot never fails: the slot you add takes its place, and shortens or splits the slots it overlaps.
- Deleting a slot extends the previous one: it never cuts the heating. To stop the heating over a period, use the Off preset.
- A day without its own slot keeps the last preset of the previous day. A schedule whose only point is Friday evening "Away" stays on Away all weekend. The bars of the editor show it exactly as it will be applied.
Under "Thermostats following this schedule", add the thermostats of the house that should follow it. A thermostat follows one schedule at a time: adding it to a schedule takes it off the one it followed.
Times are those of your house, in the timezone set in Settings / System.
The dashboard widget
On your dashboard, add a "Thermostat" widget and choose the thermostat.
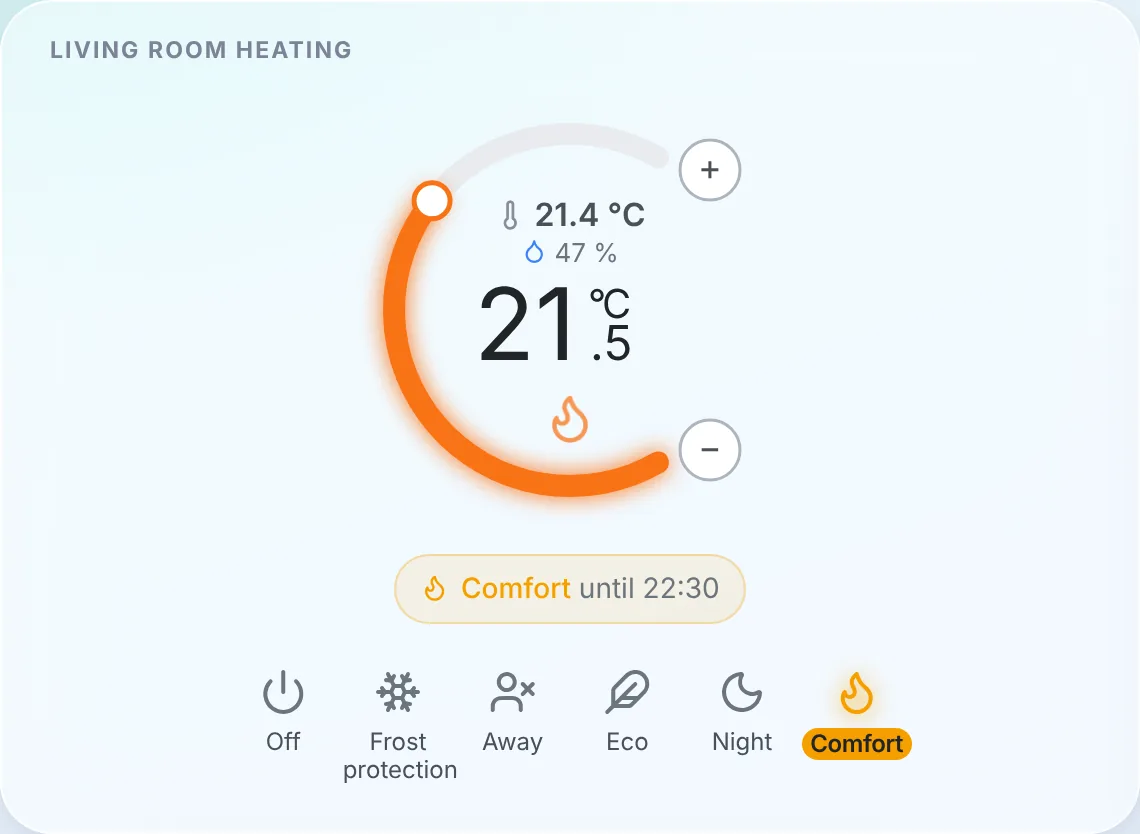
The widget shows the room temperature (and the humidity), the setpoint in large, and a glow when the device is heating. You can:
- turn the dial or use + and − to change the setpoint: it's a manual change, which lasts until the end you configured;
- pick a preset in the bar at the bottom: Off, Frost protection, Away, Eco, Night or Comfort. On a thermostat following a schedule, the preset applies until the next slot, then the schedule takes over again;
- read what the thermostat is doing in the banner: "Comfort until 22:30" when it follows its schedule, "Manual mode" for a temperature set by hand, "Window open — heating suspended" when a window is open. The ✕ of the banner cancels the manual mode.
In your scenes
A thermostat created by this integration is a device like any other, with a setpoint, a preset and a mode. With the "Set device value" action, a scene can:
- choose a preset, for example "Away" when the house is empty, or "Comfort" when the first person comes home. Choosing the "Schedule" value hands the thermostat back to its schedule;
- write a setpoint, which acts as a manual change;
- stop the thermostat (mode Off) and start it again.
The same features are visible to the AI, to MQTT, to Gladys Plus and to the voice assistants, so "set the living room to Eco" works everywhere.
Good to know
- Gladys regulates every minute. The window opening sensor acts immediately.
- A thermostat cannot drive another thermostat of this integration: the feature pickers only offer the devices of other integrations.
- Pilot wire heaters are not supported as an actuator yet: the switch of a virtual thermostat is an on/off switch. To control pilot wire heaters, see the pilot wire page.
- A reversible thermostat (heating and cooling) is driven on one setpoint: create two thermostats if you want to programme both.