Synology DSM smart home integration, free and open source
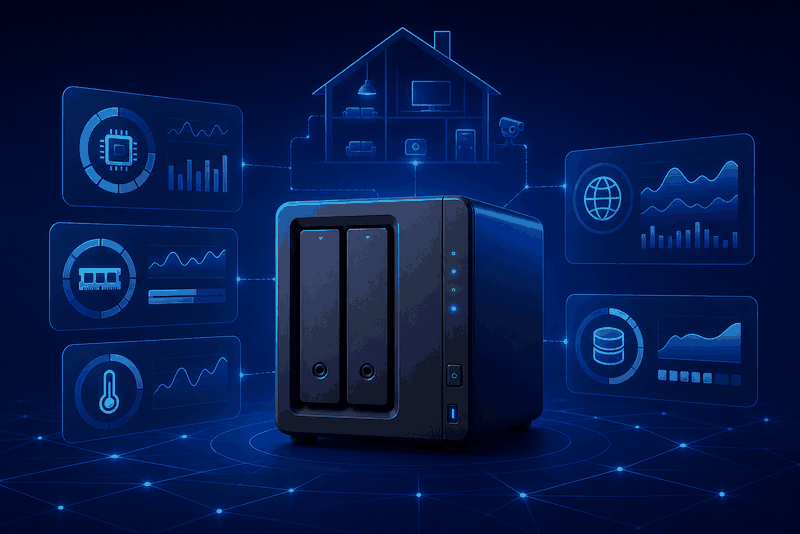
Monitor Synology NAS system metrics, storage volumes, disk SMART health and backups.
Published by prohand
- Devices
- Version 2.4.0
- Requires Gladys >=5.1.0
- ★ 0
This integration monitors a Synology NAS from Gladys Assistant. It is read-only and uses the DSM WebAPI available on the NAS.
Before you start
- In Control Panel → User & Group → User, create a dedicated user for Gladys.
- On the group assignment page, add this user to the administrators group. This is mandatory: the DSM WebAPIs used for system utilization and storage reject an ordinary user with error
105(insufficient privilege). The delegated System monitoring role is not a reliable substitute for these APIs. - Set No access for every shared folder.
- Set Deny for every application. The monitoring WebAPIs remain available through the administrator group even though the account cannot use DSM or browse files interactively.
- Do not grant a quota, File Station, Surveillance Station, SSH or any other service permission.
- In Control Panel → Login Portal, note the DSM HTTPS port (usually
5001). - Make sure the machine running Gladys can reach that address. Do not expose DSM to the public internet just for this integration.
MFA is supported through DSM verification codes (OTP). Approve sign-in and hardware security keys only work with interactive web login, so configure Verification code (OTP) for this account. On the first login, the integration exchanges the current OTP for a DSM trusted-device identifier and stores it in its private /data volume. You can clear the OTP field after the first successful connection. If the trusted device is later revoked in DSM, enter a fresh OTP and save the configuration to enroll it again.
Configuration
- DSM URL: full local URL, for example
https://192.168.1.20:5001. - Username / password: credentials of the dedicated DSM user.
- Current OTP code (MFA): a current 6-digit code for the first MFA login or after the DSM trusted device is revoked. It is not sent once the remembered device is accepted.
- Verify the TLS certificate: keep enabled for a trusted certificate. For a self-signed certificate, prefer pinning its fingerprint (next field) to disabling this check: once disabled, any device that can intercept the traffic between Gladys and the NAS on your network can pose as the NAS and receive the DSM password (man-in-the-middle).
- Pinned certificate fingerprint (SHA-256): optional. When filled in, the NAS is accepted only if its certificate has exactly this fingerprint, whatever the setting above; otherwise the connection is dropped before anything — the password included — is sent. Read it in your browser (padlock → certificate → SHA-256 fingerprint) or with
openssl s_client -connect NAS_ADDRESS:5001 </dev/null | openssl x509 -noout -fingerprint -sha256; colons, spaces and case do not matter. Update it whenever DSM renews the certificate, and do not pin a certificate renewed automatically (Let's Encrypt): keep the check enabled instead. - NAS 2, NAS 3 and NAS 4: optional connections using the same URL, username, password, OTP, TLS and fingerprint fields as the primary NAS. Leave a NAS URL empty to ignore that slot. Every password and OTP is stored in a dedicated Gladys secret field and is never exposed in a JSON document.
- Refresh interval: manually entered in seconds, from 60 to 86400. The recommended default is 900 seconds (15 minutes). A moderate interval prevents unnecessary Gladys database growth.
- Date format: how backup dates are displayed in Gladys.
ISO 8601(default, UTC) keeps the raw DSM timestamp,YYYY-MM-DD HH:mm,DD/MM/YYYY HH:mmandMM/DD/YYYY hh:mm AM/PMdisplay the local time of the integration container. Set theTZenvironment variable of the integration container to your own timezone if these formats show an unexpected hour. Changing the format applies from the next refresh onwards; dates already recorded keep the format used when they were published.
Click Test the DSM connection. A successful result shows the NAS model, DSM version and number of detected volumes. Then, in the integration's Discover tab, click Scan to search for the devices.
Devices
The integration creates one device per NAS, one device for every storage volume, one device for every internal disk and, when available, one device for every Hyper Backup or Active Backup task. Each disk exposes the exact SMART status reported by DSM, a binary SMART health indicator and, when DSM reports it, its temperature. A backup task exposes its status, latest result and latest backup time. These DSM package APIs are not available on every model and version; their absence does not prevent system and storage monitoring.
A first snapshot is sent immediately after a device is added, then every refresh updates all NAS values. Volume usage percentages are rounded to two decimal places. History is kept for utilization, temperature and health values; capacities and text information do not create redundant history.
The health indicators only take a value on a status DSM clearly reports as healthy or as a failure. During a maintenance operation (expansion, scrubbing, repair) or when SMART is unsupported, the previous value is kept instead of publishing a false alarm.
Dashboard widgets
Requires Gladys 5.1 or later. Add them in the dashboard's edit mode (Edit → New widget); every widget has a NAS setting that accepts any device of the NAS to show (the NAS itself, a volume, a disk or a backup task). Leave it empty to show the first NAS.
- Synology NAS: model, DSM version, CPU, memory and temperature, one row per volume (usage and health), a summary of the disks and the backups, and a button to open DSM when its URL uses HTTPS. Once the NAS device is added to Gladys, the card also plots the CPU and memory history over the period chosen in the Load history setting.
- Synology storage: one gauge per volume, the total free space and one row per disk with its SMART status and temperature.
- Synology backups: the Hyper Backup and Active Backup tasks with their last result, failures first. With an empty NAS setting, it lists the tasks of every NAS. The Tasks shown setting can keep only the failed or partial ones.
Widgets show the values read at the last refresh: opening a dashboard never queries the NAS. They update after each refresh. A NAS that stops answering is flagged Unreachable and keeps its last known values. On a dashboard set to US units, temperatures are shown in °F.
Scenes
Requires Gladys 5.1 or later.
Triggers fire once, on a change between two refreshes. The first reading after the integration starts only serves as a reference: a failure already present at startup does not fire again, and a change that happens while the integration is stopped is not reported. Each trigger can be limited to one device; leave the field empty to react to all of them.
| Trigger | Fires when | Variables |
|---|---|---|
| A Synology NAS stops answering | A NAS that was answering fails a refresh | NAS model, DSM URL, error |
| A Synology NAS answers again | That NAS answers again | NAS model, DSM URL, unreachable for (min) |
| A Synology volume is degraded | DSM reports a healthy volume as degraded, crashed or in error | NAS model, volume name, DSM status, usage (%) |
| A Synology disk is failing | The SMART status of a healthy disk turns to a failure | NAS model, disk name, SMART status, temperature (°C) |
| A Synology backup finished | A new result is read from a Hyper Backup or Active Backup task (filter by package and by result: success, partial, failure) | NAS model, task name, package, result, backup date |
| DSM was updated | A NAS reports a new DSM version | NAS model, previous version, new version |
A maintenance state (expansion, scrubbing, repair) never counts as a failure, and a backup still running is only reported once it has finished.
Actions query the NAS when the scene reaches them and return values that the following actions can use:
- Get the state of a Synology NAS: reachable (yes/no), model, DSM version, CPU, memory, temperature, number of degraded volumes, failing disks and failed backups, and the list of problems found. An unreachable NAS does not stop the scene: test the Reachable value.
- Get the state of a Synology volume: name, DSM status, healthy (yes/no), usage (%), used, free and total space (GB).
- Get the state of a Synology backup: task name, package, status, result, last backup date (in the configured date format) and hours since the last backup, handy to warn about a backup that no longer runs.
Troubleshooting
- Invalid credentials: verify the dedicated account and its login policy.
- MFA code required / error 403 or 406: configure OTP for the DSM account, enter a current 6-digit code in Gladys and save. Approval notifications and hardware keys are not supported by the DSM API.
- Invalid or expired MFA code / error 404: wait for the next OTP and save it before it expires.
- Insufficient privileges / error 105: add the dedicated account to the DSM
administratorsgroup. A delegated System monitoring role alone is not sufficient for these APIs. - Connection lost after a NAS reboot or a DSM update / error 498: nothing to do. DSM can refuse the remembered login while it restarts; the integration signs in again by itself and retries the connection every 30 seconds, then less often up to every 15 minutes, until the NAS answers.
- Unable to reach DSM: test the URL from the Gladys host and verify the NAS firewall.
- DSM did not answer in time: the NAS accepted the connection but did not reply within 20 seconds. The refresh is abandoned and retried on the next cycle; check the NAS load and the network.
- A single NAS is unreachable in a multi-NAS setup: the other NAS keep publishing their values and the integration's Configuration tab in Gladys names the failing address. Only a failure of every NAS reports the integration as disconnected.
- Certificate error (
certificate rejected): install a trusted certificate in DSM. For a private, self-signed installation, pin the certificate fingerprint; disabling the verification also works but leaves the password exposed to a man-in-the-middle on your network. certificate does not match the pinned SHA-256 fingerprint: DSM presented another certificate. If you renewed or replaced it yourself, paste the new fingerprint; otherwise, something is posing as your NAS — nothing was sent to it.- A volume is missing: rescan after creating or removing a volume.
- Backup tasks are missing: verify that Hyper Backup or Active Backup is installed, that at least one task exists and that the dedicated DSM account can open the corresponding package, then scan again.
- A backup date has no value: update the integration, save the connection again and wait for the next refresh. Active Backup details are queried task by task because its general task list does not always include version dates.
Configuration settings
These are the settings Synology DSM asks for in its configuration screen in Gladys.
| Setting | Type | Required | Description |
|---|---|---|---|
| Synology DSM connection | section | No | Use a dedicated, read-only DSM account. Gladys must be able to reach the NAS on your local network. |
| DSM URL | string | Yes | For example: https://192.168.1.20:5001 |
| Username | string | Yes | |
| Password | secret | Yes | |
| Current OTP code (MFA) | secret | No | Required only to trust this Gladys installation on the first MFA login, or after revoking the trusted device in DSM. Enter a current 6-digit verification code. |
| Verify the TLS certificate | boolean | No | Keep enabled unless DSM uses a self-signed certificate. |
| Pinned certificate fingerprint (SHA-256) | string | No | Optional, for a self-signed certificate. When filled in, the NAS is only accepted if its certificate has exactly this SHA-256 fingerprint (the password is never sent otherwise), whatever the setting above. |
| NAS 2 (optional) | section | No | Leave the URL empty to ignore this slot. Credentials are stored in dedicated secret fields. |
| NAS 2 — DSM URL | string | No | |
| NAS 2 — Username | string | No | |
| NAS 2 — Password | secret | No | |
| NAS 2 — Current OTP code | secret | No | |
| NAS 2 — Verify TLS certificate | boolean | No | |
| NAS 2 — Pinned certificate fingerprint (SHA-256) | string | No | |
| NAS 3 (optional) | section | No | Leave the URL empty to ignore this slot. Credentials are stored in dedicated secret fields. |
| NAS 3 — DSM URL | string | No | |
| NAS 3 — Username | string | No | |
| NAS 3 — Password | secret | No | |
| NAS 3 — Current OTP code | secret | No | |
| NAS 3 — Verify TLS certificate | boolean | No | |
| NAS 3 — Pinned certificate fingerprint (SHA-256) | string | No | |
| NAS 4 (optional) | section | No | Leave the URL empty to ignore this slot. Credentials are stored in dedicated secret fields. |
| NAS 4 — DSM URL | string | No | |
| NAS 4 — Username | string | No | |
| NAS 4 — Password | secret | No | |
| NAS 4 — Current OTP code | secret | No | |
| NAS 4 — Verify TLS certificate | boolean | No | |
| NAS 4 — Pinned certificate fingerprint (SHA-256) | string | No | |
| Refresh interval (s) | number | No | Custom interval in seconds (60 to 86400). The default is 900 seconds. A moderate interval limits the growth of the Gladys database. |
| Date format | select | No | Format used for the backup dates published to Gladys. Every format except ISO 8601 shows the local time of the integration container. |
How to install Synology DSM in Gladys
- In Gladys, open Integrations: Synology DSM appears in the catalog, next to the native integrations, with a community badge.
- Click Install. Gladys pulls the Docker image (
ghcr.io/prohand/gladys-synology:2.4.0), starts it in a sandbox isolated from the core, and generates the integration's interface (devices, discovery and configuration). - Open the Configuration screen of the integration, fill in the settings, and save.
- You can also install it directly from its repository URL: https://github.com/prohand/gladys-synology.
Synology DSM requires Gladys >=5.1.0. The catalog inside Gladys refreshes every hour, so a new version becomes available at most one hour after its release.
Not running Gladys yet? It is free and open source: follow the installation guide to get started.
About external integrations
Synology DSM is an external integration: a community integration packaged as a Docker container and published on GitHub, that Gladys installs in one click and runs in a sandbox isolated from its core. It is published and maintained by prohand, not by the Gladys core team.
- Browse all integrations, native and community
- Build and publish your own external integration
- Source code on GitHub — source of this documentation