Netatmo smart home integration, free and open source
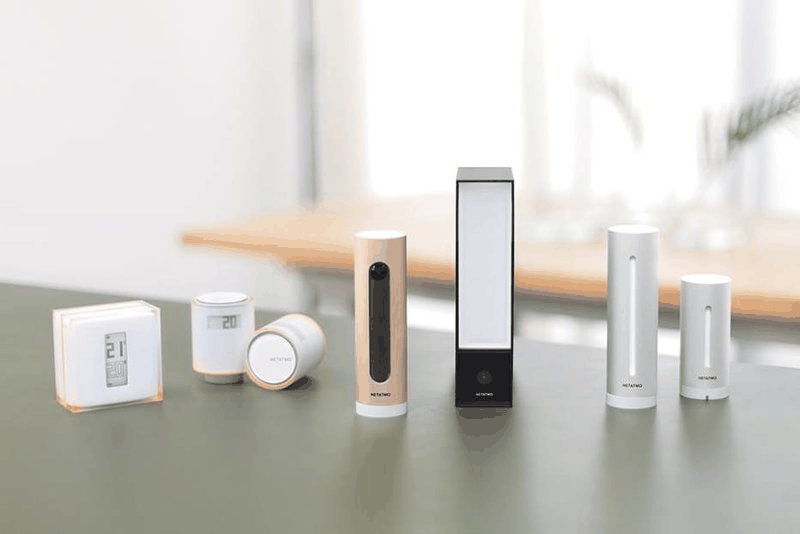
Connect your Netatmo devices (weather station, thermostats, cameras) to Gladys Assistant.
Published by Terdious
- Devices
- Version 2.6.3
- Requires Gladys >=5.2.0
- ★ 0
Connect your Netatmo devices — weather station, thermostats and radiator valves, indoor/outdoor cameras and their accessories, Bubendorff roller shutters, air quality monitors — to Gladys Assistant.
This integration talks to the Netatmo cloud on your behalf: you create your own Netatmo Connect application once, connect your account, and Gladys discovers your devices and keeps their values up to date.
In short
- Create a free application on dev.netatmo.com/apps and copy its client ID and client secret (step 1).
- In Gladys: Integrations → Netatmo → Configuration tab. Paste them, click Save configuration, then Connect (step 2).
- Turn on the device families you own and save (step 3).
- Discover tab → Add to Gladys on each device you want (step 4).
- Optional, with Gladys Plus: create an Open API key and paste it into the Gladys Plus webhooks block for real time (section Gladys Plus webhooks).
Prerequisites
- A Netatmo account, with your devices already installed and working in the Netatmo app (Gladys reads what Netatmo exposes — a device must be online in Netatmo first).
- Gladys Assistant 5.2 or later.
- Optional: a Gladys Plus subscription, only to receive events in real time (see Gladys Plus webhooks). Without it everything works, refreshed every 2 minutes.
Step 1 — Create your Netatmo Connect application
Gladys never ships a shared Netatmo key: you use your own Netatmo Connect application, free of charge, so your data stays between your Gladys and your Netatmo account. It takes 2 minutes.
-
Open dev.netatmo.com/apps and sign in with the same account as in the Netatmo app (the one that sees your devices).
-
Click Create to create an application, then fill in the form:
- app name and description: anything you like, e.g.
GladysandMy home automation; - data protection officer name and email: yours;
- Redirect URI: leave it empty;
- Webhook URI: leave it empty. Netatmo accepts one webhook per application, and the integration registers its own (see Gladys Plus webhooks): an address typed here would replace it.
Accept the terms of use and Save.
- app name and description: anything you like, e.g.
-
The application page now shows two values:
- the client ID: a string of letters and digits;
- the client secret: another, longer string.
Keep this page open: you will copy them into Gladys.
You do not need to configure scopes on the portal: Gladys requests the required permissions (read + write, covering Energy, Weather, Security including cameras and the video doorbell, and the roller shutters) automatically during the connection.
Step 2 — Paste the credentials and connect your account
- In Gladys, open Integrations, look for Netatmo ("external" badge) and open the Configuration tab.
- In the Netatmo Connect application block:
- paste the client ID into Netatmo application client id;
- paste the client secret into Netatmo application client secret.
- Scroll to the bottom of the form and click Save configuration.
- Go back up to the Netatmo account field and click Connect. The Netatmo page opens: sign in if needed and accept the requested permissions. You come back to Gladys and the status becomes Connected.
The redirect address shown above the Connect button: Gladys shows it for every integration that connects to an account. With Netatmo you do not need to declare it: the Redirect URI field of your application stays empty. Only if Netatmo refuses the connection because of the redirect address (
redirect_uri), copy it with the copy button, paste it into Redirect URI on dev.netatmo.com, save, then click Connect again.
If it does not work:
- "Fill in AND SAVE the Netatmo client id / client secret…": you clicked Connect before saving. Click Save configuration, then Connect again.
- Netatmo shows an error instead of its sign-in page: the client ID or secret was copied wrongly (extra space, missing character). Copy them again from dev.netatmo.com, save, then reconnect. A saved secret is no longer displayed: leave its field empty to keep it, or paste a new one to replace it.
- "Connected, but some Netatmo permissions added in a recent version are missing…": a family you just turned on (roller shutters, BTicino door entry, Legrand…) needs extra permissions. Click Connect again and accept: your devices and settings are kept.
The access and refresh tokens are stored by the integration itself and never appear on the form. Gladys refreshes them automatically; if the session ever expires beyond repair, the Configuration screen tells you to reconnect.
Step 3 — Choose the device families
Under Devices to discover, enable the families you own:
| Toggle | Discovers |
|---|---|
| Energy | Thermostat (NATherm1), relay plug (NAPlug), radiator valves (NRV), modulating thermostat (OTM + OTH), BTicino Smarther (BNS) |
| Weather | Station (NAMain) + outdoor, wind, rain and extra indoor modules |
| Security | Indoor (NACamera), Indoor Camera Advance (NPC) and outdoor (NOC) cameras, video doorbell (NDB), plus their accessories and known persons |
| Roller shutters | Bubendorff shutters of an iDiamant gateway (NBR, NBO, NBS) |
| Air quality | Smart Indoor Air Quality Monitor — Home Coach (NHC), off by default |
| BTicino door entry | BTicino Classe 300X / Classe 300 EOS door entry, one device (BNCX + its BNEU, BNDL, BNSL, BNCS, BNXM) — preview, off by default |
| Legrand Home + Control | Legrand with Netatmo lights, dimmers, plugs and relays of a Home + Control gateway (NL*) — preview, off by default |
Turn on the toggles of the families you own, then click Save configuration: the discovery runs again by itself, no need to click Scan.
Camera live stream quality (poor / low / medium / high, default
high) sets the quality of the indoor and outdoor camera live stream. Lower it
if the live stream stutters or is slow to start, especially remotely through
Gladys Plus.
Values refresh every 2 minutes (Netatmo rate limits), or within seconds with the Gladys Plus webhooks.
Step 4 — Add your devices to Gladys
- Open the integration's Discover tab. Every Netatmo device found shows there, with its features.
- Click Add to Gladys on each device you want. It moves to the Devices tab, where you can rename it and pick its room.
- Show it on the dashboard: Dashboard → Edit, then add a box (Devices, Camera, Thermostat…) or one of the integration's widgets (Netatmo weather, Netatmo heating, Netatmo cameras, see Dashboard widgets).
A device marked Already added is already in Gladys. After an update of the integration, an Update button can show on a device already added: it brings the new features to it, without losing its history.
Nothing shows? Check that the status is Connected, that the family is turned on and saved, and that the device is online in the Netatmo app, then click Scan.
Heating mode (schedule / away / frost protection)
Each thermostat (NATherm1, modulating OTM, BTicino Smarther BNS) and
radiator valve (NRV) carries a Heating mode feature (a thermostat preset
in Gladys) with three choices:
| In Gladys | In the Netatmo app |
|---|---|
| Schedule | follow the weekly schedule |
| Away | away mode |
| Frost protection | frost guard (hg) |
The mode belongs to the whole home in Netatmo: changing it on one device switches the entire home, and every thermostat and valve of the home shows the new mode right after (the integration refreshes immediately). A mode changed from the Netatmo app shows up at the next refresh (2 minutes, or 2-3 seconds with the Gladys Plus webhooks).
Use it in a scene ("everybody left → heating to Away") with the standard "Set device value" action.
⚠️ If your thermostats already existed in Gladys, the feature does not appear on its own: go to the Discovery screen and click Update on each thermostat and valve. Gladys 5.2 or later is required (the thermostat preset does not exist before).
Duration of a setpoint sent by Gladys
Netatmo ends every manual setpoint: after the default duration set in the Netatmo app, the room goes back to its Netatmo schedule. The Duration of a setpoint sent by Gladys setting (Heating section of the Configuration screen) chooses how long the setpoints Gladys writes last — the Setpoint temperature of a thermostat or valve, set from the device page, a "Set device value" scene action or the Gladys Thermostat:
| Choice | The setpoint lasts |
|---|---|
| Netatmo default duration | the default duration of the Netatmo app (the behaviour before this setting, the default) |
| 1 hour … 12 hours | that long |
| Until the next schedule change | until the next slot of the active Netatmo schedule that changes the room's temperature, in the home's timezone (Netatmo's default duration when no schedule is known) |
| No end | as long as Netatmo accepts: 30 days, shorter if Netatmo refuses that end, without an end time as a last resort — in practice until Gladys (or someone) changes it again |
The Set a room setpoint and Boost a room scene actions keep the duration you give them, and a boost always keeps its own duration.
Using the Gladys Thermostat integration? Choose No end. Gladys drives the weekly schedule and writes every change itself. With a limited duration, Netatmo goes back to its own schedule when the setpoint ends, and Gladys sees the new setpoint as a change made on the thermostat: a manual hold (see Netatmo's own schedule keeps running below).
Modulating thermostat (OpenTherm)
The current Netatmo thermostat, the modulating (OpenTherm) model, comes with the Energy family. Its two modules are each created as a device:
- the thermostat (
OTM): room temperature, a writable setpoint, the Heating mode (see above), the Detecting open window of its room, the Boiler status (on while the boiler heats), battery and RF signal, like the olderNATherm1; - the OpenTherm relay (
OTH) wired to the boiler: its WiFi quality, the outdoor temperature Netatmo modulates the heating on, and a Boiler fault feature: 1 while the boiler reports a fault to Netatmo (water pressure, flame, maintenance…), 0 otherwise. The Netatmo app tells which fault it is.
The thermostat's room shows up in the Netatmo heating widget, and the thermostat can be chosen in the Change the heating mode scene action. A thermostat out of reach gets the unreachable badge and its battery and signal are no longer published. No reconnection is needed: the thermostat permissions have been part of the connection since the first version.
BTicino Smarther thermostat
The BTicino Smarther with Netatmo thermostat (BNS) comes with the Energy
family. It is created with its room temperature, a writable setpoint, the
Heating mode (see above), the Detecting open window of its room, the
Boiler status (on while it heats), a Cooler status (on while the air
conditioning runs), a read-only Comfort boost state (the Netatmo
boiler_valve_comfort_boost field, as reported) and its WiFi quality. Its
room shows up in the Netatmo heating widget and the thermostat can be
chosen in the Change the heating mode scene action.
⚠️ Netatmo account connected before this version? The Smarther needs two new Netatmo permissions (
read_smarther,write_smarther): click Connect again on the Configuration screen and accept them — your devices and settings are kept. Until then the connection status shows a "click Connect again" hint, and a setpoint or heating mode command on the Smarther fails with a "reconnect your Netatmo account" message.
Use the Gladys Thermostat widget
Gladys 5.2 comes with a Thermostat integration and its Thermostat
dashboard widget: a weekly schedule set in Gladys, temperature presets
(Comfort, Eco, Night, Away, Frost protection), a stop button and the heating
cut when a window opens. It can drive a real thermostat, and every heated
Netatmo room is one: a room with a thermostat (NATherm1, modulating OTM,
Smarther BNS) or a room with radiator valves only (NRV).
To make it possible, one device per heated room — its thermostat, or one of its valves in a room without thermostat — carries two features named after the room:
| Feature | What it says |
|---|---|
| Heating state - room | Heating while the room asks for heat (or, on a boiler thermostat, while the boiler runs), Idle otherwise (Cooling while a Smarther's air conditioning runs) |
| Thermostat mode - room | Off or Heating, writable: Off switches the room off in Netatmo, Heating hands it back to its Netatmo schedule. Nothing is sent to Netatmo when the room is already so |
The window sensor is the Detecting open window feature every thermostat and valve already has: the Netatmo open window detection of its room, Opened / Closed — 0 open, 1 closed, like every Gladys opening sensor (nothing while Netatmo does not report it).
⚠️ If your thermostats and valves already existed in Gladys, the new features do not appear on their own: go to the Discovery screen and click Update on each thermostat and valve. No new Netatmo permission is needed.
Create the thermostat
- Open the Thermostat integration of Gladys and click New, one thermostat per Netatmo room.
- In Thermostat type, choose Real thermostat (the appliance regulates itself).
- Pick the features of the device that carries the room features:
| Field in Gladys | Netatmo feature to pick |
|---|---|
| Setpoint of the real thermostat | Setpoint temperature of that device |
| Temperature sensor | Temperature - room room |
| Heating state (optional) | Heating state - room |
| Operating mode (optional) | Thermostat mode - room |
| Window opening sensor | Detecting open window of a thermostat or valve of the room (optional, see below) |
- Set the presets and a schedule, save, then add the Thermostat widget to a dashboard.
Every thermostat and valve of a room has its own Setpoint temperature, and they all set the same room setpoint: pick the one of the device that carries the room features, so the whole thermostat reads one device.
What you get
- the heating halo of the widget while the room heats;
- the weekly schedule and the presets of Gladys: at each slot Gladys writes the preset's temperature as the room setpoint (a manual setpoint in Netatmo);
- stop (and the Off slots): Gladys switches the room off in Netatmo, then writes its frost protection setpoint — which is not sent while the room is off, so the room stays off. Start: the room goes back on (its Netatmo schedule), then Gladys writes its setpoint;
- window: when Detecting open window reads Opened, Gladys stops the room, and restarts it once the window is closed. This one is optional: Netatmo thermostats and valves already cut the heating themselves when they detect an open window. Pick it if you want the stop shown in Gladys.
Netatmo's own schedule keeps running
Gladys does not turn the Netatmo schedule off: it overrides it with manual setpoints. Netatmo ends a manual setpoint after the default duration set in the Netatmo app, and the room then follows its Netatmo schedule again — like when somebody turns the thermostat or changes the setpoint in the Netatmo app. Gladys sees the setpoint change on the device and keeps it as a manual hold, exactly like a turn of the widget dial (for the Manual mode duration of the thermostat, or until the next slot), then takes over again with its own schedule. Netatmo is read every 2 minutes and reports the same setpoint again and again: Gladys recognises its own setpoint in these reads, so an unchanged report never counts as a change. For the most predictable result, set the Duration of a setpoint sent by Gladys to No end (see Duration of a setpoint sent by Gladys above): the setpoints Gladys writes then stay until Gladys changes them.
Two more things to know:
- a room switched off from the Netatmo app is switched back on by Gladys at its next pass when its schedule wants heat: stop it from Gladys instead (stop button, Off slot);
- while a room is off, a setpoint sent from Gladys (device page, scene) is not sent to Netatmo — a manual setpoint would switch the room back on. Switch the room back on with its Thermostat mode first.
Cameras
When the Security family is enabled, each camera is created with:
- a dashboard image (a snapshot, refreshed automatically) — Gladys fetches it from the local network first (falling back to the Netatmo VPN URL);
- a monitoring switch (turn the camera's monitoring on/off);
- a live stream button (HLS), built local-first as well.
Live stream — latency and audio
- Latency (~10 s): this is inherent to the Netatmo live HLS stream — the
exact same delay exists on Netatmo's own web and mobile apps. Prefer the
dashboard camera box latency
low, andmediumcamera quality (720p) if you want smoother playback. - No sound? The camera microphone must be enabled in the Netatmo app: Manage my home → select the camera's room → Camera → Advanced settings → enable the Microphone. If it is off there, no client (Gladys, Netatmo web, Netatmo app) gets audio. Gladys transports the audio whenever the stream carries it — there is nothing to configure on the Gladys side.
Outdoor camera floodlight
The outdoor camera (NOC) also gets two features for its floodlight, which
Netatmo sets to On, Off or Auto (lights up on a detection):
| Netatmo mode | Floodlight (light) | Floodlight automatic mode (switch) |
|---|---|---|
| On | On | Off |
| Off | Off | Off |
| Auto | Off | On |
- Turning the Floodlight on forces the light on; turning the automatic mode on goes back to Auto.
- Turning one of them off only acts when it is the current mode, and then sets the floodlight to Off: a scene that turns off the lights leaves a floodlight in Auto alone, and switching the automatic mode off never turns off a light forced on.
- The floodlight is a Gladys light: the light scene actions (turn on / turn off) work with it.
A mode changed from the Netatmo app shows up at the next refresh (2 minutes, or right away with the Gladys Plus webhooks).
⚠️ If your outdoor camera already existed in Gladys, the floodlight does not appear on its own: go to the Discovery screen and click Update on the camera.
Indoor Camera Advance (NPC)
The Indoor Camera Advance is created like the indoor camera: a dashboard image, a monitoring switch, the Motion and Person detected detections (see Detections below), and it shows up in the Netatmo cameras widget. Two differences, both on Netatmo's side:
- its snapshot is fetched through the Netatmo VPN URL: like the video doorbell, this camera does not serve it on the local network;
- its live view is negotiated in WebRTC (see WebRTC live view below): with an older Gladys, the camera box shows the still image.
⚠️ Netatmo account connected before this version? This camera needs three new Netatmo permissions (
read_camerapro,write_camerapro,access_camerapro): click Connect again on the Configuration screen and accept them. Until then the connection status shows a "click Connect again" hint, the camera may be missing or unreachable, and a monitoring command refused by Netatmo fails with a "reconnect" message.
Video doorbell
When the Security family is enabled, the Netatmo video doorbell (NDB) is
created with:
- a dashboard image (a snapshot, refreshed automatically) — fetched through the Netatmo VPN URL: the doorbell does not serve it on the local network;
- a Doorbell feature that shows Ringing when someone presses the button, usable as a scene trigger (If the doorbell rings) — in real time with the Gladys Plus webhooks, otherwise within about 2 minutes (see below);
- its Wifi link quality.
There is no monitoring switch (Netatmo offers none for the doorbell). Its live view is negotiated in WebRTC (see WebRTC live view below): with an older Gladys, the camera box shows the still image.
⚠️ Netatmo account connected before this version? The doorbell needs two new Netatmo permissions (
read_doorbell,access_doorbell): click Connect again on the Configuration screen and accept them. Until then the connection status shows a "click Connect again" hint.
WebRTC live view (doorbell and Indoor Camera Advance)
The video doorbell and the Indoor Camera Advance stream only in WebRTC, through the Netatmo cloud: no HLS, nothing on the local network. With a Gladys version newer than 5.2.1 that includes the WebRTC camera live view (Gladys#3215), the dashboard camera box plays their live video. The browser sets up the stream; Gladys and the integration only relay that set-up to Netatmo, and the video goes straight from the Netatmo cloud to the browser, at home as through Gladys Plus.
- Older Gladys: the camera box shows the still image, refreshed automatically, as before. After updating Gladys, save the integration configuration once (or scan again on the Discovery screen): the existing doorbell and camera switch to the live view, nothing to recreate.
- Stopping: the live view ends when you pause it, leave the dashboard or close the tab (Gladys ends a forgotten session after 30 seconds).
- The live view does not start: the box shows a message and the last image.
Check that the camera is online in the Netatmo app and that the browser
supports WebRTC. A strict firewall or VPN can block the WebRTC traffic to the
Netatmo cloud. If the connection status or the integration Logs ask you to
reconnect, the authorization lacks
access_doorbell/access_camerapro: click Connect again.
Gladys Plus webhooks (real time) — optional
By default Gladys polls Netatmo every 2 minutes. With webhooks, Netatmo tells Gladys as soon as something happens: values are then refreshed in 2-3 seconds instead of waiting for the next cycle — without increasing the number of Netatmo API calls.
Since a local Gladys is not reachable from the Internet, Gladys Plus relays the events, so an active Gladys Plus subscription is required.
Setup (3 minutes)
You need an active Gladys Plus subscription, with your Gladys linked to Gladys Plus (Settings → Gladys Plus).
-
Open Gladys from plus.gladysassistant.com and sign in with your Gladys Plus account. The Open API tab only shows there: it does not exist when you open Gladys through its local address (e.g.
http://192.168.1.10). -
Go to Settings → Open API. Type a name (e.g.
Netatmo), click Generate and copy the key shown: it is displayed only once. If you lost it, revoke it and generate another one.It is not the "RSA key" of the Gladys Plus tab: that one is used for the Gladys Plus end-to-end encryption and does not work here.
-
Open Integrations → Netatmo → Configuration tab (from Gladys Plus or from the local address, either way). Below the form, in the "Gladys Plus webhooks" block, paste the key into Gladys Plus Open API key and click that block's own Save button (not "Save configuration").
The block then shows the webhook address. It contains your key: do not share it.
Nothing to paste on the Netatmo website: the integration registers the URL at Netatmo itself, and re-registers it on every reconnection. To check, open the integration Logs: you should see
Netatmo webhook registered — events will trigger an immediate refresh
Then every event Netatmo delivers adds a line such as
Netatmo webhook event received: NACamera-movement (70:ee:50:…).
Registered but nothing arrives? Run the Device diagnostic action (Configuration screen, both fields empty): the line Webhook URL held by Netatmo says whether Netatmo still holds the integration's URL. One webhook only per Netatmo application: if another client overwrote it (the "webhook URI" field of dev.netatmo.com, the former core Netatmo service), save the Gladys Plus key again. Netatmo also stops delivering for 24 hours to an application whose webhook failed 5 times in a row (only dev.netatmo.com shows it, and lets you lift it). If the URL is the integration's and still nothing arrives, create a new Open API key (from plus.gladysassistant.com, Settings → Open API) and save it here: an older key (for instance one taken from the former core Netatmo service URL) can authenticate yet never deliver the webhooks. Detections only exist while the camera monitoring is on. Whatever the cause, the detections still arrive, within about 2 minutes (see below).
Without a key (or without Gladys Plus), the integration behaves exactly as before, polling every 2 minutes — detections included.
What it brings
- Values land almost instantly — for example a thermostat setpoint changed from the Netatmo app, or a camera monitoring state.
- Detections in real time instead of within about 2 minutes (see below).
Detections (scene triggers)
Some events are momentary: they exist only in the Netatmo event stream, no device state reports them. They are published as dedicated features, usable as scene triggers:
| Device | Feature | Fired by |
|---|---|---|
| Indoor and outdoor cameras | Motion | motion detected |
| Indoor and outdoor cameras | Person detected | a person detected / recognized |
| Outdoor camera (Presence) | Animal detected | an animal detected |
| Outdoor camera (Presence) | Vehicle detected | a vehicle detected |
| Smoke alarm | Smoke | a smoke detection |
| Carbon monoxide alarm | Carbon monoxide | a carbon monoxide detection |
| Video doorbell | Doorbell | someone rings |
Each detection goes to Yes and returns to No by itself after one minute (Netatmo sends no "detection over" event, except for smoke and carbon monoxide: the "cleared" / "back to normal" event returns it to No at once). In a scene, use the "value becomes Yes" trigger — for the doorbell, the If the doorbell rings trigger. A ring fires once: the follow-up "call answered" / "call missed" events of the Netatmo app are not separate triggers.
How fast? With the Gladys Plus webhooks, in a few seconds. Without them —
or when Netatmo does not deliver them — the integration also reads the last
events of each home at every 2-minute refresh (Netatmo getevents, one call
per home): the same features and scene triggers fire, within about 2
minutes. A detection is never fired twice when both bring it, the events
already there when the integration starts are not replayed, and an event
older than 10 minutes when read (after an outage) fires nothing.
⚠️ If your cameras already existed in Gladys, these new features do not appear on their own: go to the Discovery screen and click Update on each camera (or smoke alarm) to add them.
Scenes: Netatmo triggers and actions
The integration adds its own cards to the scene editor (Gladys 5.1 or later): pick Integration trigger or Integration action, then the Netatmo entry.
Triggers (real time with the Gladys Plus webhooks, within about 2 minutes without)
| Trigger | Fires when | Information passed on to the actions |
|---|---|---|
| A known person arrives | an indoor camera recognizes a known face | Person, Camera, Home |
| A known person leaves | Netatmo marks a known person as away | Person, Camera, Home |
| The siren sounds | an indoor siren starts sounding | Siren, Home |
Optional filters: the camera (or siren) — empty means any — and the person: type the name exactly as shown in the Netatmo app (the scene editor cannot list the Netatmo persons; an empty field means any known person). An unrecognized face never fires "A known person arrives" — the Person detected feature of the camera covers every person.
Actions
| Action | What it does |
|---|---|
| Change the heating mode | Schedule, Away or Frost protection for the whole home; optional duration in minutes (Away and Frost protection: back to the schedule afterwards) |
| Mark a person as away | one known person, or — person left empty — the whole home empty (re-arms the camera monitoring set to follow the presence) |
| Mark a person as at home | one known person, or — person left empty — every known person |
| Set a room setpoint | manual setpoint (7 to 30 °C) of the room of the chosen thermostat or valve; optional duration in minutes, then back to the schedule (empty: the default duration of a manual setpoint in the Netatmo app) |
| Boost a room | full-power heating (boost) of the room of the chosen thermostat or valve; optional duration in minutes (empty: the default boost duration of the Netatmo app) |
| Back to the schedule | ends the manual setpoint or the boost of the room: it follows the schedule again |
| Choose the heating schedule | makes one of the heating schedules of the home the active one |
The home is the one of the device you choose in the action (a thermostat or valve for the heating, a camera for the persons). Leave it empty when your account has a single home. The person field accepts a scene variable: "A known person arrives → Mark a person as at home" with the Person information. Each action returns the Home name to the following steps.
The three room actions apply to the room of the thermostat or valve you choose (required) and also return the Room name. Choose the heating schedule takes the schedule name exactly as shown in the Netatmo app (upper / lower case ignored): the scene editor cannot list the Netatmo schedules. A name that does not exist fails the action, and the scene logs name the schedules of the home. It also returns the Schedule name.
Dashboard widgets
Three widgets join the dashboard widget picker (Gladys 5.1 or later): Edit dashboard, add a widget and search for "Netatmo".
| Widget | Shows | Settings |
|---|---|---|
| Netatmo weather | live tiles of the station (temperatures, humidity, CO2, noise, pressure, rain, wind) and a health row per module with a low battery or out of reach | the station (empty: the first one) and the readings shown: Overview, Indoor, or Outdoor, rain and wind |
| Netatmo heating | the heating mode of the home, how many rooms heat, the active schedule, one row per room and buttons — see below | a thermostat or valve of the home (empty: your single home); its room is the one the room form pre-selects |
| Netatmo cameras | the latest picture of each camera, its monitoring, and buttons to turn it on / off | one camera shown large (empty: every camera in a list) |
The Netatmo heating widget
- Caption: the home and its active schedule. Tiles: the heating mode
(Schedule, Frost guard, Away) and the rooms heating (
2/11). - One compact row per room: measured → setpoint temperature, then the markers Manual, Boost or Off (setpoint not from the schedule; an off room shows no setpoint), Window (Netatmo detected an open window) and Heating (the room asks for heat, or its boiler thermostat runs — the Heating state of the room). The icon and its color follow: orange while the room heats, blue for an open window. Up to ten rooms have their row; with more, the tenth row sums up the others.
- Buttons: the heating modes but the active one (Schedule, Frost protection, Away), Room setpoint and, with several schedules, Change schedule (a form listing them).
- Room setpoint opens a short form in the card: the room, the action — Set the setpoint, Boost, Back to schedule or Off —, the setpoint (7 to 30 °C, rounded to 0.5 °C; left empty, the room's current setpoint is kept — handy to change only its duration) and the duration (the choices of the Duration of a setpoint sent by Gladys setting, which pre-selects it). The duration applies to a setpoint, a boost and Off; a boost with Netatmo default duration or No end lasts the Netatmo boost duration. Dashboard rows cannot be tapped and a card holds four buttons: one form serves every room.
The tiles follow the values live; the rest refreshes with the integration (2 minutes, or as soon as the heating mode, the monitoring or a picture changes). The camera pictures are served by the integration itself — the dashboard never loads an image from Netatmo's servers. A widget only shows the devices you created in Gladys.
Security accessories (camera-bridged)
When the Security family is enabled, the accessories linked to your cameras are discovered too:
- Door / window tag (
NACamDoorTag) — an opening sensor, plus battery and RF signal. Like every Gladys opening sensor (and the Detecting open window of thermostats and valves), it reads 0 when open and 1 when closed. - Indoor siren (
NIS) — a read-only sounding sensor, plus battery and RF. - Smoke alarm (
NSD) — discovered with its battery and signal, plus a Smoke detection (see Detections above): in real time with the webhooks, within about 2 minutes without. - Carbon monoxide alarm (
NCO) — same as the smoke alarm: battery and signal (when Netatmo reports them), plus a Carbon monoxide detection, like the smoke.
Known persons
When the Security family is enabled, each home whose cameras recognize faces gets a "<home> - Known persons" device, with one Presence feature per person named in the Netatmo app: Presence detected when Netatmo considers the person at home, No presence when away — the state the Netatmo app shows. Use it in your scenes like any presence sensor.
- Only named persons get a feature: an unrecognized face (no name in the Netatmo app) is ignored.
- The presence refreshes every 2 minutes, and at once with the Gladys Plus webhooks (a known person arrives / leaves) or after the Mark a person as away / at home scene actions.
- When Netatmo does not report a person's presence, nothing is published: the last known value stays.
- A person added, renamed or deleted in the Netatmo app: click Update on the device in the Discovery screen to add, rename or remove the feature. The feature follows the Netatmo person id, so a rename keeps its history.
Roller shutters (Bubendorff / iDiamant)
Enable Roller shutters (Bubendorff / iDiamant) under Devices to
discover (off by default) to discover the Bubendorff shutters linked to your
iDiamant gateway: radio (NBR), wired (NBO) and solar (NBS) models. Each
shutter is created with:
- an open / close / stop control;
- a position (0% = closed, 100% = open), which you can also set;
- its RF signal quality.
The iDiamant gateway itself is not created as a device: its id is kept as the
shutter's plug_id parameter, every command goes through it. After a command,
Gladys refreshes the values about 30 seconds later so the new position shows
up without waiting for the next 2-minute cycle.
⚠️ Already connected before shutter support? The shutters need two new Netatmo permissions. Click Connect again on the Configuration screen and authorize Gladys — your devices and settings are kept. Until then, a shutter command fails and the Configuration screen asks you to reconnect.
Intermediate positions: depending on the model and motor, some Bubendorff shutters only open or close fully. An intermediate position may then be ignored or rounded by the shutter, and the reported position may only reflect the last command — use open / close / stop on those.
Air quality monitor (Home Coach)
When the Air quality devices (Home Coach) family is enabled, each Netatmo
Smart Indoor Air Quality Monitor (Home Coach, NHC) is discovered with its
temperature (plus the day's minimum and maximum), humidity, CO2, noise,
pressure and absolute pressure, its WiFi quality, and an Air quality
feature. It is named after the name you gave it in the Netatmo app.
The Home Coach does not measure an air quality index: it rates the room on five levels, from its CO2, humidity, noise and temperature. Gladys reads an air quality feature as an AQI (0 to 500) to colour it on the dashboard and to pass it to HomeKit, so each level is published as the middle of the matching AQI band:
| Home Coach level | Value in Gladys | Dashboard colour | HomeKit |
|---|---|---|---|
| Healthy | 25 | green | Excellent |
| Fine | 75 | yellow | Good |
| Fair | 125 | orange | Fair |
| Poor | 175 | pink | Inferior |
| Unhealthy | 250 | purple | Poor |
In a scene, compare with these values: for example "Air quality above 150" means poor or unhealthy.
An Air quality level feature shows the same rating in words on the dashboard. Gladys does not translate option labels yet: they are in French (Sain, Correct, Moyen, Mauvais, Malsain — healthy, fine, fair, poor, unhealthy). It keeps no history: the numeric Air quality feature keeps the history, the colours and HomeKit.
An offline Home Coach gets the unreachable badge and its last-known values
are not published. No reconnection is needed: the Home Coach permission
(read_homecoach) has been part of the connection since the first version.
BTicino door entry (Classe 300X / Classe 300 EOS) — preview
The BTicino Classe 300X and Classe 300 EOS with Netatmo video door entry systems are served by the Netatmo API, with far less than the Netatmo app shows (issue #59). Enable BTicino door entry (Classe 300) — preview under Devices to discover (off by default) and save.
The door entry is discovered as one device, named after its indoor unit
(the BNCX gateway, e.g. "Classe 300EOS with Netatmo"). The modules it
bridges add their features to it, named after them:
| Module | Netatmo type | On the door entry device |
|---|---|---|
| Indoor unit (gateway) | BNCX | WiFi quality, doorbell ring (real time with the Gladys Plus webhooks) |
| Staircase / outdoor light | BNSL | light on / off (e.g. "Outdoor lighting") |
| Controlled socket | BNCS | read-only on / off state, when Netatmo reports it |
| Street panel | BNEU | nothing (Netatmo reports no value for it) |
| Door lock | BNDL | nothing — see below |
| X module | BNXM | its signal quality, when Netatmo reports one |
- Light: switched through Netatmo like in the app. Netatmo never reports whether it is on: Gladys shows the last command it sent (the staircase light usually switches itself off after a while, Gladys cannot know when).
- Ring: published like the video doorbell ring (
Ringingthen the time of the last ring), usable as a scene trigger — in real time with the Gladys Plus webhooks, within about 2 minutes without. Netatmo documents this event for the Classe 300 EOS; it has not been seen on a real installation yet: if your rings do not show, send a diagnostic (below). - Opening the door is not available. The Netatmo API used by third-party applications does not let them open a BTicino door lock (Netatmo blocks it for security reasons); only the Netatmo / BTicino app can.
- The unreachable badge follows the indoor unit. A bridged module Netatmo reports offline publishes no value.
- If you created devices with the 2.2.0 preview (one per module), delete them and create the door entry device again.
⚠️ New Netatmo permissions — click Connect again. Turning the toggle on asks for four extra permissions, requested only while it is on:
read_bfi/write_bfi(BTicino IP, Classe 300X) andread_mx/write_mx(Classe 300 EOS). Click Connect again on the Configuration screen and accept them — your devices and settings are kept. Until then the connection status shows a "click Connect again" hint, and Netatmo may leave the BTicino modules out (a light command then fails with a "reconnect" message).
Sending a diagnostic to the maintainer
Use the Device diagnostic action of the Configuration screen (see
Troubleshooting): pick the door entry device, or leave both
fields empty for the whole account, and paste the result in
issue #59. Ring once before running it (and wait 2 minutes): the report lists the last webhook
events of each module, and the last events Netatmo returns for it (getevents).
While the toggle is on, the integration also writes to its logs, at the first
refresh after a start and then only when something changes, the raw data
Netatmo returns for every BTicino module and every Gladys Plus webhook event
about one. Each line starts with [bticino-diagnostic]; the same redaction
applies (tokens, keys, e-mail addresses and URLs are replaced by
<redacted>, the module, bridge and home ids are kept), and a line longer
than 8 KB is cut with a [truncated] marker.
Legrand Home + Control (Céliane / dooxie / Mosaic) — preview
The Legrand with Netatmo wiring devices (Céliane, dooxie, Mosaic…) bridged by a Home + Control gateway are served by the same Netatmo API (issue #60). Enable Legrand Home + Control — preview under Devices to discover (off by default) and save.
ℹ️ Tested on the pyatmo fixtures, feedback welcome. No real Legrand installation has been tested yet: the payloads come from the pyatmo test data (the library Home Assistant uses). If something looks wrong, send a diagnostic (below).
Each lighting module, plug or relay becomes one device, named after it in the Netatmo app:
| Modules | Netatmo types | Features in Gladys |
|---|---|---|
| Light switches, micro module, double switch (each gang) | NLM, NLL, NLIS | light on / off, power (W) |
| Dimmers | NLF, NLFN, NLFE, NLUF, NLUO | light on / off, brightness (0-100 %), power (W) |
| Plugs and outlets | NLP, NLPM, NLPBS, NLC, NLUP | switch on / off, power (W) |
| Relays | NLUI, NLPO, NLPT, NLPD | switch on / off, power (W) |
| Gateway | NLG, NLGS | not a device: every command of its modules goes through it |
(NLUI in-wall switch, NLPO contactor, NLPT latching relay, NLPD dry
contact.)
- Commands go through Netatmo like in the app, via the gateway (kept as the
plug_idparameter). Netatmo reports the state back: Gladys reads it again about 2 seconds after a command. A change made at the wall shows up at the next 2-minute refresh (Netatmo sends no webhook for these modules). - Brightness uses the Netatmo 0-100 scale. A dimmer that reports no brightness gets none (it is then an on/off light). How a dimmer reacts to a brightness change while it is off has not been checked on real hardware yet.
- Power (read-only) is added only when Netatmo reports it for the module. A module offline during the discovery gets neither brightness nor power: re-scan once it is back, before creating it.
- Double switch (
NLIS): each gang is a light of its own; the switch itself is not a device. - Contactor (
NLPO): on / off only; itscontactor_modeis not exposed yet. - Unreachable badge: a module Netatmo reports offline, or behind an offline gateway, gets the unreachable badge and publishes no value.
⚠️ New Netatmo permissions — click Connect again. Turning the toggle on asks for two extra permissions, requested only while it is on:
read_magellan/write_magellan(Legrand wiring devices). Click Connect again on the Configuration screen and accept them — your devices and settings are kept. Until then the connection status shows a "click Connect again" hint, Netatmo may leave the Legrand modules out, and a command fails with a "reconnect" message.
Not supported yet
Roller shutters (NLV, NLLV, NLLM), energy meters (Ecocompteur NLE,
NLPC, NLY, load shedder NLPS), wireless switches and remotes (NLT,
NLD, NLDD, NLAS, NLAO, NLDP), ventilation (NLLF) and garage door
(NLJ) are the next steps of
issue #60. The
Device diagnostic lists them as "not supported".
Sending a Legrand diagnostic
Run the Device diagnostic action of the Configuration screen (see Troubleshooting): pick a Legrand device, type the name of a module not created, or leave both fields empty for the whole account. Paste the result in issue #60: it shows the raw Netatmo data of each module and the fields Gladys does not use yet.
Updating the integration
Installed from the catalog (the usual case): Gladys checks the store regularly. When a new version is out, the integration shows an "Update available" badge (also counted next to Integrations in the menu), and its Supervision tab names the version offered, with a link to its release notes. Click Update: Gladys pulls the new image and applies the new manifest — new configuration fields appear on their own, there is nothing to re-paste. Your configuration and your devices are kept.
Gladys can take up to about an hour and a half to notice a new release (store index refresh). "Force update" checks right away: it reads the latest published version and pulls its image.
Installed in developer mode (manifest pasted by hand): "Force update" only re-pulls the image of the tag you installed, and the version shown and the configuration fields come from the pasted manifest — re-paste the updated manifest to pick up new fields.
Migrating from the built-in Netatmo service
This external integration replaces the Netatmo service built into Gladys. Its
devices get new identifiers (netatmo:* → ext:netatmo:*), so they are created
as new devices — but since Gladys 4.84.1 you can migrate each old device
to its new counterpart and keep its state history, its scenes and its
dashboards.
Before you start
- Do not delete your old Netatmo devices: the migration starts from them.
- Migrate soon after creating the new devices. When both devices recorded values over the same period, only the old history older than the new device's first value is moved, so nothing is counted twice: the old device's values of the overlap period are dropped.
Steps
- Install and connect this integration, then create your devices from the Discover tab: the destination must exist before you migrate.
- Open Integrations → Netatmo — the built-in integration, flagged as deprecated — then its Devices tab.
- On an old device, click Migrate.
- Pick the Destination device: the new device, listed under the external Netatmo integration (the list can be filtered by integration, room and name).
- Check the Feature matching table. Gladys pre-fills it (same category, type and unit, then same name to tell twins apart); each old feature can be matched by hand, or set to Do not migrate — its history is then deleted. Look closely at the temperature rows of thermostats and stations, which carry several temperature features.
- Click Migrate and delete the old device.
Gladys moves the history, rewrites the scenes and dashboards that used the old device, moves the new device into the old one's room if it has none, re-points the energy links, then deletes the old device. The result shows the number of states moved and of scenes / dashboards updated. Repeat for each device.
A long history can take several minutes: follow it in Settings → Tasks. If the page loses the connection, the migration keeps running in the background — check that page before trying again. A failed migration can be re-run: it only moves what is left.
Troubleshooting
- A scene on an open window or door no longer fires (updated from 2.4.0 or
older): Detecting open window (thermostats, valves) and the door /
window tag Opening now follow the Gladys convention of opening sensors —
0 open, 1 closed. They used to read 1 when open, so the dashboard showed
an open window or door as closed. A scene that tested
= 1for "open" must now test= 0. - "Save first" when connecting: save the client id / secret, then click Connect again.
- Session expired: click Connect again to re-authorize your Netatmo account.
- A device shows an "unreachable" badge: Netatmo reports it as offline (dead battery, powered off, out of range). Gladys stops publishing its last-known values so you are not misled by stale data; the badge clears when the device comes back.
- A device shows a "Degraded" badge, or the status carries a message while Connected: a part of the Netatmo cloud has been failing for several minutes (for instance the weather service). Gladys keeps publishing what the rest of the cloud still provides — station and module measures come from the home status too — and marks the devices left without fresh values. Nothing to do: both clear on their own on the first complete refresh. If it lasts, the integration Logs name the failing API.
- A camera value or monitoring command fails once with a "reconnect" message: your Netatmo authorization is missing the camera scope — reconnect your account.
- A shutter command fails with a "reconnect" message: your Netatmo authorization predates the shutter support — click Connect again.
- Motion / person detections (or rings) arrive about 2 minutes late, while
the Netatmo app alerts at once: the Gladys Plus webhooks do not reach the
integration, the detections come from the 2-minute
geteventsreading. Run the Device diagnostic action (both fields empty) and compare Last events seen by getevents with Last webhook events: events in the first and none in the second means Netatmo does not deliver the webhooks — see Registered but nothing arrives? in the webhooks section. Nothing in either: check that the camera monitoring is on. The Events poll (getevents) line shows its last error (for instance a missing permission: click Connect again). - No camera sound: see the microphone tip in the Cameras section above.
- Doorbell or Indoor Camera Advance without live video: see WebRTC live view in the Video doorbell section (Gladys version, browser, firewall).
- "Some Netatmo permissions are missing" status: a newer version added permissions (video doorbell, Indoor Camera Advance, BTicino door entry, Legrand Home + Control) — click Connect again and accept them. The integration Logs list the missing ones.
- Device diagnostic (report a problem or an unsupported device): on the
Configuration screen, run the Device diagnostic action. Pick a device
created in Gladys, or type the name or Netatmo id of a module you did not
create (e.g. one the integration does not support yet); leave both fields
empty for a summary of the whole account. The report shows what Netatmo
sends for the module, what the integration publishes for it, the Netatmo
fields it does not use yet, the last webhook events and the last events
read with
getevents, the permissions and the state of each Netatmo API. It is also written to the integration Logs (lines after[netatmo-diagnostic]) if you cannot copy it from the screen. Read it before posting it publicly: tokens, URLs and e-mail addresses are removed, but module and home ids and the names you gave your modules are kept. - Still stuck, or a device is missing? Ask on the forum topic Intégration externe - Netatmo, or open an issue on GitHub with the integration logs (Logs tab).
Configuration settings
These are the settings Netatmo asks for in its configuration screen in Gladys.
| Setting | Type | Required | Description |
|---|---|---|---|
| Netatmo Connect application | section | No | Gladys talks to Netatmo through YOUR own Netatmo Connect application (free, 2 minutes): 1. Open "Create an application" below and sign in with the account you use in the Netatmo app. 2. Fill in the required fields: name (e.g. "Gladys"), description, data protection officer name and email (yours). Leave "Redirect URI" and "Webhook URI" empty. 3. Save: the page shows a "client ID" and a "client secret". Copy them into the two fields below. 4. Click "Save configuration" at the bottom, then "Connect", and accept on the Netatmo page. Then open the "Discover" tab and click "Add to Gladys" on each device you want. |
| Netatmo application client id | string | Yes | The "client ID" line of your application's page on dev.netatmo.com (a string of letters and digits). |
| Netatmo application client secret | secret | Yes | The "client secret" line of the same page. Once saved it is no longer displayed: leave the field empty to keep it. |
| Netatmo account | oauth2 | Yes | Once the client ID and secret are saved, click "Connect": the Netatmo page opens, sign in and accept. The status turns to "Connected". The redirect address shown above does not need to be declared at Netatmo. If Netatmo refuses the connection because of the redirect address (redirect_uri), paste it into the "Redirect URI" field of your application. Click "Connect" again whenever the status asks for it: some families (roller shutters, BTicino, Legrand…) add permissions. |
| Devices to discover | section | No | Turn on the families you own, then click "Save configuration": the discovery runs again by itself. Then open the "Discover" tab and click "Add to Gladys" on each device you want. On a device added with an older version, "Update" brings the new features. Values are refreshed every 2 minutes (Netatmo API limits), within seconds with the Gladys Plus webhooks (end of this form). |
| Energy devices (thermostats, valves) | boolean | No | Thermostats (classic, modulating OpenTherm, BTicino Smarther), relay plugs and radiator valves. Each heated room also shows in the "Netatmo heating" widget. |
| Weather devices (stations and modules) | boolean | No | Discover the Netatmo Weather devices: stations, outdoor, wind, rain and indoor modules. |
| Security devices (cameras, doorbell, alarms) | boolean | No | Indoor (NACamera), Indoor Camera Advance (NPC) and outdoor (NOC) cameras, video doorbell (NDB) and their accessories: door/window tags, siren, smoke and carbon monoxide alarms, plus the presence of the known persons. Detections (motion, person, doorbell…) can trigger scenes. |
| Roller shutters (Bubendorff / iDiamant) | boolean | No | Discover the Bubendorff roller shutters linked to an iDiamant gateway (open, close, stop, position). Already connected? Click Connect again to grant the shutter permissions. |
| Air quality devices (Home Coach) | boolean | No | Discover the Netatmo Smart Indoor Air Quality Monitors (Home Coach): temperature, humidity, CO2, noise, pressure and air quality. |
| BTicino door entry (Classe 300) — preview | boolean | No | Discover the BTicino Classe 300X / Classe 300 EOS door entry as one device (signal, doorbell ring through the webhooks, staircase or outdoor light) and write its raw Netatmo data to the logs. Opening the door is not available through the Netatmo API. Already connected? Click Connect again to grant the BTicino permissions. |
| Legrand Home + Control — preview | boolean | No | Discover the Legrand with Netatmo wiring devices (Céliane, dooxie, Mosaic) of a Home + Control gateway: lights and dimmers, plugs and relays (on/off, brightness, power). Roller shutters, energy meters and wireless switches are not supported yet. Already connected? Click Connect again to grant the Legrand permissions. |
| Camera live stream quality | select | No | Quality of the indoor and outdoor camera live stream in Gladys. Lower it if the live stream stutters or is slow to start, especially remotely through Gladys Plus. |
| Heating | section | No | How the setpoints Gladys sends to your Netatmo rooms behave. |
| Duration of a setpoint sent by Gladys | select | No | Netatmo ends every manual setpoint and returns to its own schedule. Applies to the setpoints Gladys writes (dashboard, scenes, Gladys Thermostat), not to the scene actions that set their own duration nor to a boost. Using the Gladys Thermostat integration? Choose "No end": Gladys drives the schedule, and a setpoint Netatmo ends on its own would look like a manual change. |
| Real time with Gladys Plus (optional) | section | No | Without anything to do, Gladys polls Netatmo every 2 minutes. With a Gladys Plus subscription, Netatmo notifies Gladys within seconds (detections, doorbell, setpoint changed in the Netatmo app). The key takes 3 steps: 1. Open Gladys from plus.gladysassistant.com: the Open API tab does not exist on the local address. 2. Settings → Open API: type a name (e.g. "Netatmo"), click "Generate" and copy the key, shown only once. It is not the RSA key of the Gladys Plus tab. 3. Paste it into the "Gladys Plus webhooks" block below this form and click its own "Save" button. Nothing to enter on dev.netatmo.com: the integration registers the address there itself. To check: "Device diagnostic" action, line "Webhook URL held by Netatmo". |
How to install Netatmo in Gladys
- In Gladys, open Integrations: Netatmo appears in the catalog, next to the native integrations, with a community badge.
- Click Install. Gladys pulls the Docker image (
ghcr.io/terdious/gladys-netatmo:2.6.3), starts it in a sandbox isolated from the core, and generates the integration's interface (devices, discovery and configuration). - Open the Configuration screen of the integration, fill in the settings, and save.
- You can also install it directly from its repository URL: https://github.com/Terdious/gladys-netatmo.
Netatmo requires Gladys >=5.2.0. The catalog inside Gladys refreshes every hour, so a new version becomes available at most one hour after its release.
Not running Gladys yet? It is free and open source: follow the installation guide to get started.
About external integrations
Netatmo is an external integration: a community integration packaged as a Docker container and published on GitHub, that Gladys installs in one click and runs in a sandbox isolated from its core. It is published and maintained by Terdious, not by the Gladys core team.
- Browse all integrations, native and community
- Build and publish your own external integration
- Source code on GitHub — source of this documentation