Getting started with Gladys Assistant
It can be difficult to know where to start when you're new to home automation.
Choose Your Home Automation Hub
Gladys Assistant is a self-hosted software, which means everything works locally on a home automation hub. This is one of its main strengths!
You have several options to run Gladys:
Option 1: Mini-PC (Recommended)
- Beelink Mini S13 or similar mini-PC
- Powerful and stable hardware (Intel N150, 16GB RAM, 500GB NVMe SSD)
- Install Ubuntu Server via bootable USB + Gladys via Docker
- Available on Amazon US or your local retailer
- Best price/performance ratio for a long-term setup
Option 2: Existing Hardware
If you already have compatible hardware:
- Synology NAS, Intel NUC, or any Docker-compatible Linux server
- Reuse your existing hardware
- Follow our installation guides below
Option 3: Raspberry Pi
- A great way to discover Gladys if you already have one on hand
- Simplified setup with our official 64-bit image (Pi 3, 4, and 5)
- 👉 Raspberry Pi installation guide
- For everyday long-term use, a mini-PC is still the better choice
Installing Gladys Assistant
Depending on the hardware chosen, you can follow one of the following tutorials:
- Install Gladys Assistant on a Mini-PC
- Install Gladys Assistant on a Synology NAS
- Install Gladys Assistant on an Unraid NAS
- Install Gladys Assistant on a Raspberry Pi
Define Your Smart Home Project
The most important thing is to define the automations you want to implement in your home: connected lights, an alarm to secure your home, energy savings by turning off unused devices or heating?
A good way to organize is to create a table (in Excel, Google Sheets, or Notion) where you list all the devices you want to integrate, room by room.
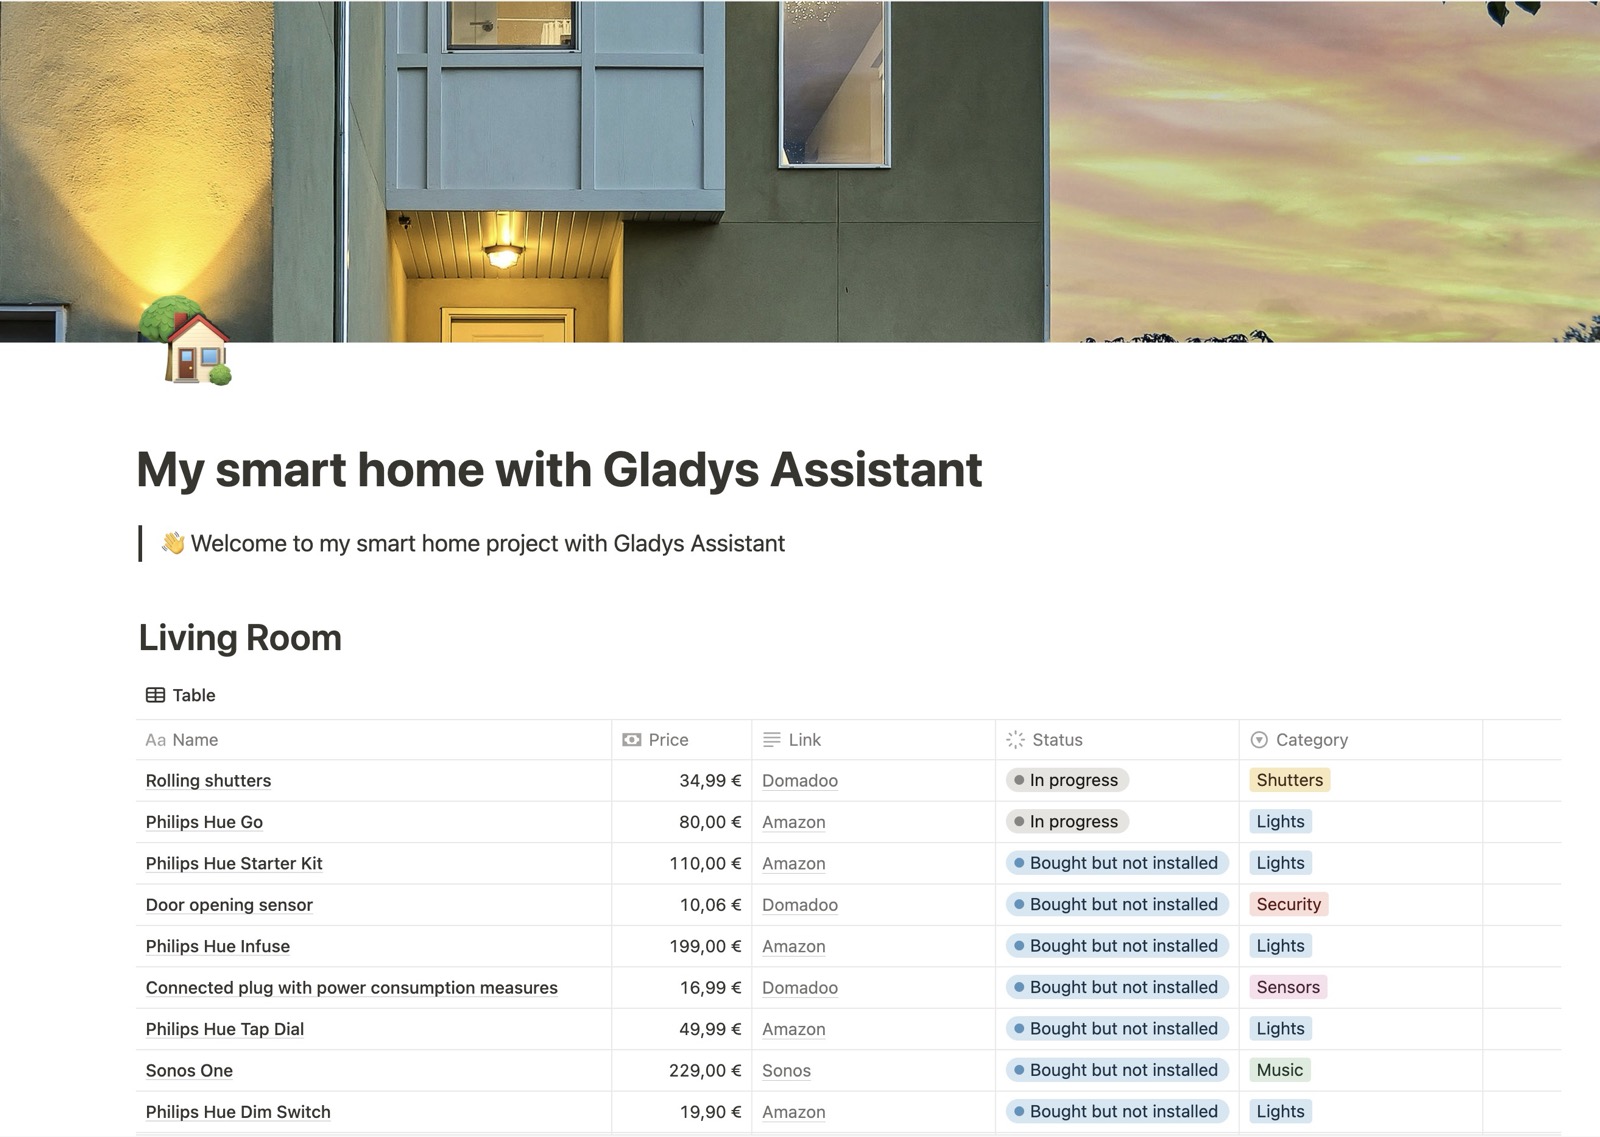
Example: Living Room
| Name | Price | Link |
|---|---|---|
| Zigbee Temperature/Humidity Sensor with Display | $19,99 | Amazon US |
| ZigBee Smart Plug 4 Pack with Real-time Energy Monitoring | €16.99 | Amazon US |
| IKEA TRÅDFRI E27 Bulb (Ceiling Light) | $13,99 | IKEA US |
| IKEA STYRBAR Remote (Brightness) | $13,99 | IKEA US |
| Zigbee Motion Sensor 4 Pack | $75,99 | Amazon US |
The idea is not necessarily to buy everything at once, but rather to plan and gradually equip your home, unless you have just moved in and want to install everything immediately.
Configuring Your Smart Home
Once Gladys is running at your home, you can access it via your web browser and start configuring your home.
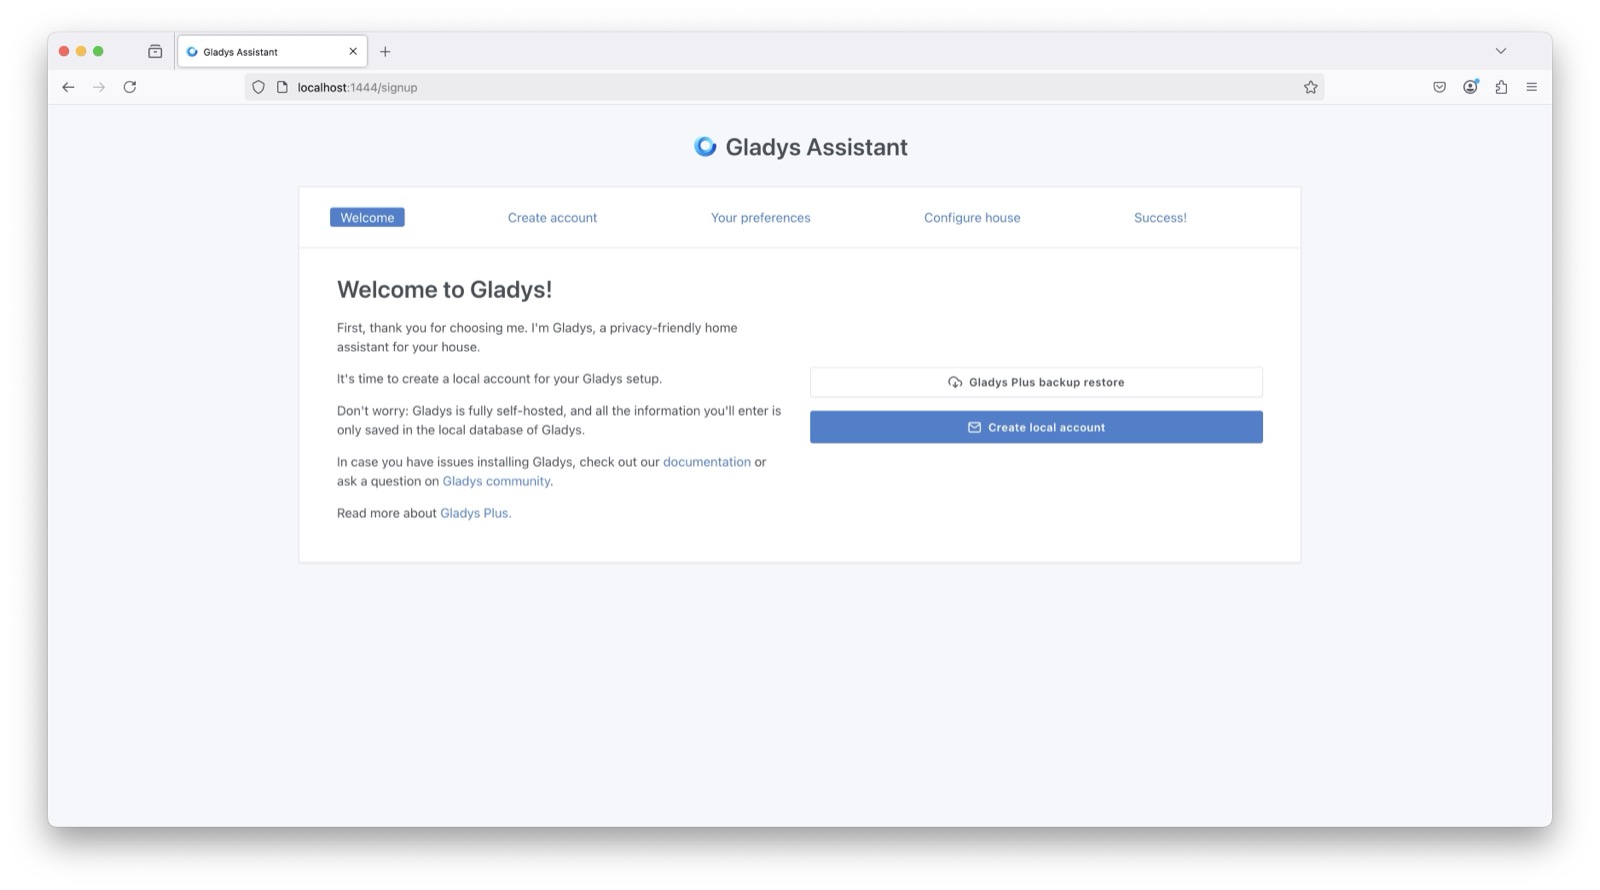
Simply follow the steps here.
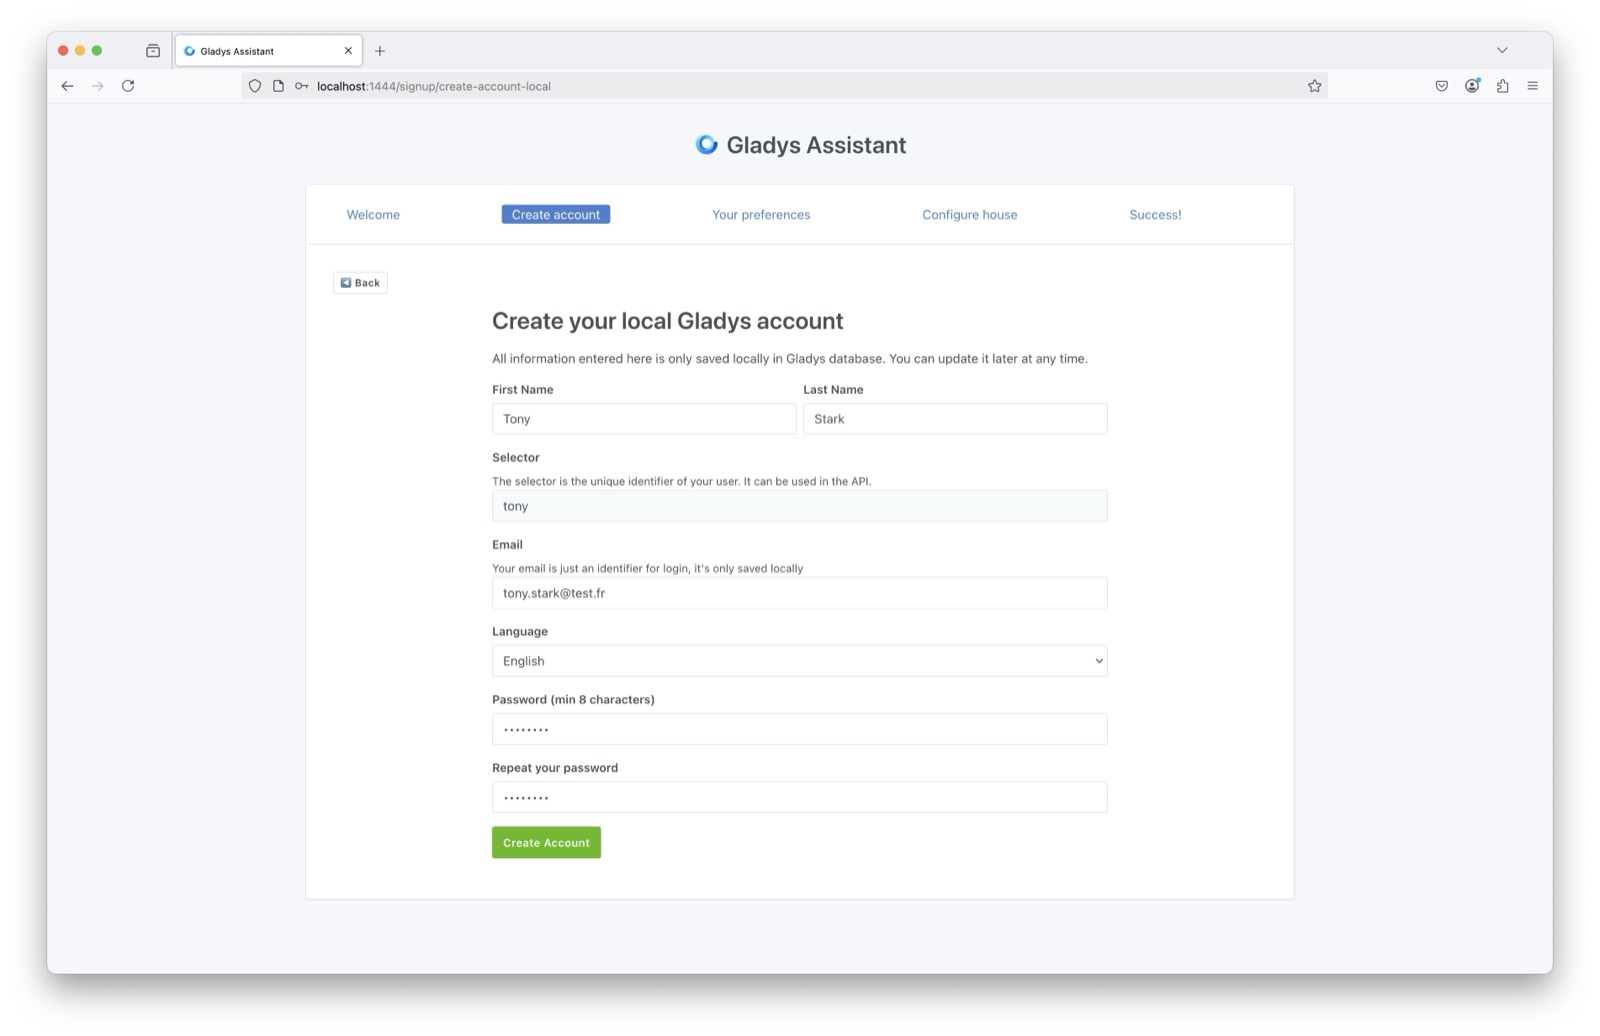
We will first create the main administrator account for your smart home:
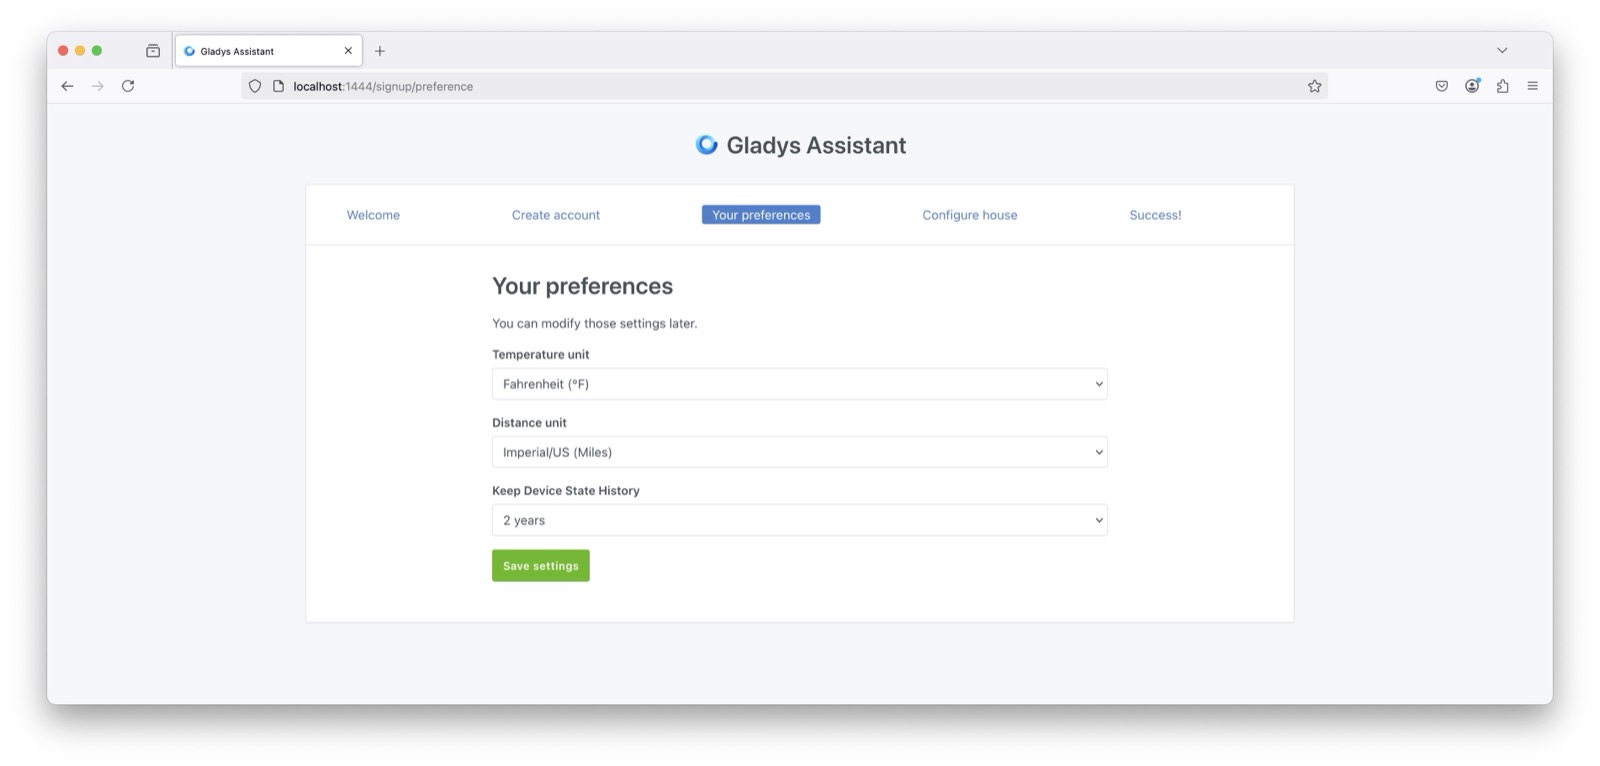
Next, Gladys will ask you for some preferences:
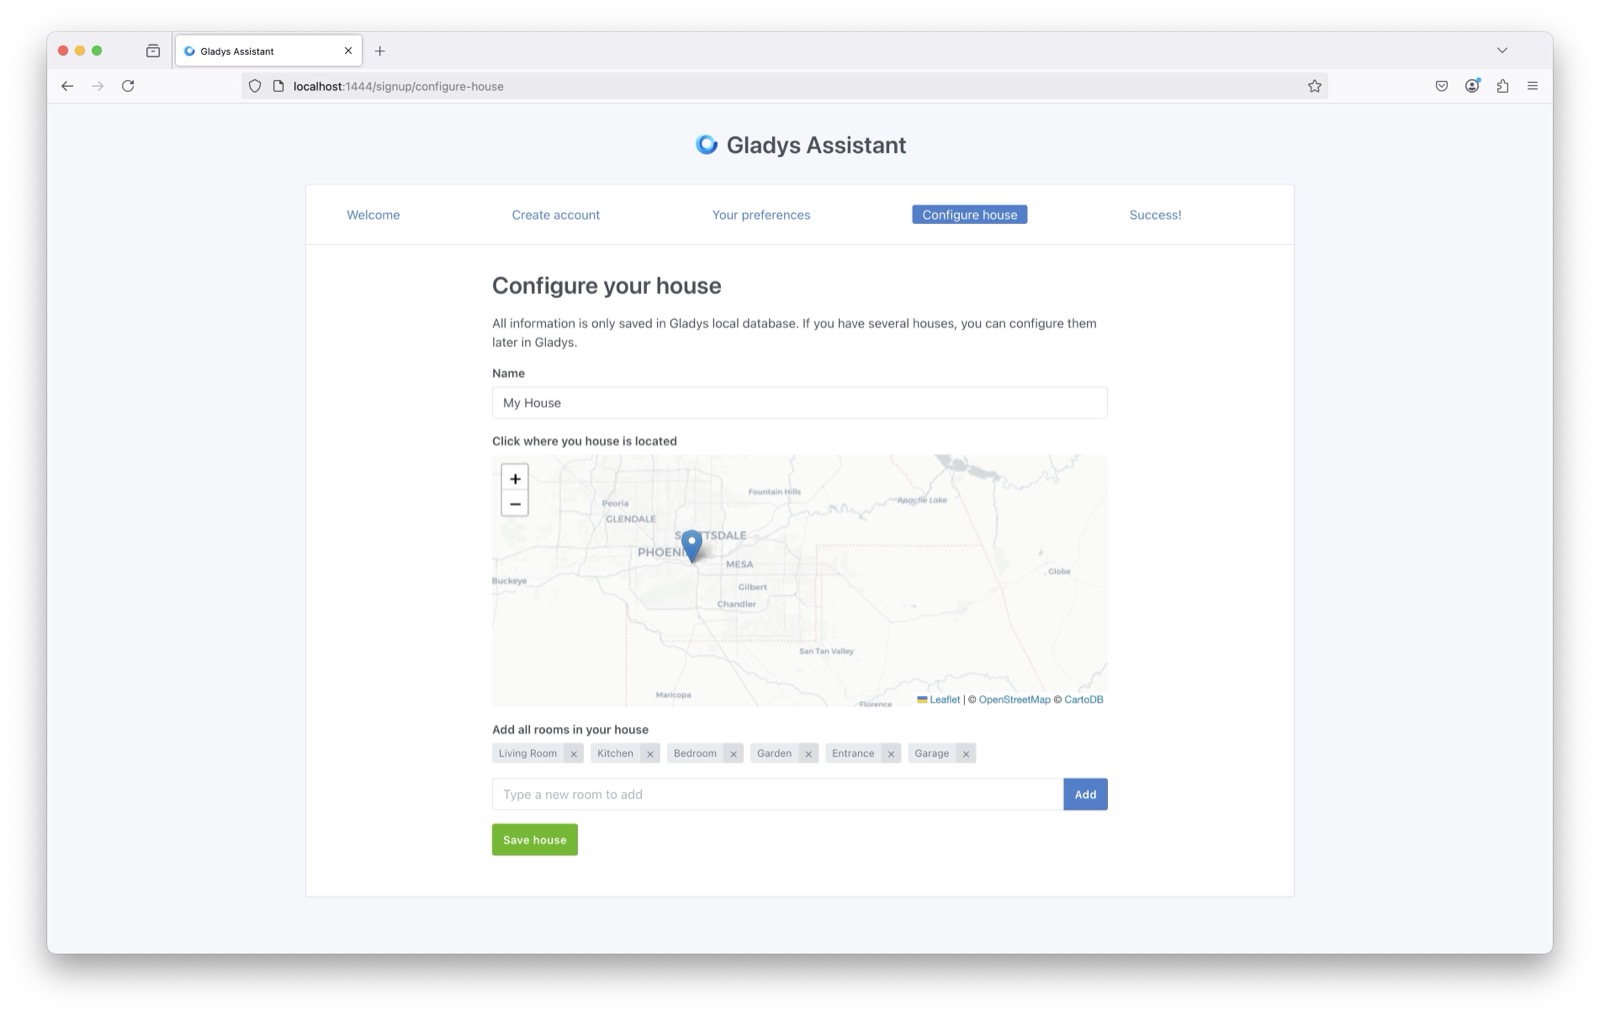
Finally, you can name your house:
There you go! You now have a Gladys smart home system at your place.
You can now set up the various integrations available in Gladys.
If you have any questions, join us now on the forum!