Meross Smart-Home-Integration, kostenlos und Open Source
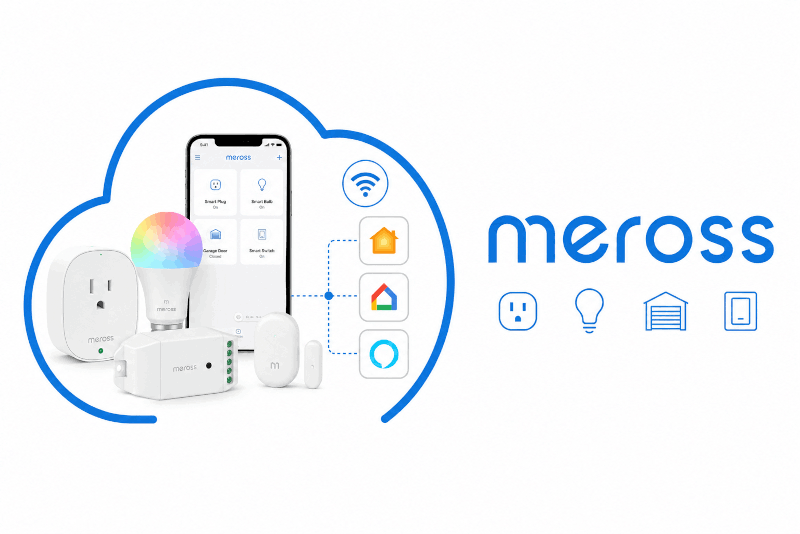
Read and control your Meross smart plugs, switches, lights and garage doors.
Veröffentlicht von PhilippeMA
- Geräte
- Version 1.1.4
- Erfordert Gladys >=4.86.0
- ★ 0
Die Dokumentation dieser Integration wird von ihrem Autor geschrieben und ist bisher nur auf Englisch verfügbar.
Control your Meross plugs, switches, lights and garage doors from Gladys, and see their consumption on your dashboard.
What you get
Sign in once with your Meross account and every compatible device of the account appears in the Discovery tab, ready to be added. No re-pairing, no extra hardware.
| Your device | What you can do in Gladys |
|---|---|
| Smart plug or wall switch (MSS110, MSS210, MSS510…) | Turn it on and off |
| Plug with metering (MSS310, MOP320) | On/off, plus power, voltage, current and today's energy |
| Power strip (MSS425…) | Each outlet on and off separately |
| Bulb or light strip (MSL120, MSL320, MSL430…) | On/off, brightness, colour and white temperature |
| Garage door opener (MSG100, MSG200) | Open and close it, and see whether it is really open |
| Hub (MSH300, MSH400) | Everything paired to it — see below |
Devices connected to a hub
A hub is a gateway: it has nothing to switch on or off by itself. So the hub does not appear in Gladys — each sensor paired to it does, under the name you gave it in the Meross app.
| Paired device | What you get in Gladys |
|---|---|
| Thermometer (MS100) | Temperature, humidity, battery level |
| Thermostatic valve (MTS100/150) | Target temperature, room temperature, on/off, battery |
| Water leak sensor (MS400) | Leak detected, battery level |
| Door/window sensor (MS200) | Opening, battery level |
| Watering timer (MST100) | Start a watering, set its duration, battery |
If your hub appears to do nothing, check that at least one sensor is paired to it in the Meross app: a hub with nothing paired has nothing to show. The Diagnose my devices button lists what the integration found behind it.
The valve mode (comfort, economy, schedule) is not available yet — only the target temperature, which is what automations need most.
Watering timers
An MST100 watering timer on an MSH400 hub gives you a Watering switch, three durations in minutes and its battery level.
Turn Watering on and the timer waters, then stops by itself — exactly like the "water now" button in the Meross app. Turn it off to stop early. The switch clears itself when the watering ends.
The three durations
| Feature | What it is |
|---|---|
| Default watering duration | The device's own setting, the one in the Meross app |
| Next watering duration (0 = default) | How long the next watering started from Gladys runs |
| Last watering duration | How long the last watering actually ran |
Default watering duration is the value configured on the timer itself — the same one the Meross app shows. Changing it from Gladys writes it to the device, so the app sees the change, and the other way round. There is a single value and it belongs to the hardware. Until the timer has reported one, it stays empty rather than showing an invented number.
Next watering duration is a one-off, for a single watering. It is never written to the device: your Meross app setting is left untouched.
- At 0 — its resting value — Gladys says nothing about the duration and the timer uses its own. That is the default behaviour, exactly as before.
- At anything else, the next watering started from Gladys runs for that long.
You set it with a slider, from 0 to 120 minutes. That ceiling is lower than the default duration's on purpose: Gladys renders an editable duration as a slider, so the wider the range, the coarser the setting. For a longer watering, set the default duration instead — that one goes up to 24 hours.
It returns to 0 as soon as the watering starts: it is spent. The field empties itself, and Last watering duration is what tells you the duration actually used. If the hub refuses the command, the value is kept — you do not have to type it again.
In a scene, set Next watering duration and then turn Watering on: the two actions run in order.
A watering started from the Meross app, or by the hub's own schedule, uses the default duration and does not spend your value.
This duration does not survive an integration restart: it starts back at 0, so a watering started after a restart uses the default. That is deliberate — a duration entered weeks ago must not silently apply to a watering started today.
Gladys talks to your hub directly on your local network when it can reach it, and through the Meross servers otherwise. If a watering fails, the error names both channels and the address that did not answer; Diagnose my devices shows each device's local address and the channel actually in use.
Watering schedules stay in the Meross app: the hub does not let anything else read or change them.
Configuration
- Open the Configuration tab of the integration.
- Enter the email and password of your Meross account — the same ones you use in the Meross mobile app.
- Choose the region where your account was created (Europe, America, Asia/Pacific). This is the most common cause of a refused login: if you are unsure, try Europe first, then Global.
- Save. Click Test the connection to check everything works: it tells you how many devices were found.
- Your devices appear in the Discovery tab.
Your password is stored encrypted by Gladys. It is never sent in clear text: only a hashed form leaves the integration, and only to the Meross authentication server.
Local or cloud?
The Prefer the local connection toggle (on by default) asks the integration to talk to your devices directly over your Wi-Fi network instead of going through Meross' servers. Local control is faster and keeps working when your internet connection is down.
Each device shows a badge telling you the channel it really uses:
- local — commands never leave your home network;
- cloud — commands go through Meross;
- cloud with an orange dot — local was preferred, but this device did not answer on the network; hover the badge to see why.
Some Meross firmware versions refuse local control. That is a device-side limitation: the integration falls back to the cloud so the device keeps working.
Note that even in local mode, the integration signs in to Meross once at startup: your devices only accept commands signed with your account key, and only Meross can hand it out.
Refresh interval
Plugs that measure consumption and sensors behind a hub are read at this interval. Pick it from the list: every minute (the default, and the slowest Gladys supports) down to every second.
Everything else — on/off, colours, the garage door position — arrives instantly, pushed by the device, including when someone presses a physical button or uses the Meross app. So the slowest setting suits most homes; a faster one only means more requests to Meross.
Actions
- Test the connection — signs in with the credentials in the form and reports how many devices your account holds, and how many are online.
- Refresh the device list — re-reads your account. Use it after adding or renaming a device in the Meross app, or after pairing a new sensor to a hub.
- Diagnose my devices — lists every device on your account, what it can do, the sensors found behind a hub, and how the integration handled each one. Start here when a device is missing.
Troubleshooting
"Meross refused the credentials" — check the three fields together: email, password and above all the region. An account created in Europe cannot sign in on the American endpoint.
A device stays offline — check it is reachable in the Meross app first. Gladys reports what Meross tells it, and a device that is offline for Meross is offline here too.
The Meross app logs me out — Meross limits the number of simultaneous sessions per account. Simply sign in again in the app: both sessions can coexist. The integration caches its session and releases it on shutdown to limit this.
A device is missing from the Discovery tab — click Diagnose my devices: it tells you whether the device was seen, what it advertises, and whether the integration could handle it. If it is a sensor that should be behind a hub, check it is paired to that hub in the Meross app. The integration also logs a line for every device it skips, naming what it saw.
My device's local address does not answer — the integration falls back to the cloud and says so in the logs, with the reason:
- no route to the device — Gladys is not on the same network as the device. This is the usual case when Gladys runs in Docker on another subnet or another VLAN.
- connection refused — the address answers but nothing listens: it is probably not your device any more (a DHCP lease that moved). Use Refresh the device list.
- no answer before the timeout — a firewall is dropping the packets.
Click Diagnose my devices to test it properly: it sends a real, correctly signed request
and reports what each address answers. A hand-written curl cannot tell you much here — a
Meross device accepts the connection and then silently ignores anything that is not signed,
so a healthy device looks exactly like a dead one.
Anything other than a connection error means the device is reachable. If it is not, the fix is on the network side. Reading states and most commands keep working through the cloud; watering does need that local channel on MSH400 hubs.
The Diagnose my devices button tests the local address port by port and reports what each
one answers — more reliable than a hand-written curl, since a Meross device accepts the
connection and then silently ignores any request that is not correctly signed.
Nothing works, and I want to know why — the integration logs everything it does. Open
the integration logs from the Gladys UI (or docker logs on the host); set LOG_LEVEL to
debug for the full detail, including every message exchanged with your devices.
Konfigurationseinstellungen
Diese Einstellungen fragt Meross in seinem Konfigurationsbildschirm in Gladys ab.
| Einstellung | Typ | Pflichtfeld | Beschreibung |
|---|---|---|---|
| Connect your Meross account | section | Nein | Sign in with the same email and password you use in the Meross mobile app. Your devices are then discovered automatically, with no pairing to redo. Meross allows a limited number of[...] |
| Meross email | string | Ja | The email address of your Meross account. |
| Meross password | secret | Ja | Stored encrypted by Gladys and only ever sent, hashed, to the Meross authentication server. |
| Meross region | select | Ja | The region your Meross account was created in. Pick the wrong one and the login is refused. |
| Refresh interval | select | Nein | How often metering plugs and hub sensors are read. On/off states arrive in real time and are never polled, so the slowest setting suits most homes. |
So installierst du Meross in Gladys
- Öffne in Gladys Integrationen: Meross erscheint im Katalog neben den nativen Integrationen, mit einem Community-Badge.
- Klicke auf Installieren. Gladys lädt das Docker-Image (
ghcr.io/philippema/gladys-meross:1.1.4) herunter, startet es in einer vom Kern isolierten Sandbox und erzeugt die Oberfläche der Integration (Geräte, Erkennung und Konfiguration). - Öffne den Bildschirm Konfiguration der Integration, fülle die Einstellungen aus und speichere.
- Du kannst sie auch direkt über die URL ihres Repositorys installieren: https://github.com/PhilippeMA/gladys-Meross.
Meross benötigt Gladys >=4.86.0. Der Katalog in Gladys wird stündlich aktualisiert, eine neue Version ist also spätestens eine Stunde nach ihrer Veröffentlichung verfügbar.
Du nutzt Gladys noch nicht? Es ist kostenlos und Open Source: folge der Installationsanleitung, um loszulegen.
Über externe Integrationen
Meross ist eine externe Integration: eine Community-Integration, die als Docker-Container verpackt und auf GitHub veröffentlicht wird. Gladys installiert sie mit einem Klick und führt sie in einer vom Kern isolierten Sandbox aus. Sie wird von PhilippeMA veröffentlicht und gepflegt, nicht vom Gladys-Kernteam.
- Alle externen Integrationen durchsuchen
- Die nativen Integrationen entdecken, die in Gladys eingebaut sind
- Deine eigene externe Integration bauen und veröffentlichen
- Quellcode auf GitHub — Quelle dieser Dokumentation