Dreame Smart-Home-Integration, kostenlos und Open Source
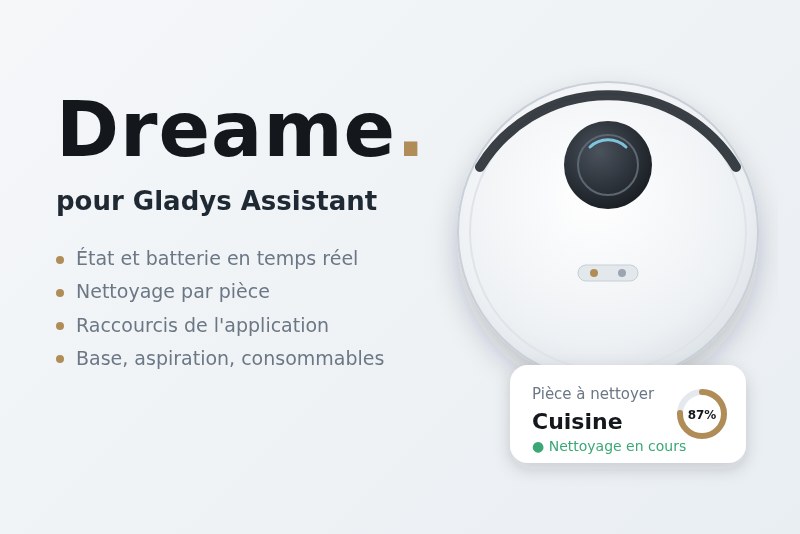
Dreamehome-Saugroboter: Reinigung, Saugleistung, Wischen, Räume, Verknüpfungen, Verschleißteile.
Veröffentlicht von guim31
- Geräte
- Version 1.2.0
- Erfordert Gladys >=5.1.0
- ★ 0
Die Dokumentation dieser Integration wird von ihrem Autor geschrieben und ist bisher nur auf Englisch verfügbar.
Control the robot vacuums of your Dreamehome account from Gladys Assistant.
This integration serves the robots paired in the Dreamehome app. It goes through the Dreamehome cloud, as these robots offer no command on the local network, and receives their changes in real time: a clean that ends, an error or a return to the dock shows up in Gladys at once.
A Dreame robot paired in the Xiaomi Home app (Mi Home) answers on another cloud: it is not supported by this integration.
Features
For each robot of your account:
-
State — cleaning, paused, returning to the dock, charging, docked, error.
-
Cleaning — start a full clean (or resume the paused one), and stop it. The robot cleans the whole home with the current Cleaning mode and settings.
-
Return to dock, Pause / resume (a second press restarts the robot) and Locate the robot (it plays a sound).
-
Cleaning mode — Vacuum, Mop, Vacuum and mop, Mop after vacuum or Customize room cleaning (each room keeps the settings chosen for it in the app), as in the app. Offered on the robots whose mops lift.
-
Suction power — Quiet, Standard, Strong or Max, and Max suction power (for the next clean only, as in the app).
-
Mop wetness — from 1 (slightly dry) to 32 (wet).
-
Mop washing frequency — By area, By time or By room, with two sliders: the area (m²) between two washes by area, and the time (minutes) by time. Each slider acts when its frequency is chosen; otherwise its value is kept for when it is. The wetter the mops, the more often they are washed: above 26, no more than 20 m² or 20 minutes between two washes.
-
Cleaning route — Quick, Standard, Intensive or Deep, on the robots that have this setting. A mode that vacuums only has Quick and Standard: switching to one brings an Intensive or Deep route back to Standard, as the app does.
-
Battery, and Error: the message of the robot in plain words ("Main brush tangled", "Clean water tank empty"...), "No error" otherwise.
-
Last clean - area and Last clean - duration — in m² and minutes, those of the clean under way while it runs, with their history.
-
Room to clean — the rooms of your robot's map; picking one starts cleaning it, and the list goes back to "—" once the room is done.
-
Several rooms — a Selection switch per room, and the Clean the selection button that cleans the rooms switched on, in the order you switched them on, as in the app. To change the order, switch the rooms off, then on again in the order you want (switching on a room already on does not move it). The selection and its order are kept from one clean to the next, Gladys or the integration restarting included.
The robots that offer Customize room cleaning (and the fifth generation) get the rooms in that order, but not their order numbers: sending them stops those robots. Their firmware may then follow the cleaning order set in the Dreamehome app instead of yours. Watch which order your robot takes: if it is the app's, set the order you want there.
-
Shortcuts — one button per shortcut created in the Dreamehome app. It keeps all its settings: rooms, order, suction, water flow, passes, mopping.
-
Consumables — the remaining life, in percent, of each wear part your robot tracks: brushes, filter, sensors, mop pads and, depending on the station, tank filter, detergent, squeegee... Only the parts your model has are offered, as in the app.
Only the features your robot actually has are offered.
The settings apply to the next clean, started from Gladys or from the app, unless CleanGenius is on in the app: the robot then chooses by itself.
On the dashboard, Gladys shows the generic name of a feature that is alone of its type: Run Mode is the cleaning (Clean / Idle; Mapping is not supported) and Text the error message. These rows can be renamed in the dashboard box.
Dashboard widgets
With Gladys 5.1 or later, the integration offers four widgets (Edit the dashboard → Add a widget). Each shows the robot picked in its settings, or the first robot of the account.
Gladys widgets are read and tapped: they have, by design, no dropdown nor slider. For every setting with its lists and sliders, add a Devices box with the setting features of the robot (mode, suction, max suction, route, wetness, washing frequency and intervals) next to the Robot vacuum widget.
- Robot vacuum — the name and state of the robot, the map of the home (rooms in colors, path of the robot — white where it vacuumed, blue where it only mopped —, dock in green, robot in white on top, ringed in green when on its dock), a list and four buttons: Clean, Pause, Dock, Locate. The list gives the battery, the last clean (area and duration), then the wear of each part, the most worn first; when room runs out, the least worn part is the one left out. The List setting of the widget turns it into the battery, the current settings (mode, suction, route, wetness), the last clean and the most worn part. Clean cleans the whole home, or only the rooms whose Selection switch is on, in the order they were switched on: the button then reads Clean the selection. A paused robot offers Resume. The path is the one of the clean under way, or of the last one, as the robot sends it with its map; a robot that sends none keeps the map alone. The map is read again every minute while cleaning, every 30 minutes otherwise, and only while a dashboard shows it. Room names are not written on it.
- Robot setting — a single setting as big buttons, the current choice ticked, at hand on a tablet: Cleaning mode, Suction power, Max suction power, Cleaning route, Mop wetness (Slightly dry, Damp, Wet) or Mop washing frequency, picked in the widget settings. The Customize room cleaning mode, the exact wetness and the washing interval are set in the Devices box.
- Quick clean — up to four buttons. Without settings, the shortcuts of the Dreamehome app; otherwise, write in Button 1 to 4 the name of a shortcut or a room as Gladys shows it (case and accents do not matter), several rooms joined by "+" ("Kitchen + Living room"), or "Clean the selection". A name that matches nothing is reported in the widget, with the names it knows. The button of the task under way is ticked. Handy on a wall tablet. Gladys shows four buttons at most per widget: for more, add a second Quick clean and name its buttons.
- Robot maintenance — the three most worn parts as gauges, then every part tracked, the most worn first: red under 10 %, orange under 30 %.
Configuration
- In the integration, Actions box, fill in Link the account: the email (or phone number) and password of your Dreamehome account, then its region — the one chosen in the app when the account was created — and click the button.
- Open the Discovery tab and add your robots to Gladys.
The password is only used to log in. It is never stored: only a fingerprint, the one the Dreamehome app sends itself, is kept to reopen the session without asking you anything. The Unlink the account action erases everything.
An account created with Google, Apple or a text message code has no password. Set one first in the Dreamehome app (profile, account settings), then link the account here.
The Language of the names setting picks the language of the feature names, room names and error messages: French, English, German or Spanish. Feature names are set when the device is created. The dashboard widgets and the messages of this page follow the language of your Gladys account.
When an update of the integration adds features, or when you create a shortcut or a room in the app, the Discovery tab offers to update the device (rooms and shortcuts are read again every 6 hours, or at once with Scan).
In scenes
- Trigger on the state: for instance, be warned when the robot goes "Error", then read the message of the Error feature.
- "Control a device" action: Cleaning on Clean to start the robot, Room to clean on a room, or a Shortcut button.
- Several rooms: switch their Selection on in the order to clean them, then press Clean the selection. To force an order, switch every room off first, then on one by one. The mode and settings are set the same way, before starting.
Reporting a problem
The Diagnostic action shows what the integration sees of your robots: model, firmware, raw values, map reading. Paste its result into a Gladys forum post or a GitHub issue. It contains no email, no identifier and no room name.
Limitations
- The cleaning mode and the mop settings are only offered to the models whose encoding the integration knows (from the model table of the Home Assistant integration): a wrong write would change your settings. An app shortcut covers the other cases.
- Mapping is started from the Dreamehome app, not from Gladys.
- The robots of the MOVAhome and Trouver apps are not supported.
- This integration was written without a robot at hand, from the protocol of the reference Home Assistant integration: your feedback (and the result of the Diagnostic) validates it model by model.
Konfigurationseinstellungen
Diese Einstellungen fragt Dreame in seinem Konfigurationsbildschirm in Gladys ab.
| Einstellung | Typ | Pflichtfeld | Beschreibung |
|---|---|---|---|
| Dreamehome-Konto | section | Nein | Verknüpfe das Konto, mit dem deine Roboter gekoppelt sind, im Bereich „Aktionen“ unten: seine E-Mail-Adresse (oder Telefonnummer), sein Passwort und seine Region. Das Passwort dient nur der Anmeldung: Gespeichert wird nur ein Fingerabdruck, um die Verbindung still wiederherzustellen, nie das Passwort selbst. Ein mit Google, Apple oder einem SMS-Code erstelltes Konto hat kein Passwort: Lege zuerst eines in der Dreamehome-App fest. |
| Sprache der Namen | select | Nein | Sprache der Funktionsnamen, Raumnamen und Fehlertexte. Funktionsnamen werden beim Anlegen eines Geräts festgelegt: Um sie nach einer Änderung umzubenennen, lösche das Gerät und füge es erneut hinzu. |
So installierst du Dreame in Gladys
- Öffne in Gladys Integrationen: Dreame erscheint im Katalog neben den nativen Integrationen, mit einem Community-Badge.
- Klicke auf Installieren. Gladys lädt das Docker-Image (
ghcr.io/guim31/gladys-dreame:1.2.0) herunter, startet es in einer vom Kern isolierten Sandbox und erzeugt die Oberfläche der Integration (Geräte, Erkennung und Konfiguration). - Öffne den Bildschirm Konfiguration der Integration, fülle die Einstellungen aus und speichere.
- Du kannst sie auch direkt über die URL ihres Repositorys installieren: https://github.com/guim31/gladys-dreame.
Dreame benötigt Gladys >=5.1.0. Der Katalog in Gladys wird stündlich aktualisiert, eine neue Version ist also spätestens eine Stunde nach ihrer Veröffentlichung verfügbar.
Du nutzt Gladys noch nicht? Es ist kostenlos und Open Source: folge der Installationsanleitung, um loszulegen.
Über externe Integrationen
Dreame ist eine externe Integration: eine Community-Integration, die als Docker-Container verpackt und auf GitHub veröffentlicht wird. Gladys installiert sie mit einem Klick und führt sie in einer vom Kern isolierten Sandbox aus. Sie wird von guim31 veröffentlicht und gepflegt, nicht vom Gladys-Kernteam.
- Alle externen Integrationen durchsuchen
- Die nativen Integrationen entdecken, die in Gladys eingebaut sind
- Deine eigene externe Integration bauen und veröffentlichen
- Quellcode auf GitHub — Quelle dieser Dokumentation