Gladys 4.70: Reset Your Zigbee2mqtt Integration in One Click
· 2 min read

Hey everyone,
A new version of Gladys is out, focused on UX and stability improvements for the Zigbee2mqtt and MQTT integrations.
Hey everyone,
A new version of Gladys is out, focused on UX and stability improvements for the Zigbee2mqtt and MQTT integrations.
Hey everyone,
Can you really run a capable AI model locally, on a small mini-PC, without sending any data to the cloud? I gave it a serious try, and I show the whole thing in a new video.
Hey everyone!
You've probably heard of OpenClaw, the AI framework that blew up on GitHub a few weeks ago and was just acquired by OpenAI. I decided to connect it to Gladys to see what it could do, and honestly, the result is impressive.
Hey everyone,
A new version of Gladys Assistant is available 🥳, featuring the new Zigbee2mqtt Ember driver and Tasmota energy tracking.
Hey everyone,
A new version of Gladys is out, with several improvements and fixes, including a one-click way to run Matterbridge and open the door to many more compatible devices.
Hey everyone,
Some great news on the press side: Gladys was just featured on iGeneration (iGen.fr), one of the biggest mainstream French tech media outlets 🎉
Hey everyone!
Many of you want to help with the project but don't have the skills to develop a full integration from end to end. That might be about to change.
Hey everyone,
Quick news: I just came back from holidays, and the official starter kit is back in stock 📦
Hey everyone,
I'm happy to introduce a new version of Gladys Assistant! This release brings a brand-new smart lock integration and several reliability improvements.
Hey everyone,
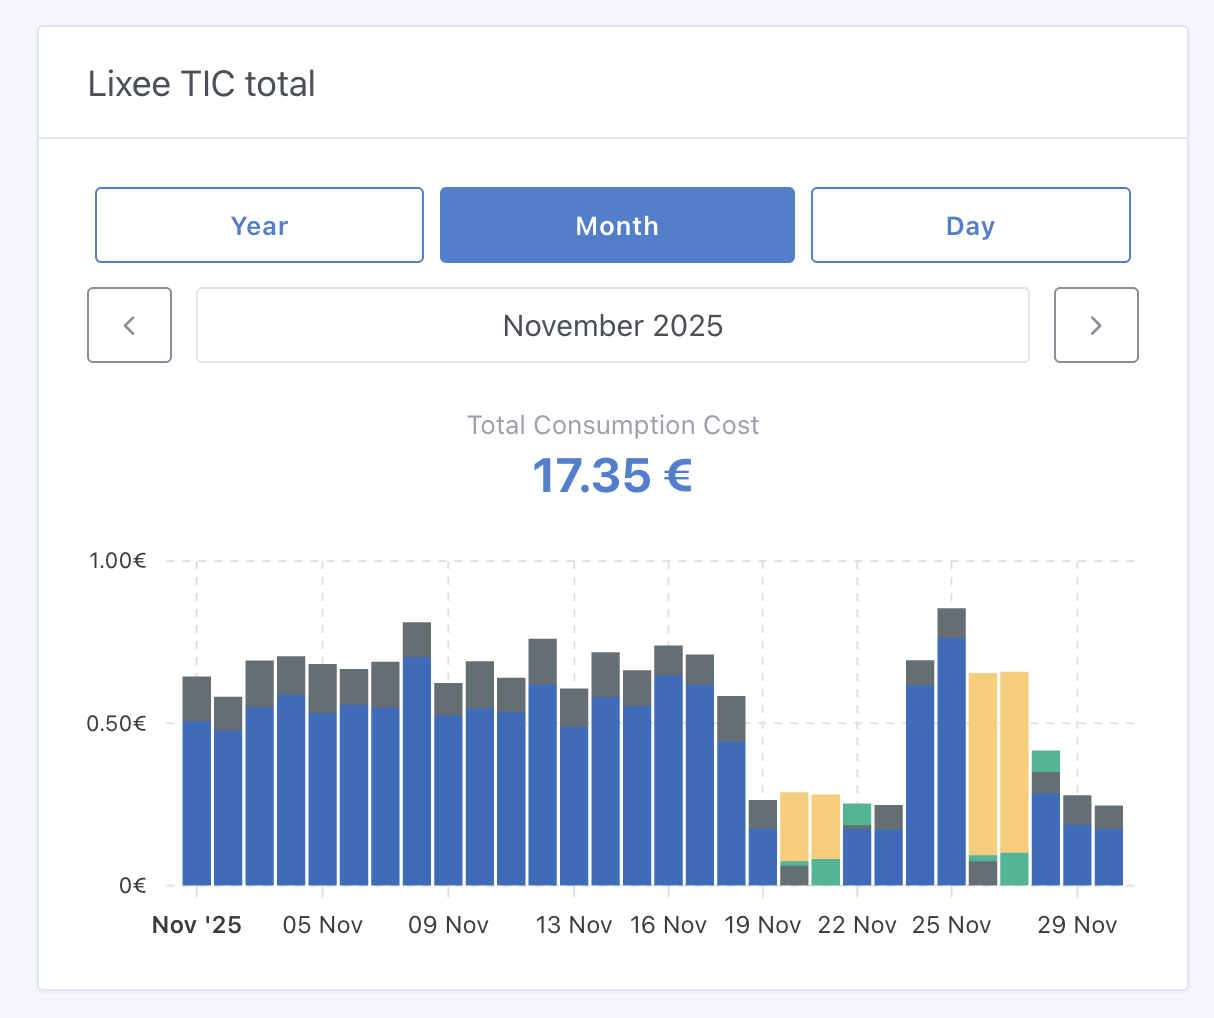
Back in September, I announced that energy monitoring was coming to Gladys. Today, I'm thrilled to announce that it's officially live in Gladys Assistant 4.66! 🎉